Amazing agate nails

Autumn/Winter, Colour focus, Step by Step
Amy Rickaby showcases a sliced agate design in Gelish tones and a nifty brush trick for perfect application…
Gelish products are available via www.nailharmonyuk.com
Check out more of Amy’s work by clicking here!
Step 1
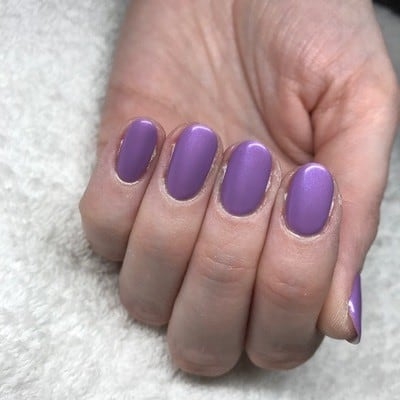
Prepare your clients nails for a gel polish application and apply your chosen gel polish base colour to all nails and cure. Repeat. For this design, I've used Gelish shade, All The Queen's Bling, from the Royal Temptation collection.
Step 2
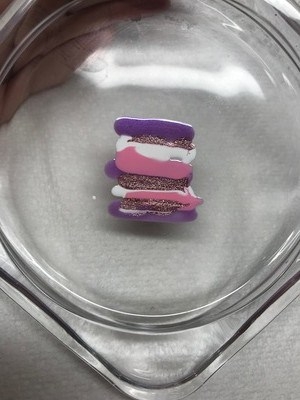
Select about three other gel polish colours, as well as your base colour. On a piece of foil or a palette, draw a line of gel polish about an inch long of each colour, placing them side by side to create a square of colour. I always place the colour I used for my base on the outer edges.
For this design, I've used Gelish shades, All The Queen's Bling, Artic Freeze, You’re So Sweet You're Giving Me Toothache and Last Call.
Step 3
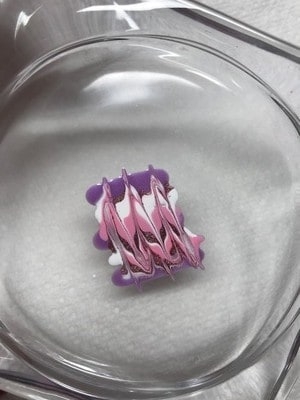
With a small dotting tool, create a zigzag pattern in the gel by drawing lines up and down the square of gel polish.
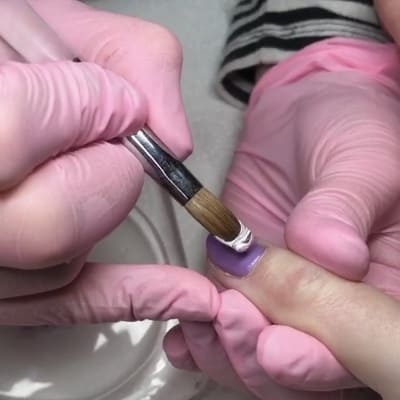
Step 4
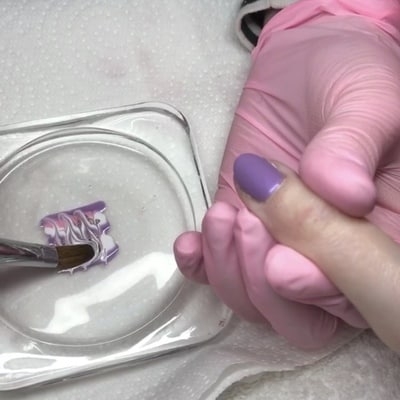
Using a large brush to slide it under the colour square and lift the gel onto the brush
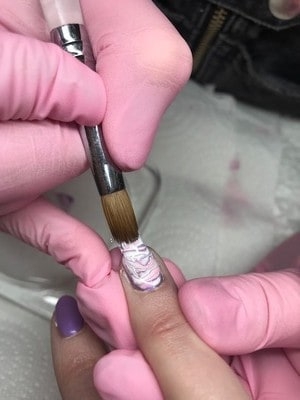
Step 5
Place the brush central of the nail and as you begin to apply the gel move the brush side to side in a wiggly motion. You will see the gel creating the pattern onto the nails. Slowly pull the brush to the free edge and allow the gel polish to naturally flow off the brush and onto the nail.
Step 6
Once you have covered the nail, cure and topcoat.