12 steps to help perfect gel polish application at the cuticle zone
By Katie Barnes | 01 July 2021 | Expert Advice, Feature

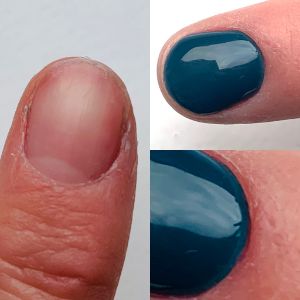
Achieving a close and neat cuticle application with gel polish can be a nail tech’s nemesis but with just a few simple steps you can master a photo perfect cuticle application your clients will love.
To achieve this with the gel polish brush alone can prove difficult even for the steadiest of hands. As techs, we aim to offer the client a close application, but we fear touching the skin. A gel polish bottle comes with a built-in brush, but this doesn’t mean that the brush must always be the only brush used. Think to when you do your nail art designs; each tech has a different brush preference.
By using a fine line brush, you can master a really close application and avoid touching the skin. Using a brush like this offers you more control and the size of the brush gives you precision.
There are two ways to achieve this, and your choice is dependent upon the gel polish brand you use. You need to determine whether it is a thin viscosity and quickly self-levels, or it is a thicker viscosity.
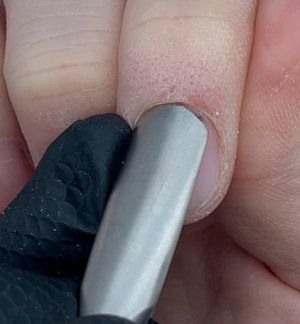
The first step is to perfect your cuticle work. When this area is neat and tidy, it makes the polish application flow much better. Once you have finished the nail service at hand or the cuticle work, right before painting – push back the eponychium once more. This gives you the biggest surface area on which to work.
The trick to using a fine line brush, is to create a framework of colour around the cuticle area.
Whether you do this as a first or second step is down to the viscosity as mentioned above. When your gel polish is thicker, this can be the first step. Create the framework with the fine line brush, then fill in the colour with the gel polish brush as usual.
When the gel polish is a thin viscosity and self-levels quickly, if this is performed first, the colour will run into the cuticle. You must then polish the nail as usual, then create your framework right before curing.
Step 1: Cuticle prep
Step 2: Push back eponychium growth right before painting
Step 2
Step 3: Check the viscosity of your gel – if you aren’t sure, then you can do this by placing a bead of gel polish on a palette or the back of some form paper and seeing how quickly the gel spreads. The quicker this spreads, the more self-levelling your gel is.
Step 4: If the gel is thicker, create the framework first. If gel is thinner, create the framework second. If creating the framework second, swap steps 5 & 6.
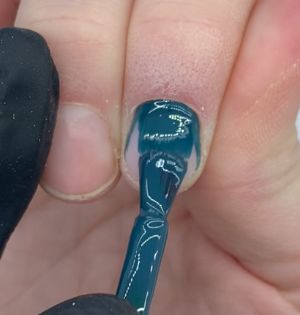
Step 5: Draw a line of colour with the fine brush around the cuticle zone. Use the fine line brush to slowly push the colour as close as possible to the cuticle without touching the skin. Start at the centre and work to one side, then the other. Do not cure.

Step 5
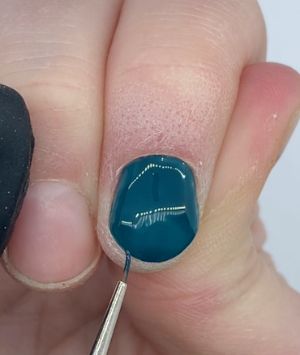
Step 6: Apply gel polish on the remaining nail with the bottle brush or brush of choice as usual.
Step 6
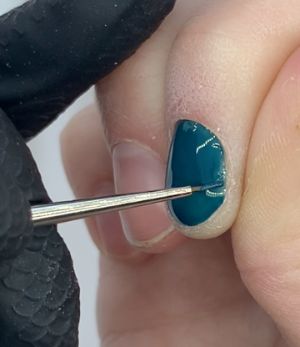
Step 7: Use the fine line brush to cap the free edge.
Step 7
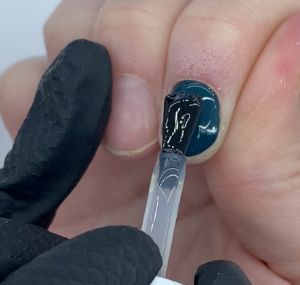
Step 8: Use the fine line brush to make sure the sidewalls of the nail are also covered.
Step 8
Step 9: Cure.
Step 10: Repeat step 6. No need to create the framework the second time.

Step 10
Step 11: Cure.
Step 12: Apply top coat as usual and cure.
Follow this video guide for perfecting cuticle application using self-levelling gel polish or this video guide for a thicker viscosity gel polish.
While this method may seem like it will add time to your service, it won’t. By achieving the perfect base colour application, each subsequent step flows much easier and quicker, and your work will instantly go to the next level.
Love Katie B x

Read the latest issue