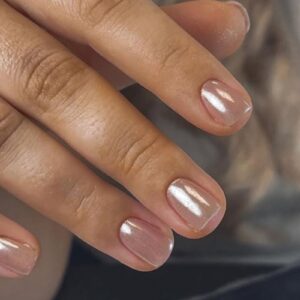
As such a long-standing industry system, liquid & powder acrylic (L&P) continues to develop and present new design opportunities; affording the creation of a multitude of shapes and styles. However, while L&P services boast a lengthy array of benefits, the system is also sensitive to many external conditions and demands refined application techniques in order to perfect. Understanding the chemistry, ensuring the perfect ratio, correctly building the apex and mastering the application of a form or tip are just a handful of the practicalities a nail technician has to consider when using the system.
Here, fellow nail professionals share their top tips on how to perfect the apex in an L&P service…
Fereida Lydiate, Hazel Dixon Nail Artist Academy educator and Scratch Stars L&P Tech of the Year 2019, says: “One thing I see a lot of when teaching structure classes is techs applying the apex bead into the back third of the nail and then flattening it too much by pressing into the bead. This then results in a flatter apex, with the tech having to reapply another bead, wasting time and product.
“My top tip to creating the perfect apex is to apply your bead into the back third of the nail (zone 3) and then wait just a couple of seconds and allow the bead to begin to polymerise slightly before gently smoothing into zone 2, making sure you leave most of that bead in the back third of the nail. It is important to remember that nail strength doesn’t come from the apex alone, strength comes from a nail that has great structure, which includes the apex, C-curve, sidewalls and upper and lower arches.”
Ilex Wood, Nail Harmony UK educator, says: “When I am applying L&P, a good way to check where the apex placement should be on a standard length salon nail is to gently press the free edge. The nail bed will then change colour slightly to show where your stress point (apex) needs to be. On extreme nails, you should tailor the apex to be higher to accommodate to a higher levels of stress on the nail plate. For overlays, the apex only needs to be very natural.”
Jayne Packenas, INK London educator, says: “The apex is usually in the back 1/3rd, but it varies depending on the length of the nail being created. If the client wants longer nails, I sit it closer to the cuticle but make sure it is not too close that it will create a hump or look unbalanced. I always advise two-to-three weekly infill appointments to ensure the apex has not grown out too much so as to cause an imbalance, which would weaken the structure and could do damage to the nail.”
For more answers to your most common L&P questions, take a look at the November issue of the Scratch!
Lead image c/o Fereida Lydiate

Read the latest issue


