How-to: Reverse French using Halo’s Polibuild
By Guest Writer | 10 January 2021 | Feature, Technique

The team at Pure Nails share how to create French style nail designs using the reverse technique and Halo’s PoliBuild system…
Are you seeking an enhancement system that’s speedy to apply – but that offers super strength? Halo PoliBuild Precision Gel combines the benefits acrylic and hard gel to create a system that provides a strong and flexible, light nail enhancement that is perfect for use with an overlay of Halo Gel Polish.
Halo PoliBuild requires zero monomer, mixing and ratios; all that’s needed is the Halo PoliBuild Liquid Control to manipulate the product as you want it, working as fast or as slow as you like. Its unique formula allows for a smooth and flawless finish that’s easy to file to create the perfect nail enhancement.
Step 1: Prep

Prep work is vital and should never be rushed, taking 10-15 minutes to complete. It helps ensure that the product will adhere to the natural nail by eliminating any barriers that may affect it. Check out some prep tips, here.
Cuticle work: Push back cuticles using the Pure Nails Manicure Tool and the Pure Nails Cuticle Nipper to cut away any dead skin/cuticle. Remember – when using cuticle nippers, is if there isn’t anything to cut, don’t cut it! Cutting live cuticle or skin can hurt the client and cause damage to the nail and skin.
Shaping: Using a 240/240-grit file, shape the nail as desired and buff. Spray Prep & Scrub all over the nails to dehydrate the nail plate and remove any debris from the nail.
Step 2: Reverse French technique
Adhere a nail tip and put a bead of Cover Pink Polibuild into the centre of the nail. Dip your Dual Tool into Liquid Control and pat it from side to side and down the sidewalls to ensure even coverage.
Use the Dual Tool (brush side) and shape the Polibuild into a smile line; it is vital that you get the sides of the smile line even in this step. Once you are happy, cure the nail for 60 seconds.
Next, take another small bead closer to the cuticle and work this around the cuticle area, patting it in and blending with the previous beadwork. Once you are happy with the coverage, cure for 60 seconds.
Step 3: Smile!
Define the smile line and even up the sides with a file. Remove excess dust using Prep & Scrub. Apply Halo Base Coat to the end of the tip and cure for 30 seconds.
Take a very small bead of Bright White Polibuild and apply around the smile line, taking it right around the sides and patting it into place. When you are happy with the shape, cure for 30 seconds.
After you have cured your nails, take another small white bead and repeat the process.
Apply Halo’s Easibuild in Clear over the entire enhancement and cap the free edge. Don’t forget the sidewalls! Turn your client’s hand upside down for a couple of seconds to build a natural apex) and then cure for 60 seconds.
Step 4: Finish
Using Halo’s Prep & Scrub, remove the inhibition layer and file the nail to refine the shape. Use Prep & Scrub to remove the dust from the filing and again apply Halo’s Non-Wipe Top Coat. Cure.
Tag your PoliBuild creations on Instagram using @purenailsuk. We look forward to you joining our Halo family!
Pure Nails products are available via www.purenails.co and its associated stockists.
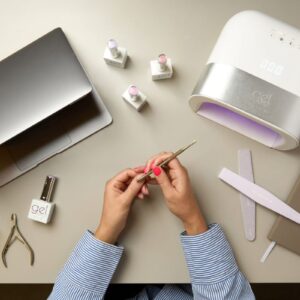
Nails pictured by Pure Nails educator, Nicole Dowling

Read the latest issue