Nail talk: The importance of parallel side walls
By Katie Barnes | 03 May 2022 | Feature, Technique

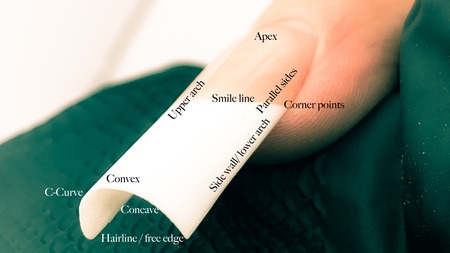
Parallel side walls run from the side wall to the upper arch of the nail, starting at the cuticle zone and ending at the free edge. These sides help to give the nail enhancement a slim and slender appearance and they must mirror each other. It is a term heard on the competition circuit frequently, but it is not just for competition nails, it is an essential part of all nail enhancements and structures.
Have you ever looked at your nail enhancement and thought that it looked bulky, but you couldn’t work out why and where the issue lay? You tried to fix it but possibly made it worse or didn’t improve it at all? More often than not, the issue falls at the parallel side walls, and it is easy to fix. It can be one of the most overlooked about areas on an enhancement when both building and finish filing but can affect the whole finish. Your eye is instantly drawn to the widest area of something.
The aim is to draw the eye to the slim free edge and these smooth, straight side walls are leading lines which help attract our eye to this.
Many techs forget that the apex is just a point and that it is not a band across the whole back third of the nail. This is then breaching into the parallel sides. If the product comes down to these, it gives the enhancement additional weight and bulk giving the nail a wide appearance.
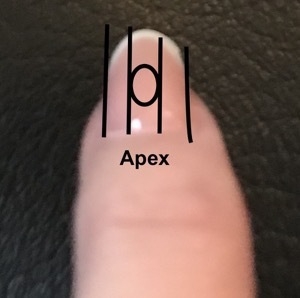
The point highlights the apex, and the two panels on either side are the parallel side walls. No bulk of product from the apex should be here.
These sides should always come out straight whatever the shape. There must be no fanning or bulking. They can often be referred to as the hips or shoulders of the enhancement.

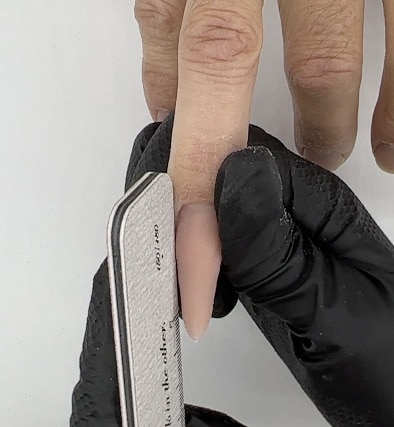
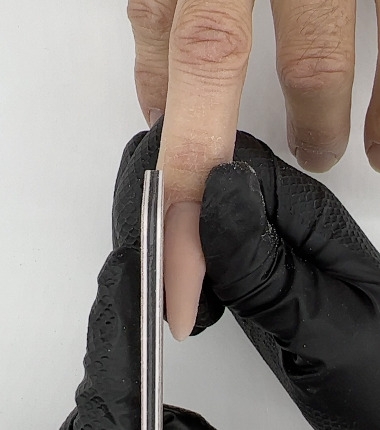
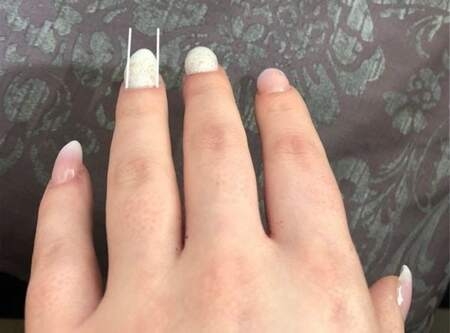
It may not be apparent until you compare it to one which has been filed perfectly. If you look at this nail, you can see that the right-hand nail has a slight roundness and bulging in comparison the nail on the right. The line indicates where the bulk product is. The key is to not file down the natural side walls and remove strength, but along the side panel as indicated in the circle on the left-hand image.
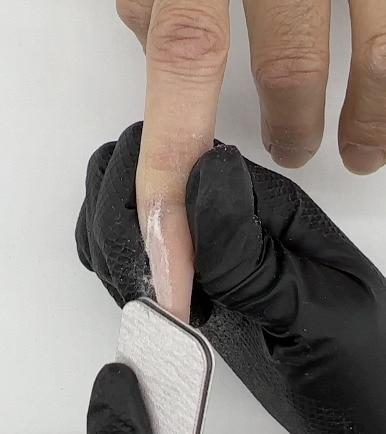
Whatever you do on one side of the nail enhancement, you must repeat on the other side to achieve uniformity. How you file on one side must be mirrored on the other. Following a consistent filing routine is essential for success with this. The way in which you hold your nail file is also key. It must be held flat against the sides and roll over the enhancement.
Follow my filing routine video by clicking here.
While this can sometimes be seen from the standard view, it is necessary to check the nail enhancement from the client’s view to be able to fully notice this. This is a key angle to check on all sets.
Working on this area, will take your nails to the next level and instantly make them much slimmer and slender in just a few simple steps.
Love Katie B x

Read the latest issue