
Thrilling 3D nail art: 10-step tutorial for haunting Halloween hands
Autumn/Winter, Seasonal & Occasions, Step by Step, Themed
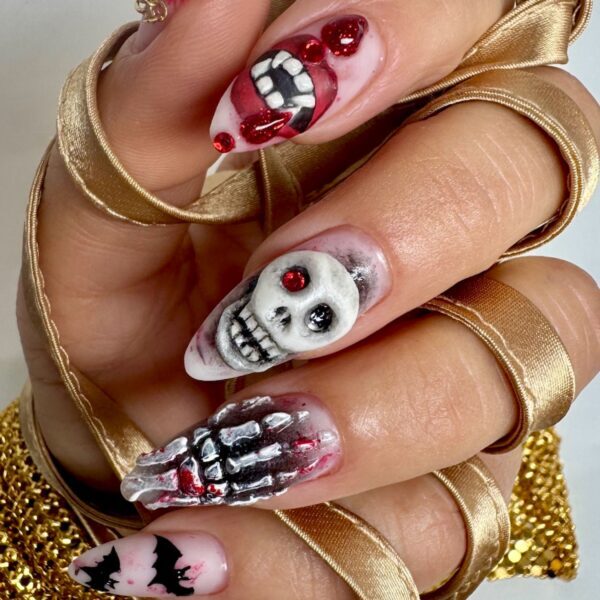
Justyna Pryke is a Leeds-based nail artist & educator who scooped the title of Scratch Stars Ultimate Gel Tech after securing wins in the category in 2015, 2025 & 2026. Bringing classic Halloween symbols to life, she shares a thrilling 10-step tutorial for creating show-stopping 3D nails…
You will need:

Are you enjoying this content?
Join our community to receive more like this
- Moyra UK Flower Builder & Art Hard Gel in 02.
- Black art gel.
- Sponge.
- Clear sculpting gel.
- Gel paints in white, black and red.
- White acrylic powder.
- E-file and drill bit.
- Small red crystal.
- Glossy gel polish top coat.
Step 1
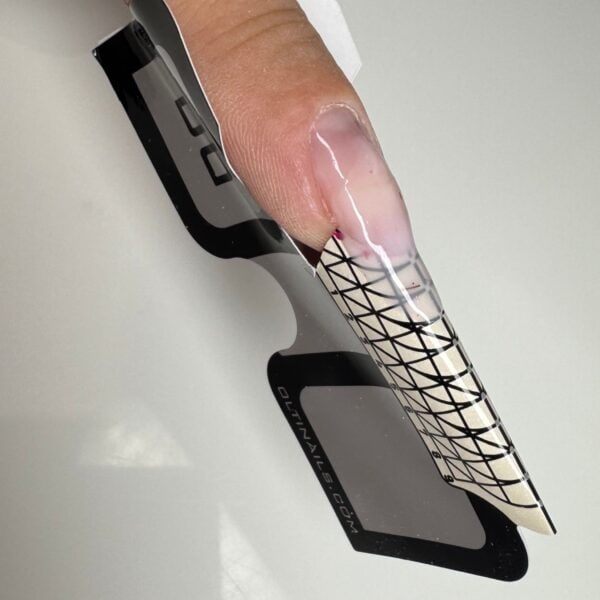
Prep the nail and add a nail form. Using Moyra UK Flower Builder & Art Hard Gel in 02, sculpt a medium-long almond enhancement. Cure.
Step 2
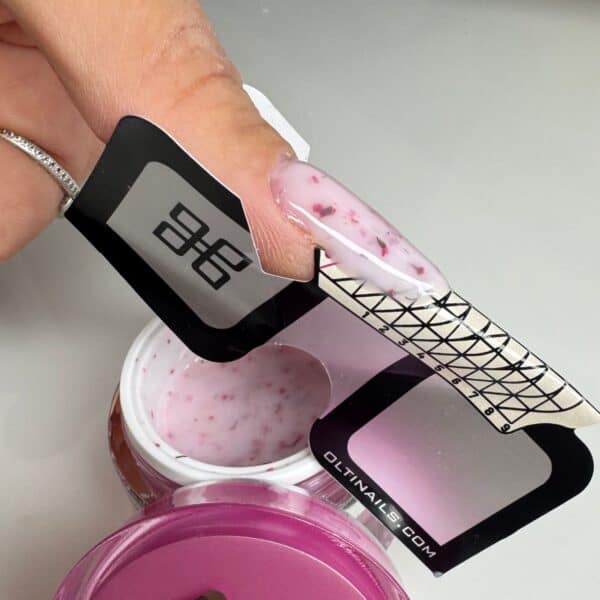
File and refine the structure, then use red gel polish to create soft stains on the nail to give the set its distressed, blood-stained effect. Cure.
Step 3
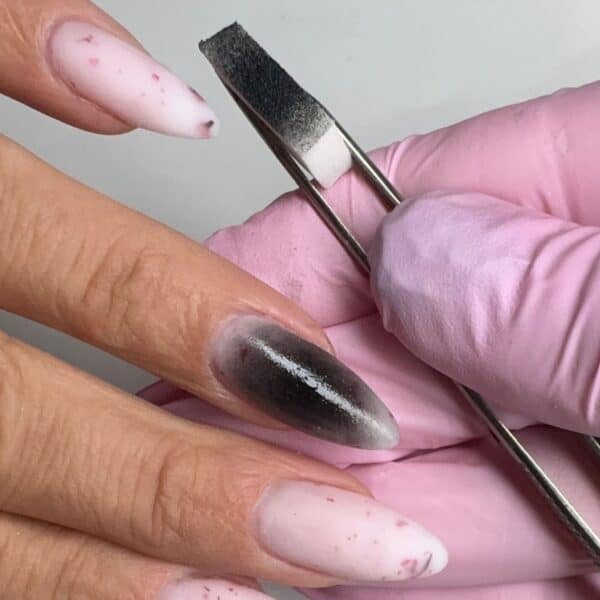
For the skeleton: Using a sponge, fade black art gel from the centre of the nail outward. Cure.
Step 4
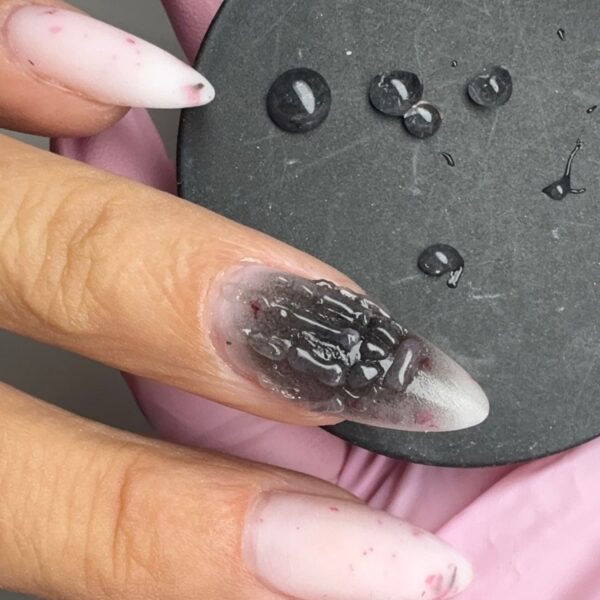
Sculpt the individual bones of the skeleton hand using 3D clear sculpting gel. Flash cure as you go, then cure fully once the hand is complete.
Step 5
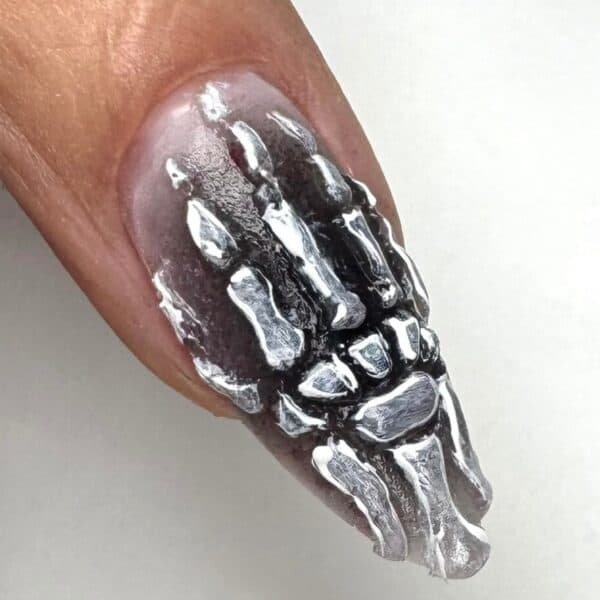
Add depth by blending white and black gel paints to form shadows and highlights. Cure.
Step 6
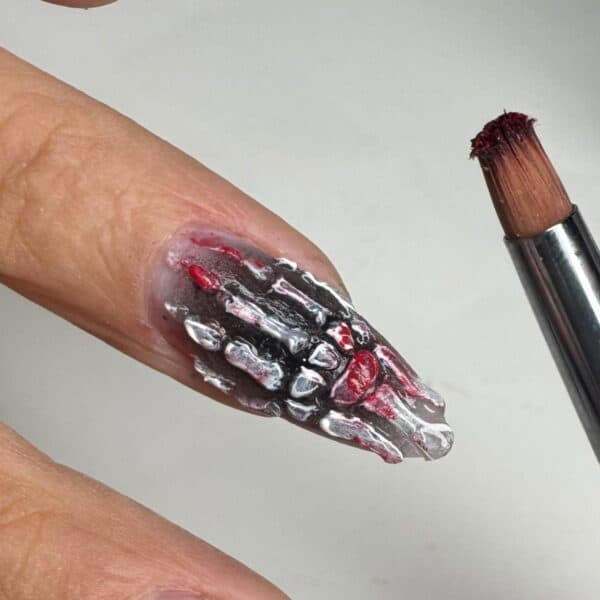
Finally, pat red gel paint onto the skeleton to give it a blood-stained effect. Cure, then add a glossy gel polish top coat and cure again to finish.
Step 7
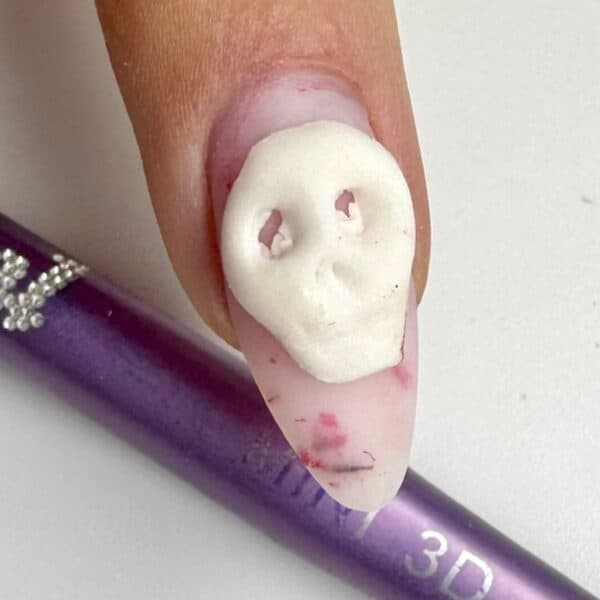
For the skull: Repeat steps 1 and 2. Next, use white acrylic powder to sculpt the basic shape of a skull, making rough indents where the nose, mouth and eyes will be. Allow to fully harden.
Step 8
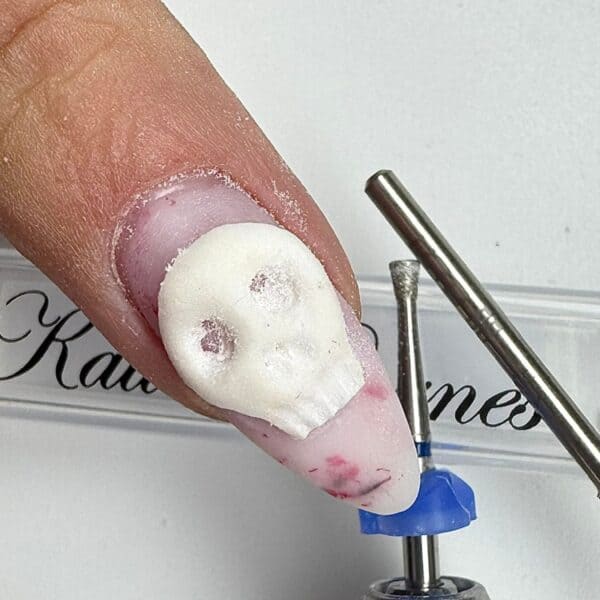
Use an E-file and drill bit to carefully refine the eye sockets, nose, jaw and individual teeth. Brush away dust and debris.
Step 9
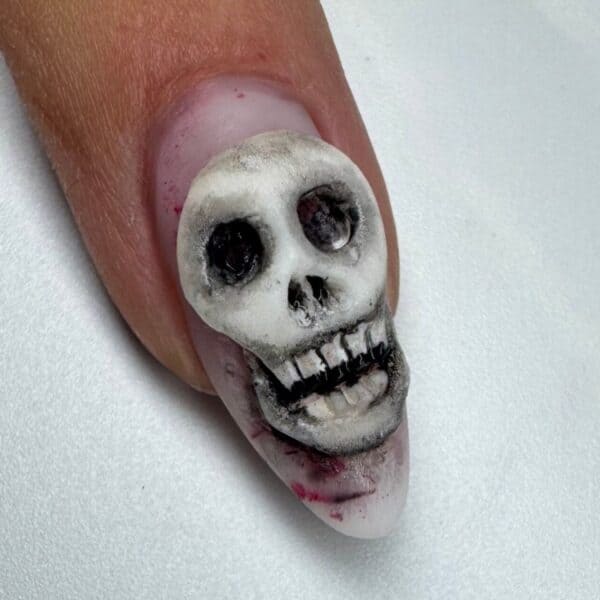
Use black gel paint to fill the eye sockets, nose, and mouth. Then, lightly blend a small amount of black gel paint around the indents to create subtle shadows and add depth. Cure.
Step 10
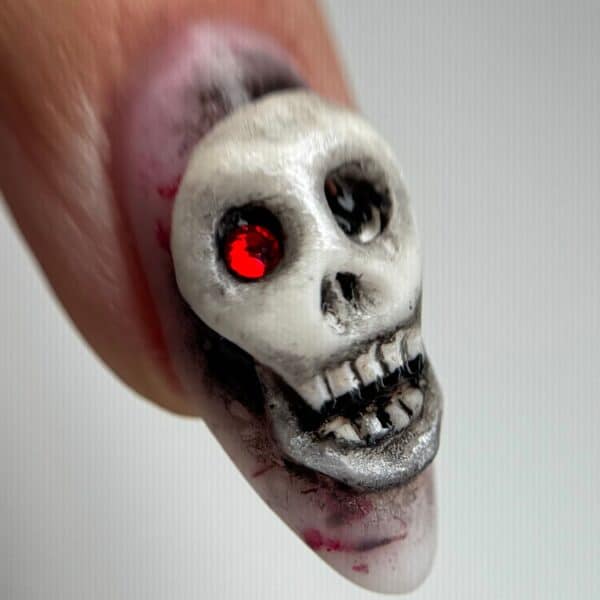
Apply a small dot of glossy gel polish top coat into one of the eye sockets, using it as an adhesive to secure a red gemstone in place. Carefully press the gemstone into the top coat, then cure to set. Finish by sealing the entire design with the same glossy top coat and cure.