
A royal Gellux manicure

Seasonal & Occasions, Step by Step
Ahead of the Royal Wedding, Salon System nail expert Karen Louise has created this step-by-step design using Gellux products…
The Gellux range is available from wholesalers nationwide.
Step 1
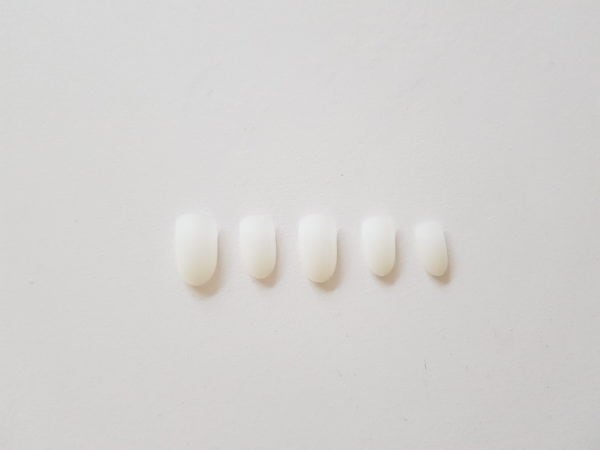
Prepare nail and clean with Gellux Prep & Wipe, and apply Gellux Fast Bond. Allow to dry for 60 seconds.
Apply a thin layer of Gellux clear Base/Top to each of your nails being sure to cap the free edge. Then cure, 30 seconds using the Gellux Express LED Lamp.
Step 2
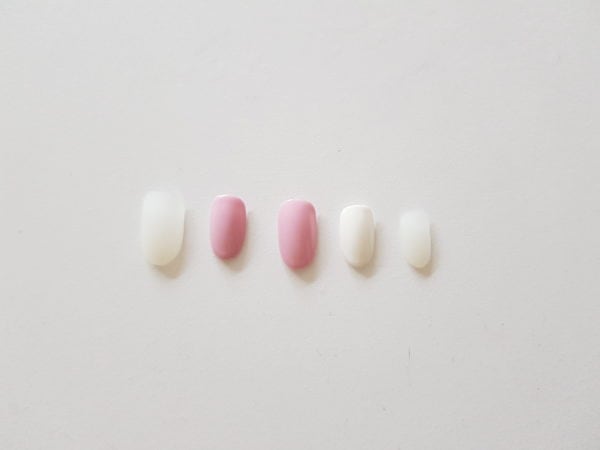
Using Gellux Cherry Blossom and apply your first coat to the index and middle finger. Then apply your first coat of Gellux Purely White to the ring finger then cure. Repeat these for the second coat and cure.
Step 3
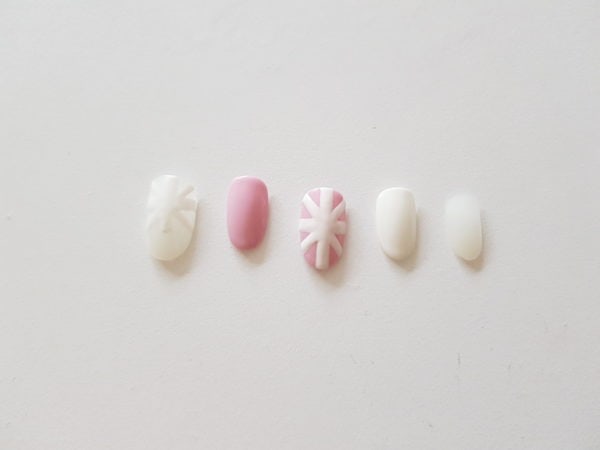
Using a thin striping brush, apply your lines on the thumb to half the nail and the middle finger to start creating your flag design. Cure.
Step 4
Using the thin details brush, draw the lines inside of the white lines using Gellux Silver Lining onto the thumb and middle finger then on the ring finger apply your stripes to start creating the American flag design. Cure.
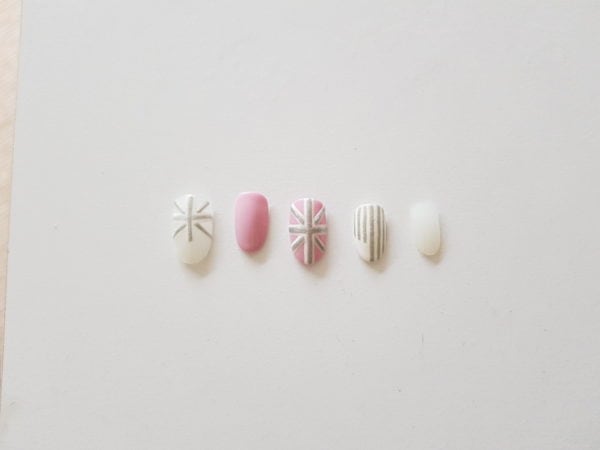
Step 5

Using Gellux Cherry Blossom, paint half the thumb nail and then on the ring finger paint a rectangle shape at the free edge of the nail and then cure.
Step 6
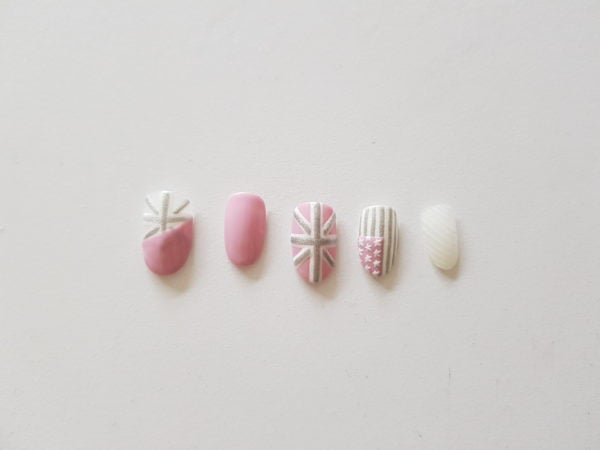
Inside the small rectangular box on the ring finger, create your small stars in a line. Make sure the stars have five points, not six. Cure. Using Gellux Purely White, apply fine lines all the way across the pinky finger then cure using a thin striping brush.
Step 7

With a small detailing brush, create tiny lines in between each stripe in alternating directions, then cure. Create a leafy design over your lace effect and once you’re happy with this, cure your design.
Step 8
Using Gellux Cherry Blossom create a half moon at the cuticle area of the ring finger nail and then cure.
Once you’re happy with your design, seal with Gellux Clear Base/Top coat, being sure to cap the free edge..
Wipe tacky layer with Gellux Prep + Wipe then apply NAILLUX Cuticle Oil.
