Ariel & Eric from Disney’s The Little Mermaid

Step by Step
As The Little Mermaid fever continues after the release of 2023’s live-action movie, Georgie Smedley Group ambassador, Georgina Duffy, shares how to paint Ariel and Eric from the original Disney film on nails.
Step 1
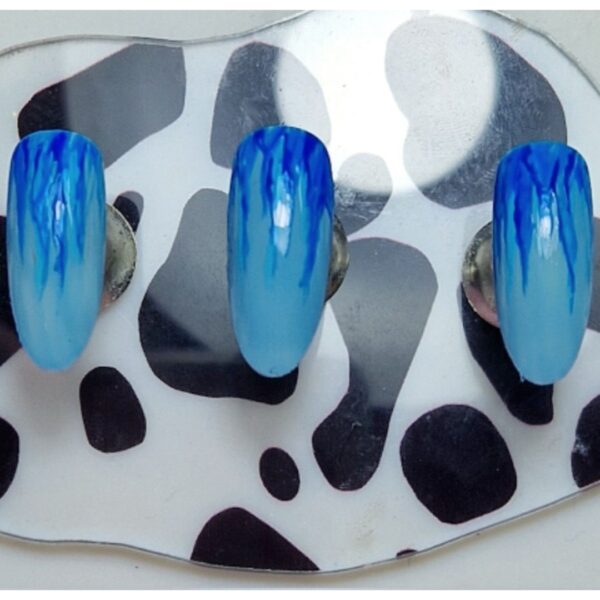
Choose three blue gel polish shades of various intensities, and paint the lightest one over the entire nail. Cure, then choose the slightly darker shade and use a fine liner brush to paint wavy lines from the cuticle area towards the centre of the nail. Cure, then repeat with the darkest blue shade and cure again.
Step 2
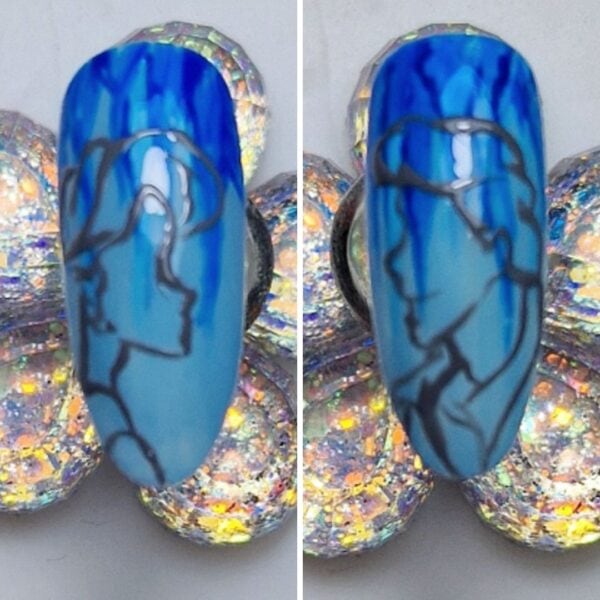
Use a dark grey gel polish with a fine liner brush to paint the outlines of Ariel and Eric.
Step 3

I chose a nude gel polish shade for the skin tones, a dark brown for Eric’s hair, a warm red for Ariel’s hair and a light blue for their clothing. Paint within the lines, curing between each colour application to prevent the colours from bleeding.
Step 4
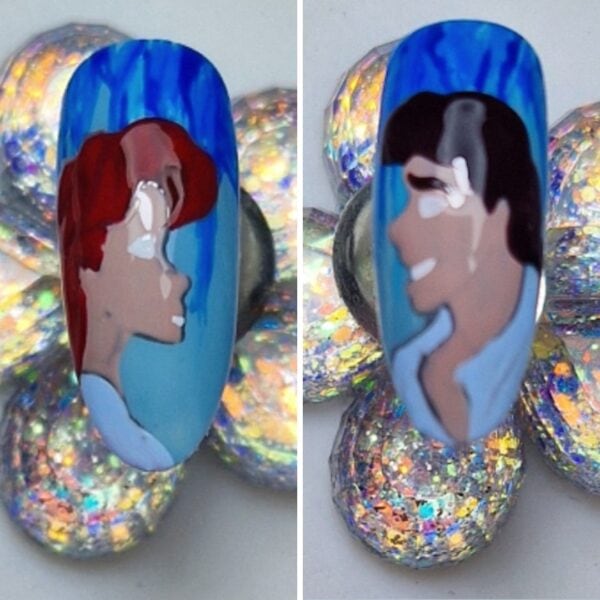
Using a white gel paint and nail art brush, create eye and mouth shapes on each character and cure.
Step 5
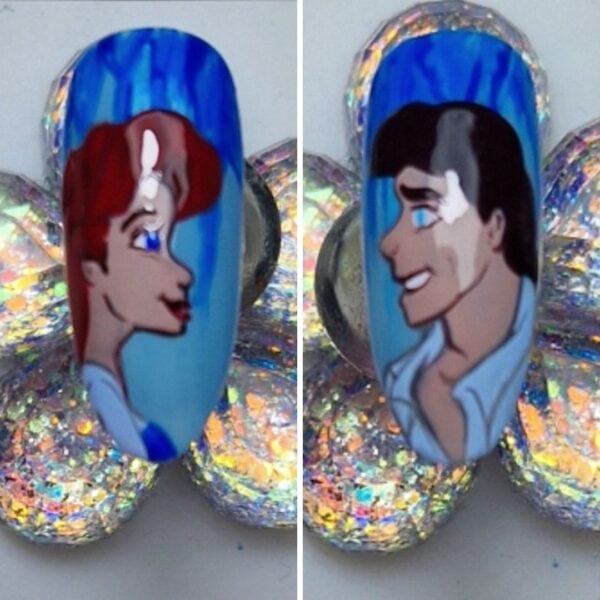
Apply your chosen eye colour (I used blue) and cure, before outlining the facial features using a dark grey or black gel polish and fine liner brush. Cure.
Step 6
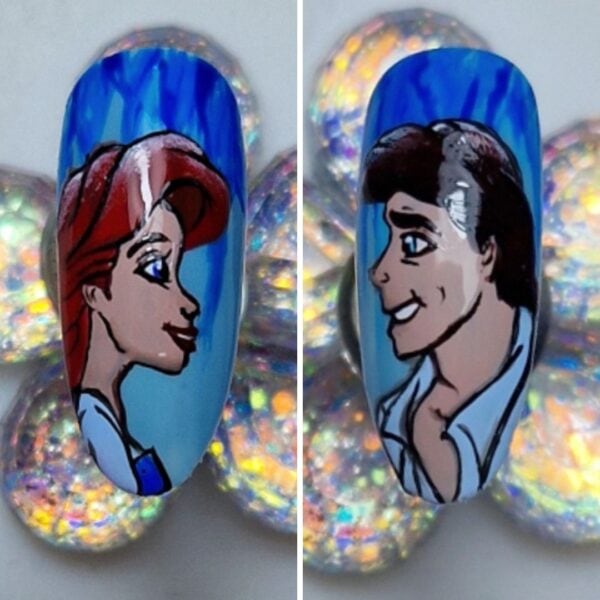
Add highlights to the characters using a white gel paint. I envisaged the light being above the characters, so added highlights to their hair. Smooth out harsh lines using a shading brush. Cure, then apply top coat and cure to finish.

Read the latest issue