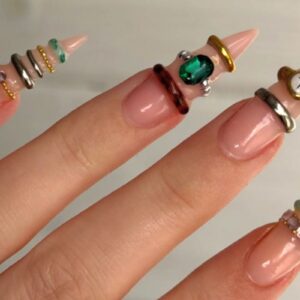
Master the art of butterfly nails with this step-by-step guide

Step by Step, Trends
Follow this tutorial by Karyna Kyliushyk to produce butterfly nail art that will ‘flutter’ any client…
Karyna is an award-winning Ukrainian nail artist who placed first at Nailympia San Antonio 2025 for the Joy of Nails category, division 2.
You will need:
- Gel polish base coat.
- Blue gel polish (Karyna used OPI GelColor in Blue Them All Away.)
- Blue cat eye gel polish (Karyna used Kokoist Dramatic Magnet in Dramatic Ocean.)
- Cat eye gel polish magnet.
- Mirror chrome powder (Karyna used Kokoist Fairy Veil Powder.)
- Black and white art gels.
- Glossy gel polish top coat (Karyna used OPI GelColor Stay Shiny Top Coat.)
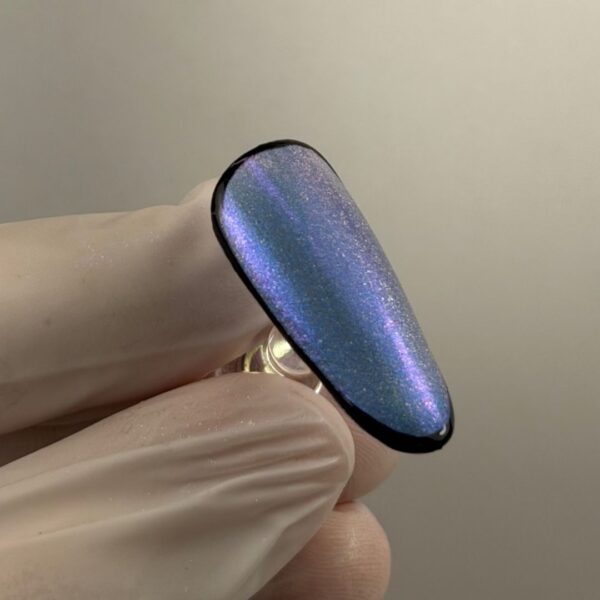
Step 1
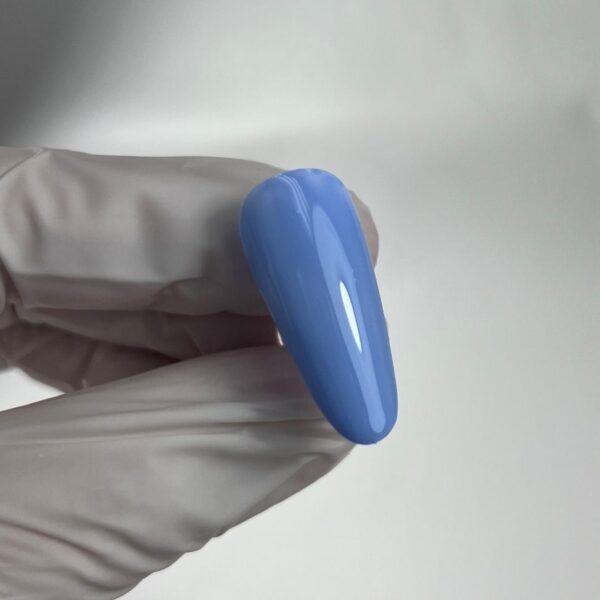
Apply your chosen gel polish base coat and cure, before applying two thin layers of blue gel polish. Cure after each layer.
Step 2
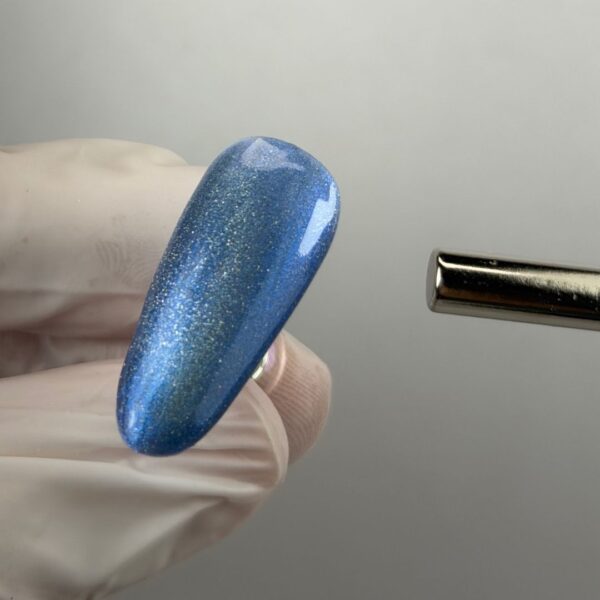
Apply a blue cat eye gel polish. Before curing, use a magnet to manipulate the magnetic particles to create the desired reflection. Cure.
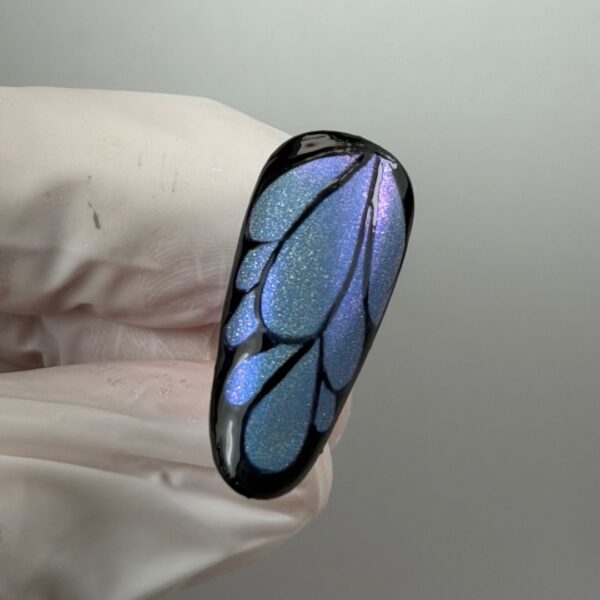
Step 3
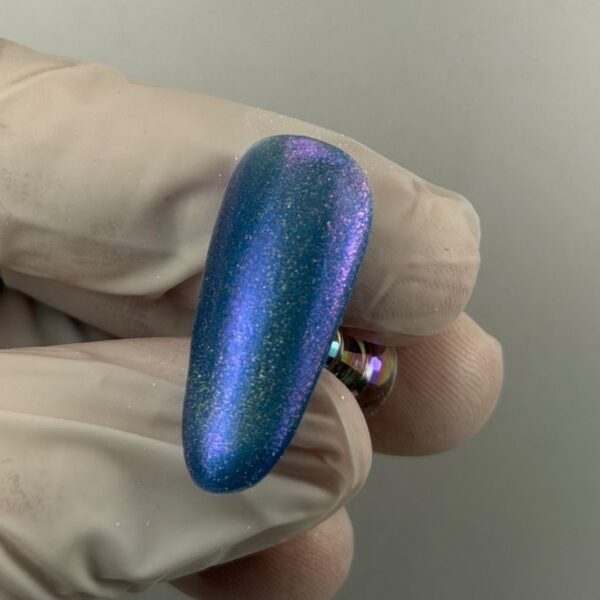
Use acetone or gel cleanser to remove the sticky inhibition layer from the cat eye gel polish. Apply mirror chrome powder, gently rubbing it into the nail with your gloved finger. Do not cure.
Step 4
Using a thin brush and black art gel, paint a fine line around the entire perimeter of the nail. Cure.
Step 5
Use the same thin brush and black art gel to paint the main butterfly wing pattern, starting with a teardrop shape from the top of the nail, and adding smaller teardrop shapes around it. Cure, then fill in any gaps around the outside of the design with the black art gel. Cure again.
Step 6
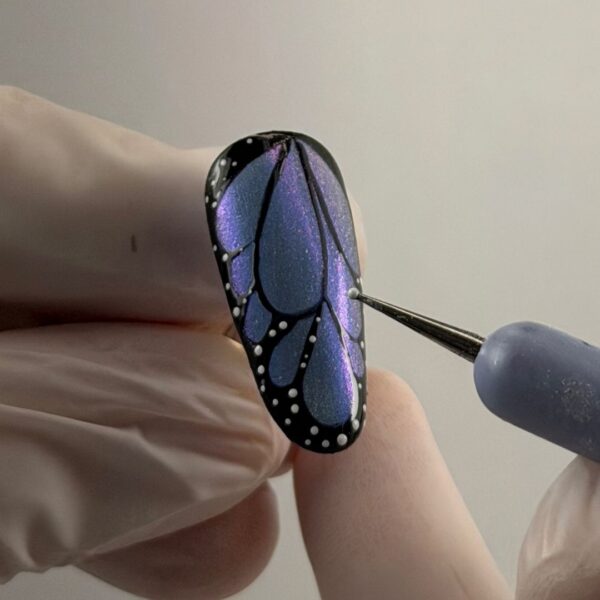
Using a dotting tool and white art gel, add small dots to any black gel paint areas. Cure.
Step 7
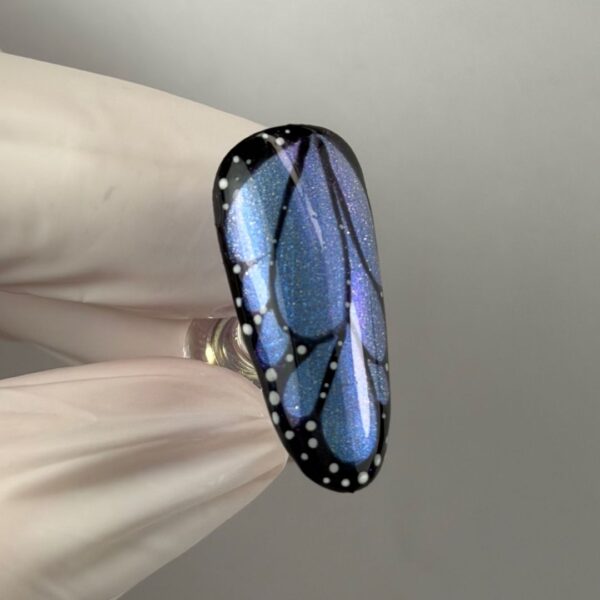
Apply a glossy gel polish top coat and cure to finish.

Read the latest issue