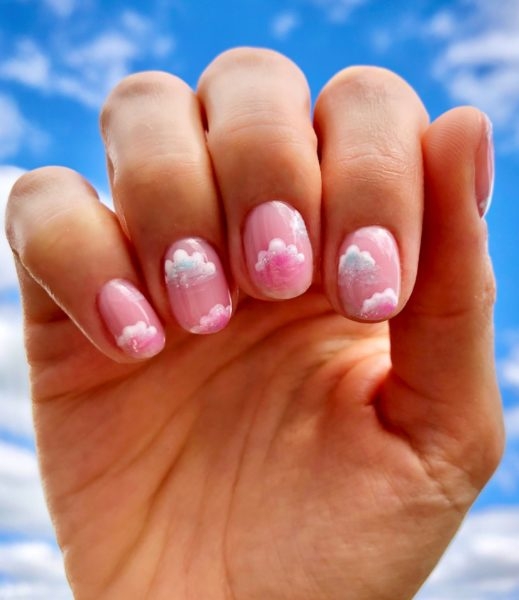
Dreamy pink cloud nail art

Step by Step
Salon System nail expert, Julie-Anne Larivière, has created a pink cloud-inspired step-by-step using a range of Gellux products.
Step 1
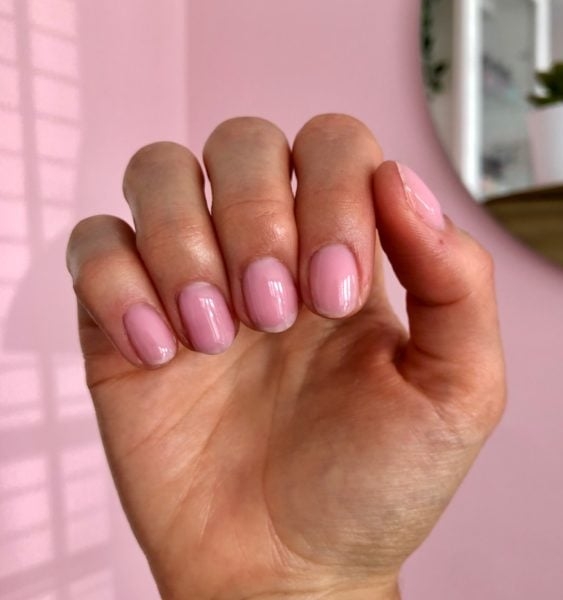
File the nails to shape, push the cuticles back with the Gellux Cuticle Handy Manicure Tool and gently buff the surface of the nails with a white block. Thoroughly wipe nails with Gellux Nail + File Antiseptic Spray and a lint-free pad. When the nails are dry, apply Fast Bond. Let dry for 30 seconds. Apply the Gellux Fast Bond and let dry for 30 seconds. Then apply one very thin layer of Gellux Builder Gel in Rose Pink, curing for 60 seconds.
Step 2
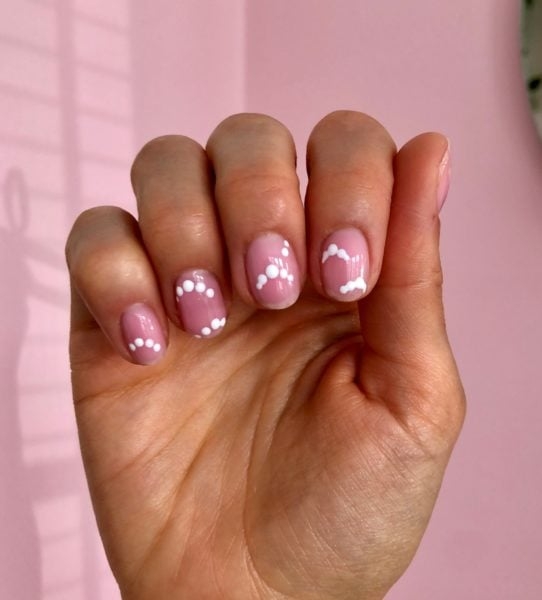
Apply a thicker layer of Gellux Builder Gel in Rose Pink, making sure you leave the bulk of the product about 1/3 of the way down the nail from the cuticle area to create a nice apex, and cure for 60 seconds. Using a dotting tool dipped in Gellux Gel Polish in Purely White, apply dots in the shape of a cloud. Do not cure.
Step 3
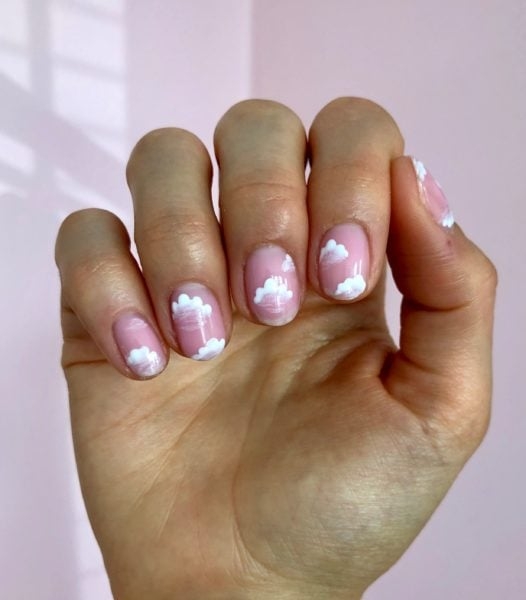
Using a nail art brush, join the dots and blend the white down so it creates a smokey effect. Cure for 30 seconds.
Step 4
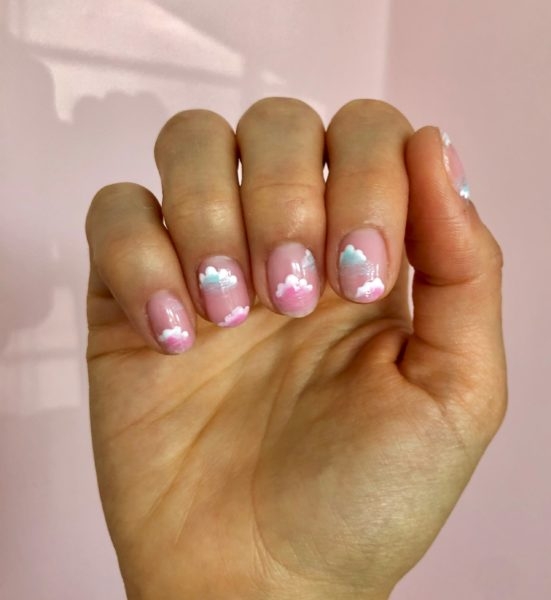
Using a nail art brush, apply a small amount of Gellux Gel Polish in Once and Floral and Gellux Gel Polish in Tease Me Teal on the inside of the clouds and blend downward like you did with the white. Cure for 30 seconds. Dip a fine liner brush in Gellux Gel Polish in Star Dust and apply a little glitter on the clouds. Cure for 30 seconds.
Step 5
Apply the Gellux Mirror Glaze Top Coat and cure for 60 seconds. Wipe the nails with Gellux Prep + Wipe and apply Gellux Nail & Cuticle Oil.

Read the latest issue