
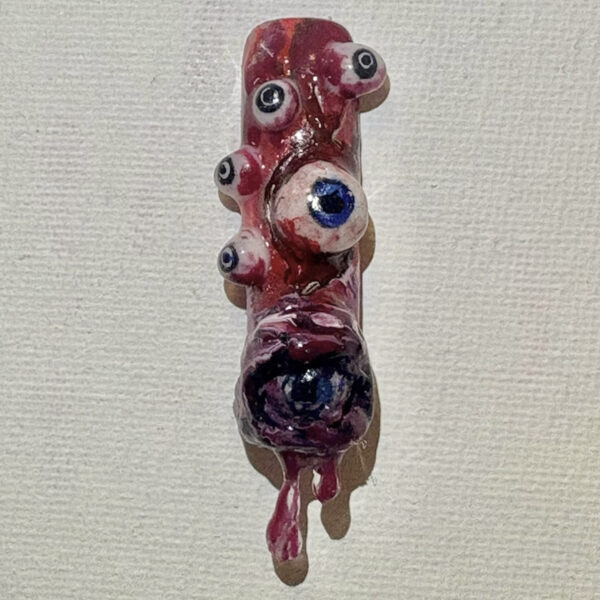
Gorgeously gory: Halloween 3D eyeball nail art tutorial
Step by Step
Faranak Shafie is a Manchester-based nail artist and founder of The Glow Nail & Beauty, as well as a 2026 Scratch Stars Gel Tech of the Year finalist. Here, she shares a step-by-step guide to a 3D eerie eyeball nail design…
You will need:

Are you enjoying this content?
Join our community to receive more like this
- Small ball magnet.
- 3D sculpting gel in white and clear.
- Gel polish in black, white, blue, red and deep crimson.
- Fine detail nail art brush.
- Dotting tool.
- Nail tip.
- E-file with drill bit.
- Glossy gel polish top coat.
Step 1
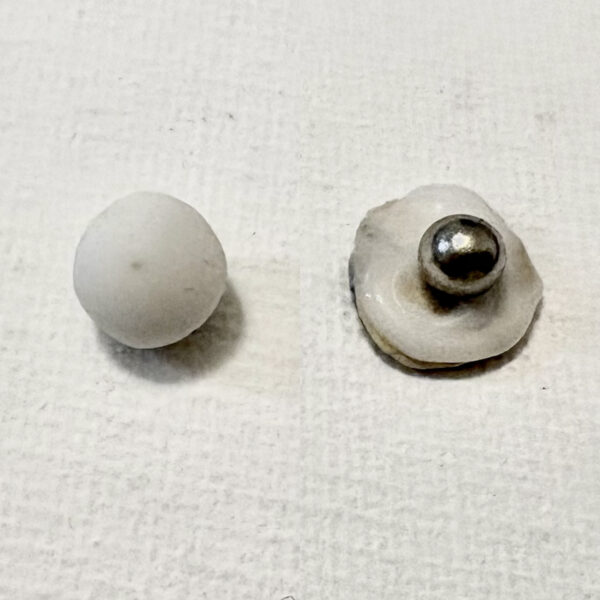
Using white 3D sculpting gel, sculpt a sphere around a small ball magnet. Cure.
Step 2
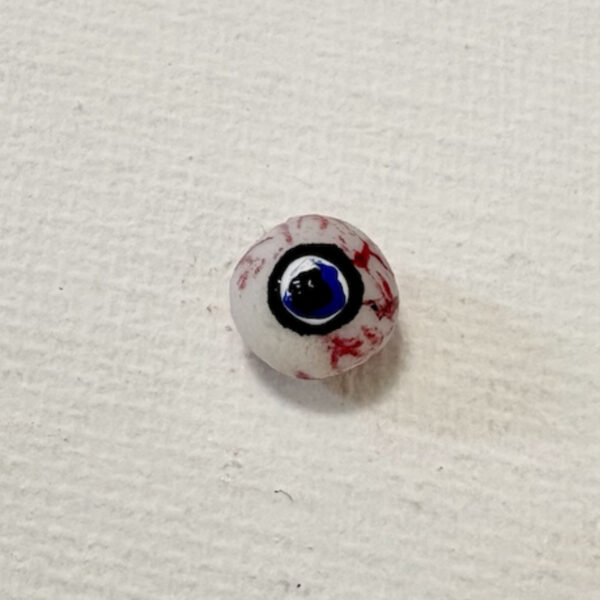
Using a dotting tool with black, white and blue gel polish, paint the iris and pupil, curing between each colour. Then, using a fine liner brush and red gel polish, add blood-vessel details and cure again.
Step 3
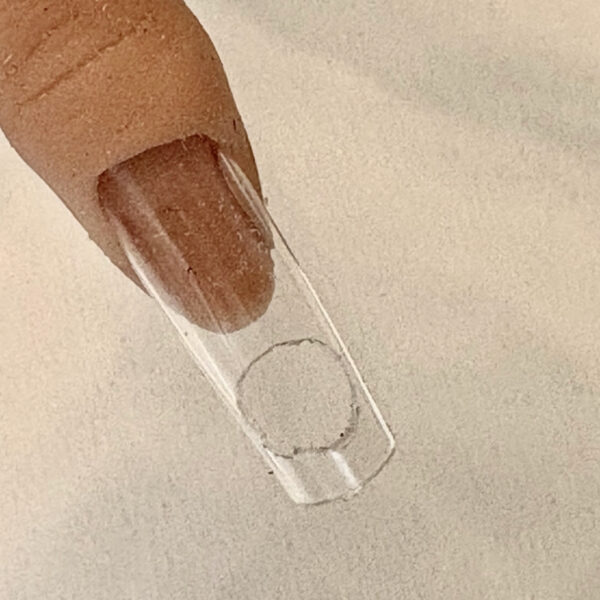
After prepping your nail tip, use an E-file with a drill bit to create a circular hole - slightly bigger than the size of your prepared eyeball - towards the end of the tip.
Step 4
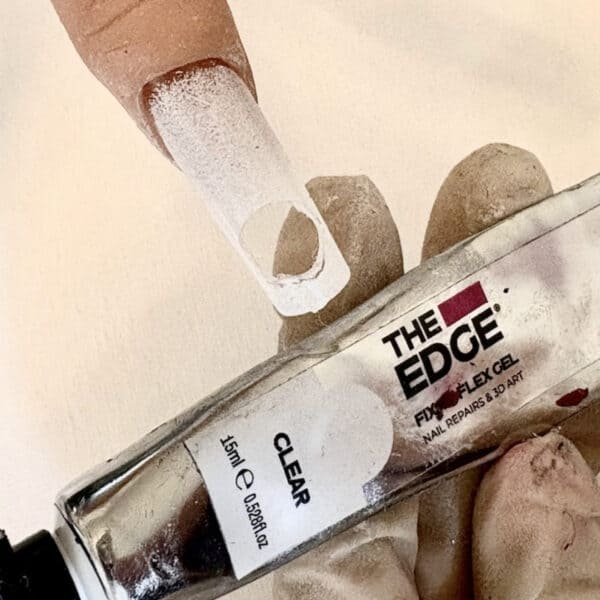
Use 3D sculpting gel in clear to line the rough edge of the hole you have created. Cure.
Step 5
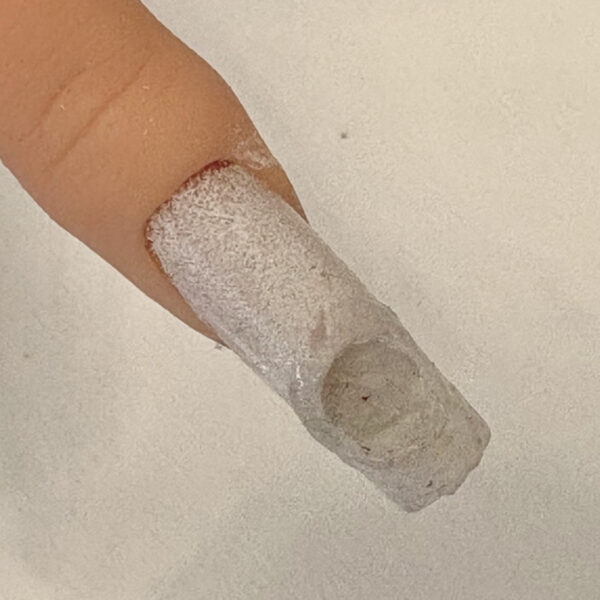
Fill the hole with white 3D sculpting gel. Before curing - while the gel is still mouldable - shape a concave impression that will later hold your prepared eyeball in place. Cure.
Step 6
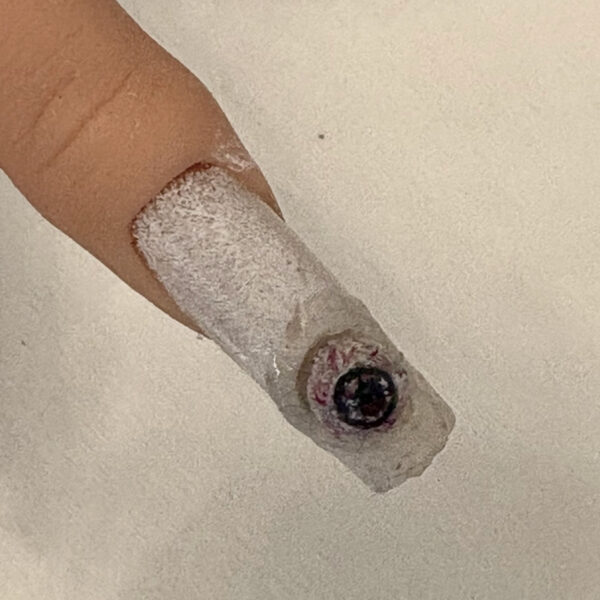
Place your pre-prepared eyeball into the socket. Then, using a small amount of clear 3D sculpting gel and a fine brush, build up a thin rim around the edge of the socket and over the edge of the eyeball to form 'eyelids'. Cure once shaped, checking the eyeball can still move freely within the socket.
Step 7
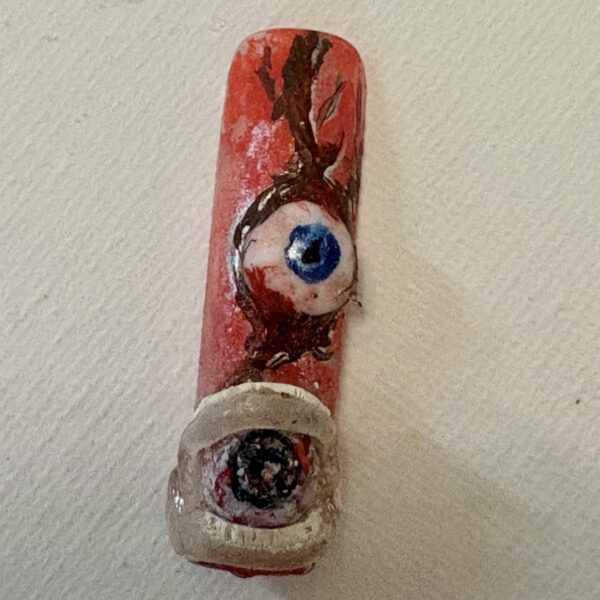
Sculpt a second sphere using white 3D sculpting gel and cure. Paint on the pupil and iris details using gel polish in various shades, then cure again and attach the eye to the nail tip. Roughly paint the background of the nail tip with red gel polish and cure, then add vein details in dark crimson gel polish and cure again.
Step 8
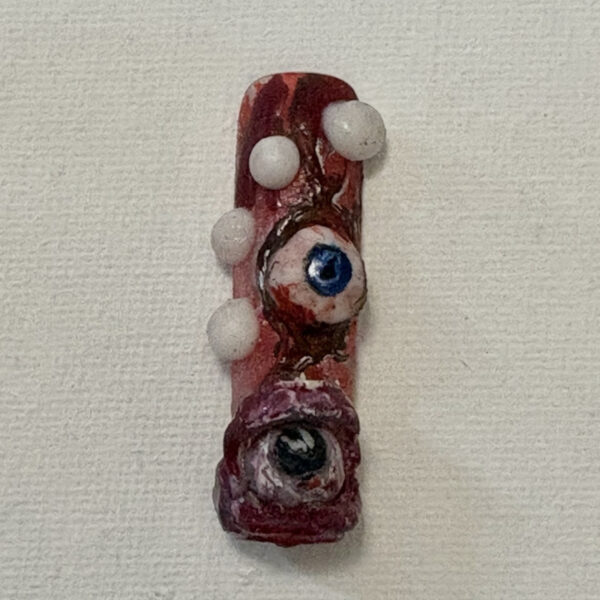
Paint the eyelids using a deeper red gel polish for extra depth and gore, then cure. Create four smaller eyeballs using white 3D sculpting gel and adhere them to the nail tip. Cure again.
Step 9
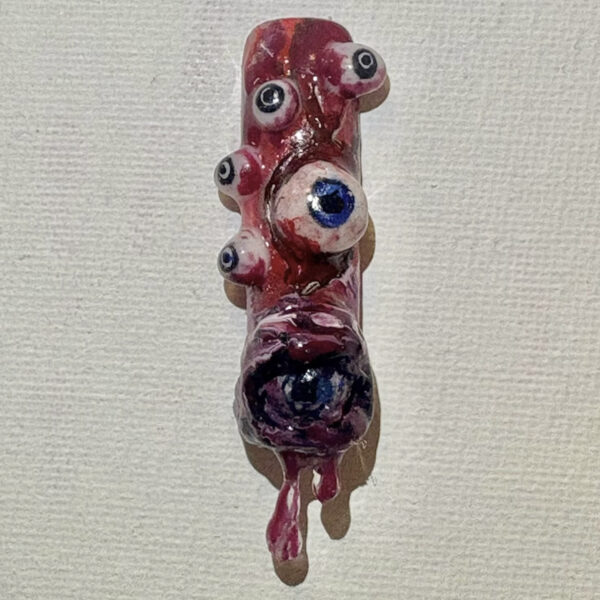
Add iris and pupil details to the four smaller eyeballs using gel polish. Cure. Then, using clear 3D sculpting gel, sculpt drips flowing from the eyelid closest to the edge of the nail tip and cure. Paint these drips with red gel polish and cure again, then seal the whole look with a glossy gel polish top coat and cure to finish.