
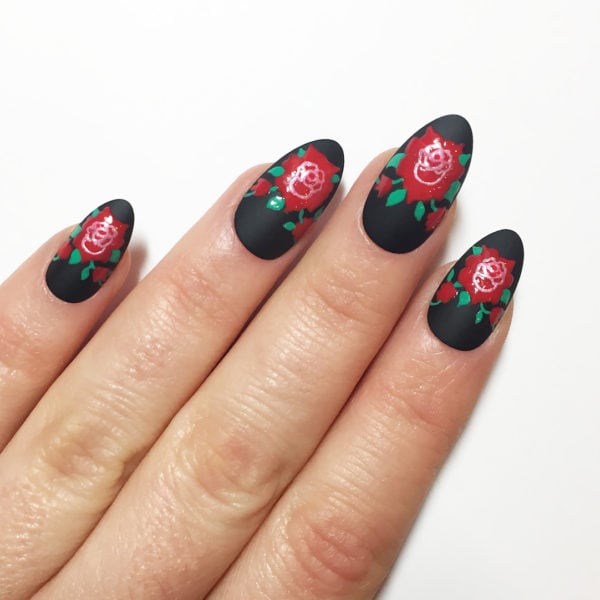
Graffiti rose nails

Step by Step
This step-by-step is courtesy of Sophie Harris-Greenslade, who was inspired by cool, customised illustrative rose patches. “A raised, realistic patch-like effect is achieved by painting the roses with the nail art pen on top of a matte top coat,” says Sophie. “I’ve added a quick dry top coat to the roses at the end to smooth things out but you could leave this coat out of your design to maintain the raised patch effect.”
Step 1
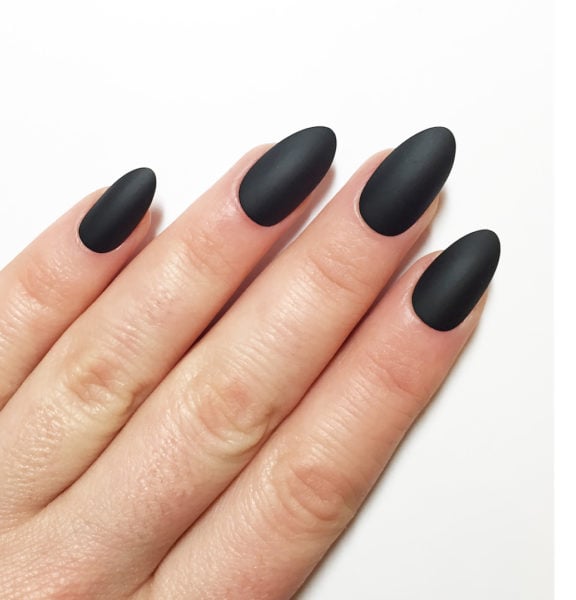
Paint all 20 nails with two coats of Black Nail Paint by Barry M, followed by a coat of Barry M's Matte Top Coat. Allow to dry.
Step 2

Using a fine detailer brush, dotting tool or red nail art pen to add a small circle of red polish about a third of the way down from the centre of each nail tip. Repeat on each nail, then add a red rose petal to one side of the red circle. This should look like a wide tear drop with a point at the top.
Step 3

Mirror this rose petal shape directly next to the first on all 10 nails.
Step 4

Paint another rose petal shape directly next to the first on all 10 nails.
Step 5

Add two rounded rose petal shapes next to the last two in the remaining spaces around the central circle. They should join up to the pointed rose petal underneath the circle.
Step 6

Using a fine detailer brush and green nail polish, paint little leaves in between the rose petals and in different places on each nail. Add two smaller red rose shapes either side of the large rose shape and join them up with green vines and leaves using a fine detailer brush and green polish.
Step 7
Using a light pink nail art pen, draw a small outline of a circle inside the large rose shape. Add an outline of five petals around this central light pink circle.
Step 8
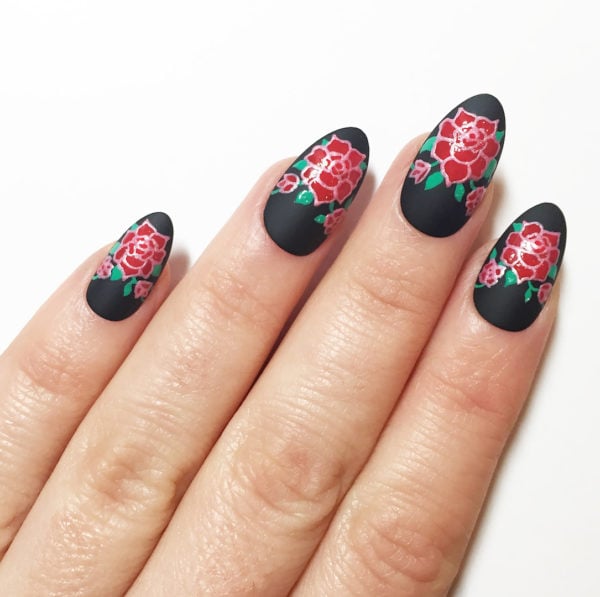
Underneath the central light pink shape, paint a U-shape to create a rose bulb. Outline the large rose petals around the rose bulb and the smaller rose shapes either side of the large central rose. Allow to dry and add a top coat or leave as is for a more raised patch effect.
