
Half-moon tortie nails

Step by Step
Animal print? Tick. Half-moon? Tick. Combine two trends into one with this super chic tortoise shell-inspired nail design by Salon System educator, Julie-Anne Larivière. Try your hand at the look with this step-by-step.
Step 1

Prepare all nails and wipe over with Gellux Prep + Wipe. Apply Gellux Fast Bond and let dry for 30 seconds. Then apply Gellux Cover Pink Base Coat and cure for 30 seconds.
Step 2
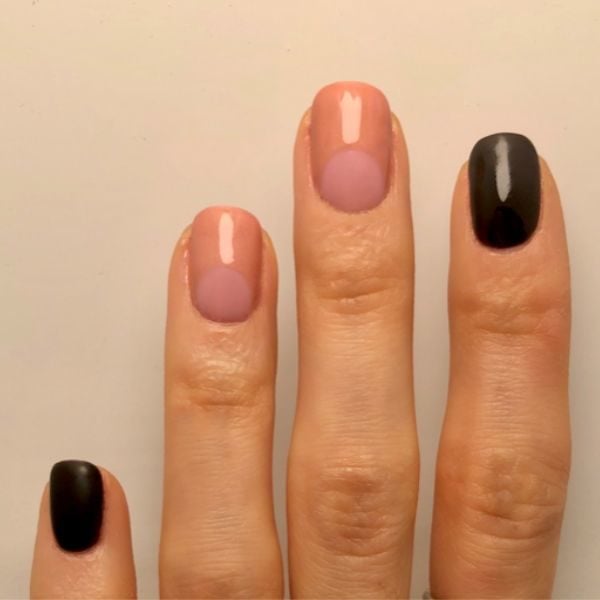
Apply Gellux in Rockin It to the thumb, index and pinkie fingers. Then, apply Gellux in Naturally Bronzed to the middle and ring fingers, being sure to leave a bare half-moon shape at the bottom of the nails, and then cure for 30 seconds.
Step 3
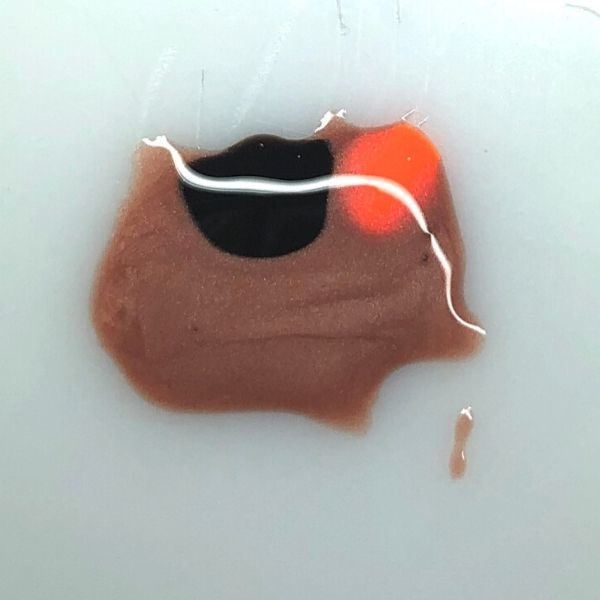
Next, on a paint palette or piece of foil, mix a 20p size blob of Gellux in Naturally Bronzed with drops of both Gellux in Rockin It and Gellux in Orange A Peel to create a pale orangey brown shade.
Step 4
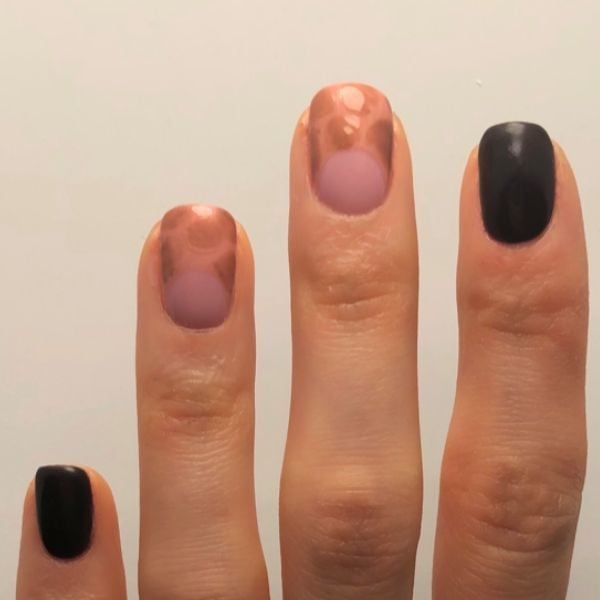
Then, using a medium sized brush add four blobs shapes to the middle and ring fingers using the pale brown you have just mixed and cure.
Step 5
Next, mix some Gellux Easy Off Base Coat with the pale brown you made and paint a thin layer onto the middle and ring fingers (do not paint on the half-moon). Then, add small blobs of Gellux in Rockin It just slightly off the centre of the patches you had previously painted. Leave them to bloom for a few seconds, and then cure.
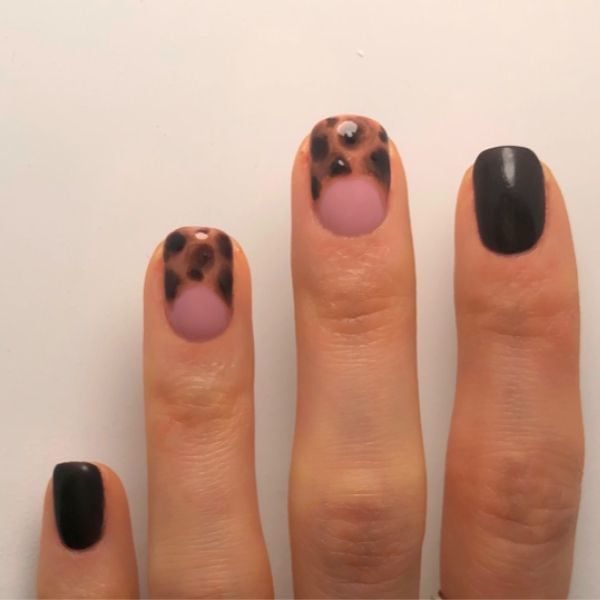
Step 6
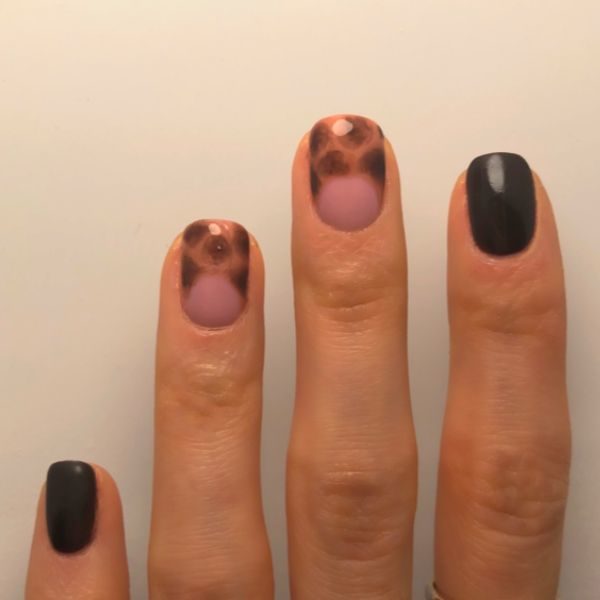
Repeat the previous step but this time adding slightly smaller blobs than previously. Then, cure again for 30 seconds.
Step 7

Next, with a thin liner brush, dip in to Gellux in All That Glitters and outline the half-moons previously created and flash cure.
Step 8
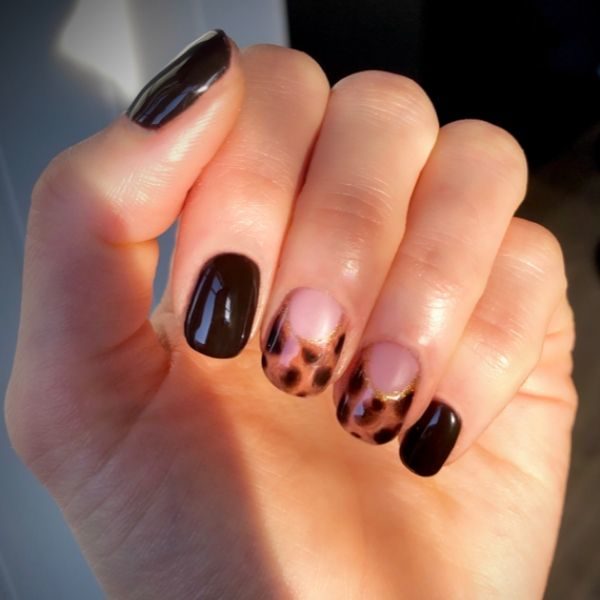
Apply Gellux Matte Top Coat to the bare half-moons, cure. Apply Gellux Mirror Glaze Top Coat to all fingers making sure to avoid the half-moon on the middle and ring fingers, then cure for 60 seconds. Finally, apply Gellux Shiny Top Coat and cure again. Wipe nails with Gellux Prep + Wipe and a slick of Gellux Nail & Cuticle Oil.
