Halloween nail art tutorial: Disney’s Mickey & Minnie Mouse

Step by Step
Sammy MacDougall, part of the team at Body Beautiful Lincoln, shares a step-by-step guide to a Halloween nail art design featuring Disney’s Mickey and Minnie Mouse.
Step 1
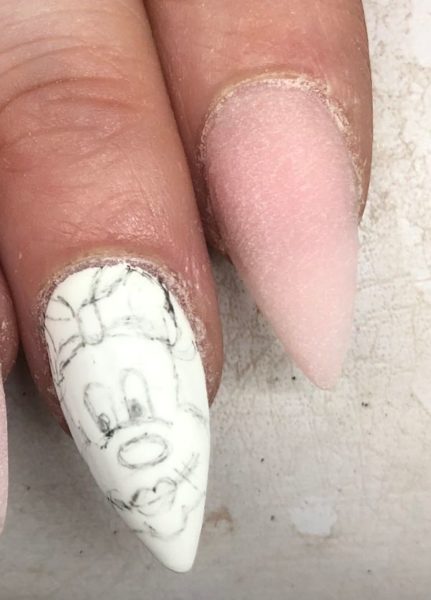
Prep nails and extend if desired. Paint using a white gel polish (two coats if desired), cure and apply a matte top coat. Cure and create the outline of Minnie's character.
Step 2
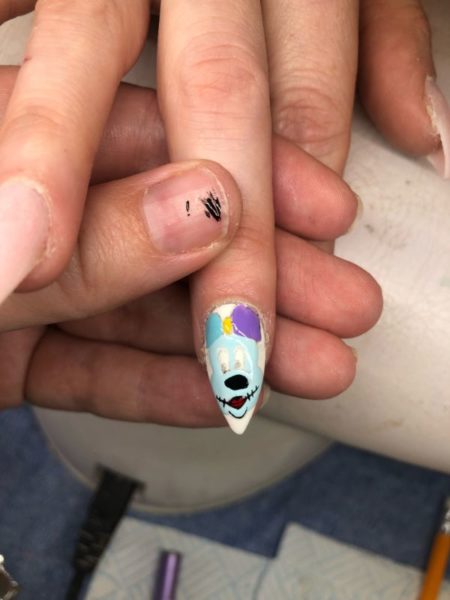
Start adding your chosen gel polish colour to each area of the character. Cure in between each colour application.
Step 3

Use a fine detailer brush and gel paints (I used Nailchemy Artisan Gel Paints) to add facial features, such as the lips and nose.
Step 4
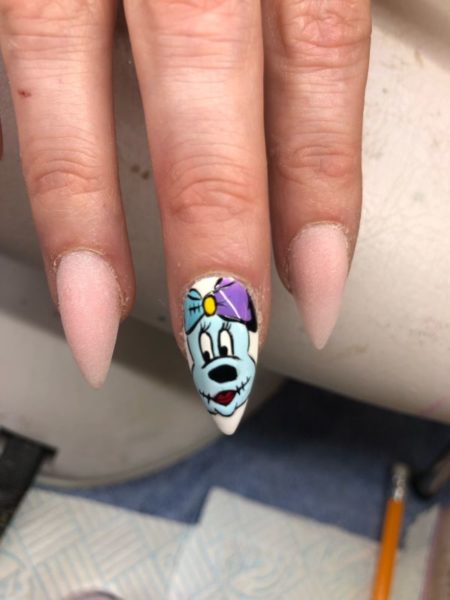
Add detail to the eyes and paint eyelashes using the fine detailer brush and gel paints. Add details to the bow and outlines where needed. Cure.
Step 5

Paint some stitch marks around the character's face. Cure. Apply top coat and cure.
Step 6

Use the same techniques to paint Mickey Mouse on another feature nail. On the remaining nails, add stitch designs and use a dotting tool to create Mickey Mouse silhouettes. Finally, add stamped designs if desired.

Read the latest issue