Happy Feet nails

Autumn/Winter, Step by Step
Freehand nail artist, Gemma Dawson, has created this Happy Feet nail design, perfect to sport during winter.
Step 1

Start with a nude matte base nail
Step 2

Paint on a rounded triangle, making sure the top dips up slightly in the centre, then repeat this shape inside of the first shape to make a beak
Step 3

Next, add a cloud-shaped outline across the nail, just under the bottom point of the beak. Then, position the centre of his eyes directly above each side of his beak
Step 4
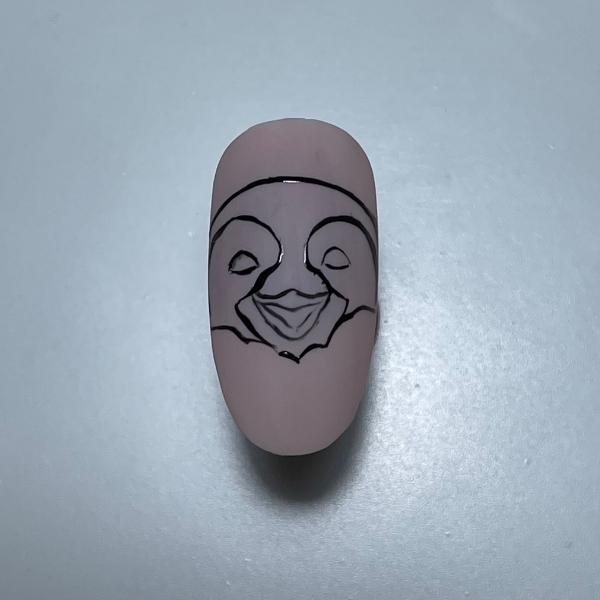
Outline around his beak and eyes in black and add the top of his head
Step 5
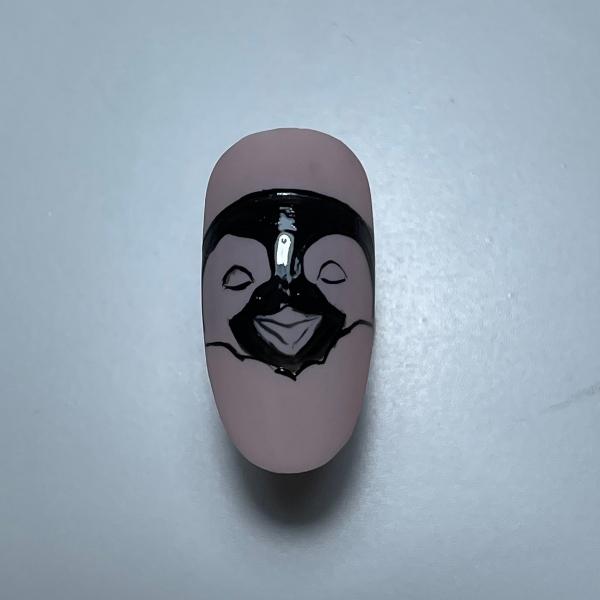
Fill in the outline with black art gel, leaving the eye area blank, then cure
Step 6

Paint both of the eye areas white and make sure to drag out the white onto the black to make it look like little hairs. Cure
Step 7
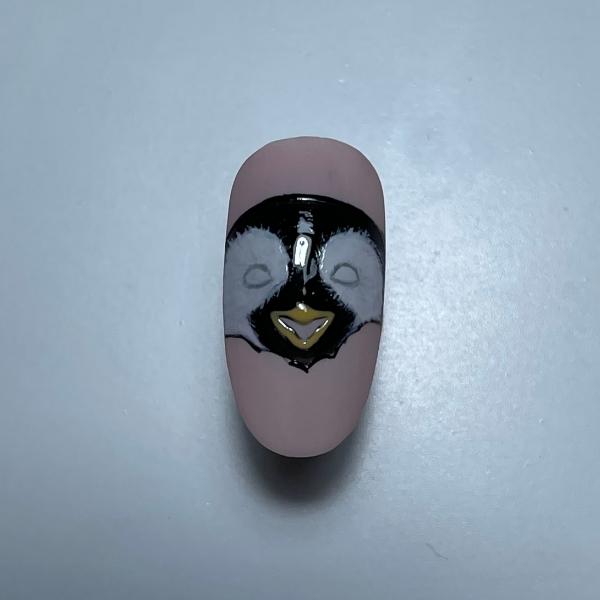
Outline the eyes in grey and paint the beak yellow. Using a small amount of pale grey and a clean brush, drag some grey strokes through the white to add some depth. Cure
Step 8

Fill in the eyes with blue, paint the inside of the mouth burgundy and the tongue pale pink. Cure
Step 9

Add black pupils, and some extra shading where needed to the mouth, then cure. Add a tiny line down the beak to give the illusion of it being pointed. Add a white spot to each eye and cure
Step 10

Next add small cloud shapes to his head and beak to make snow, and fill in the big cloud at the bottom, using white gel for both. Do not cure
Step 11

Sprinkle over a fine white glitter to give a sugared effect and cure. Dust off the excess glitter to reveal your finished Happy Feet-inspired penguin

Read the latest issue