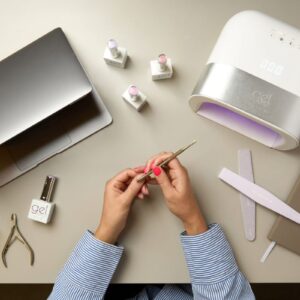
How to use Halo’s PoliBuild System to create nail enhancements
")
Step by Step

Halo VIP, Leanne Mitchell, shares how to use the Halo PoliBuild system to create sleek nail enhancements.
What is Halo PoliBuild?
Halo PoliBuild Precision Gel combines the benefits of L&P acrylic and hard gel for strong, light and flexible nail enhancements. The system is ideal for creating French or pink & white ombré nail looks, and offers the ideal foundation for Halo Gel Polish application.
Halo’s PoliBuild is available via Pure Nails.
Step 1
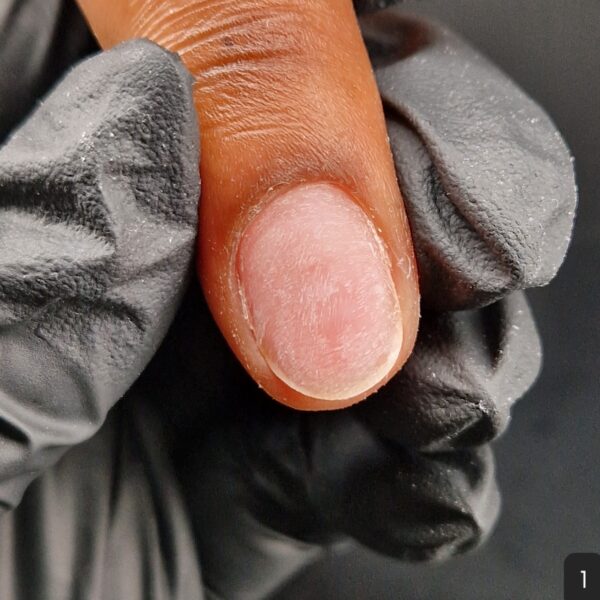
Prep the nails for enhancement by applying cuticle remover and pushing back the cuticles. Next, apply hand scrub and ask the client to wash their hands. Shape the nails, then lightly etch over the nail plates with a 20-grit file and wipe with Pure Nails Prep & Scrub.
Step 2
Both tips and forms can be used to create enhancements with PoliBuild. If using tips, ensure the nail is dehydrated and then measure the tip, ensuring it fits snugly at the side walls. Apply a small amount of nail glue to the tip and attach this as clpse to the tip of the nail as possible. Allow the glue to dry, then file to blend the tip to the nail plate.
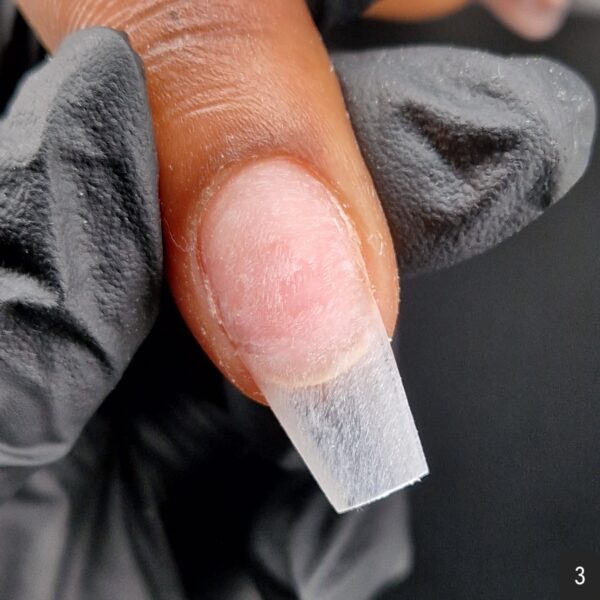
Step 3

Wipe the nail and tip using Pure Nails Prep & Scrub. Apply a thin layer of base coat and cure for 60s.
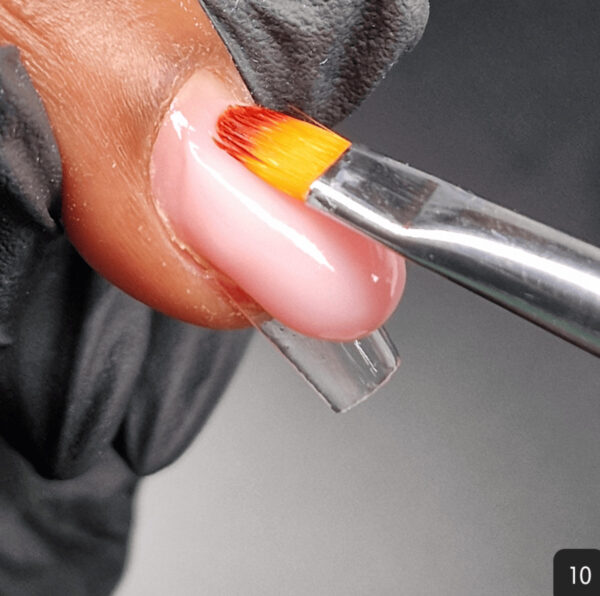
Step 4
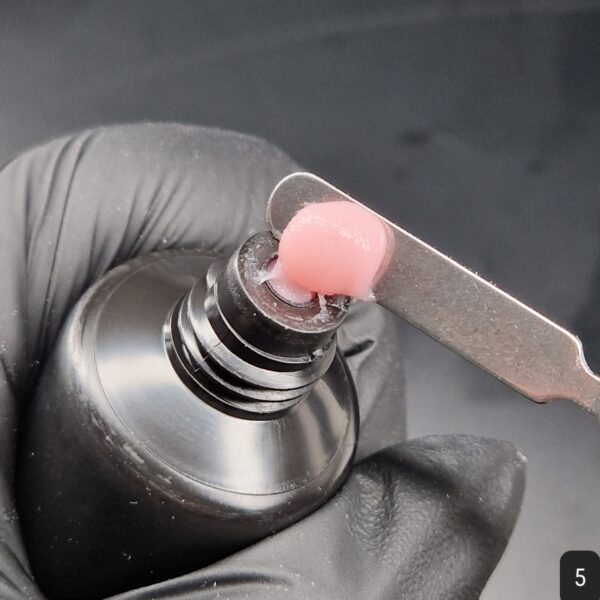
Pick up a bead of Halo PoliBuild Precision Gel in Cover Pink, using the spatula on one end of the Halo PoliBuild Dual Tool.
Step 5

Place the bead in the centre of the nail plate. The product will remain in the same place until you manoeuvre it.
Step 6
Dampen the brush end of the Dual Tool with Halo PoliBuild Liquid Control. A small amount i needed to create a barrier between the brush and PoliBuild. Use the body of the brush to push behind the product and manoeuvre it, being careful not to stipple the brush into the product. Push the PoliBuild towards the cuticle area first, tapping the product gently into place and ensuring that it is not touching the client's skin.
Step 7

Move the product towards the side walls and blend out using the body of the brush. Next, pull the body of the product down and towards the tip of the nail, until you are happy with the coverage. Wet the brush with Liquid Control, hold it vertically against the tip of the nail and swipe away the excess product. Smooth the edges and tip with the brush and cure for 60 seconds in the Halo Smart Lamp Pro.
Step 8
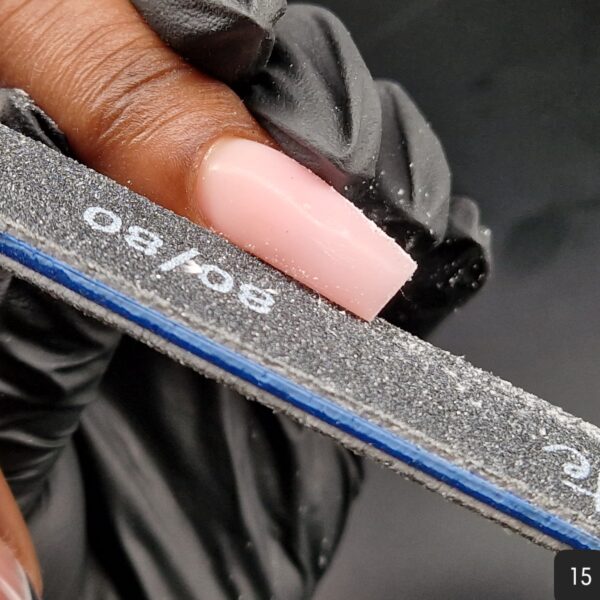
Wipe over the nails with a lint-free wipe and Halo Prep & Scrub. Refine the nails with a 80/80-grit file.
Step 9

Buff over the nails with a budding block for a smooth finish, before creating a design or applying colour.

Read the latest issue