
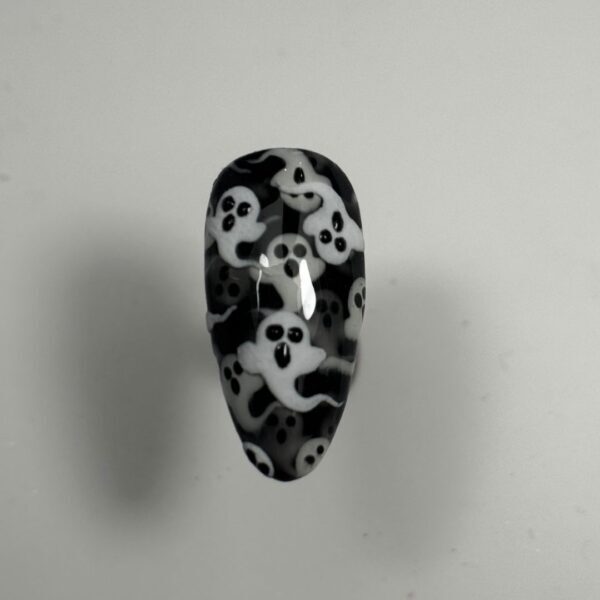
Nail Halloween with this 7-step guide to layered ghost art
Autumn/Winter, Seasonal & Occasions, Step by Step, Themed
Scratch Stars Mixed Media Nail Artist of the Year finalist 2026, Tina Li, shares how to create a gorgeous ghost illusion nail design…
You will need:

Are you enjoying this content?
Join our community to receive more like this
- Black gel polish.
- White gel polish.
- Sheer black jelly gel polish.
- Glossy gel polish top coat.
- Optional: glow-in-the-dark pigment.
- Small & large dotting tools.
- Fine liner nail art brush.
Step 1
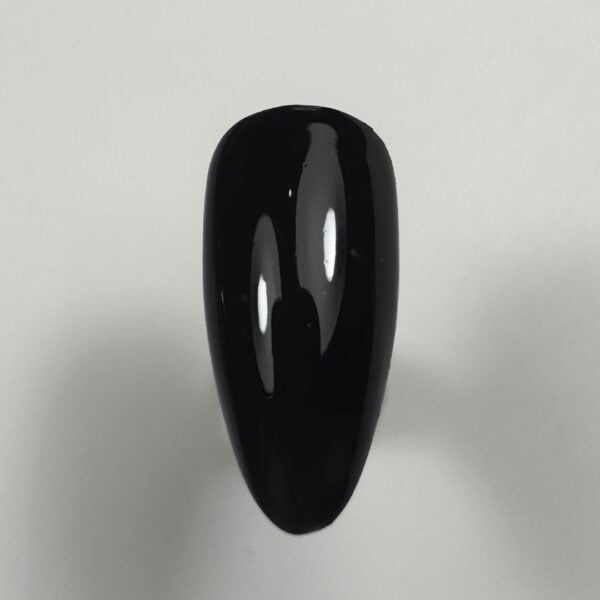
Prep the nail & apply one coat of black gel polish. Cure according to manufacturer's instructions.
Step 2
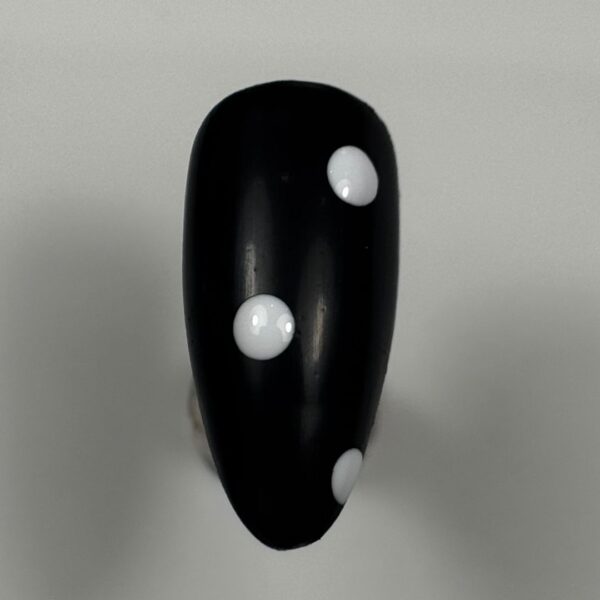
Using a large dotting tool and white gel polish, add three dots to the nail. Do not cure. (Optional: If you want to add some extra spook to your nail set, mix the white gel polish with glow-in-the-dark pigment.)
Step 3
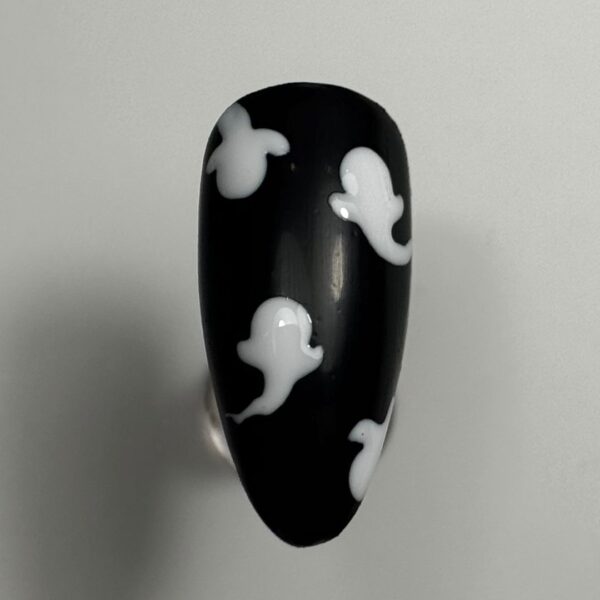
Whilst the white gel polish is still uncured, use a fine liner nail art brush to drag the paint out to create a tail and arms. Cure.
Step 4
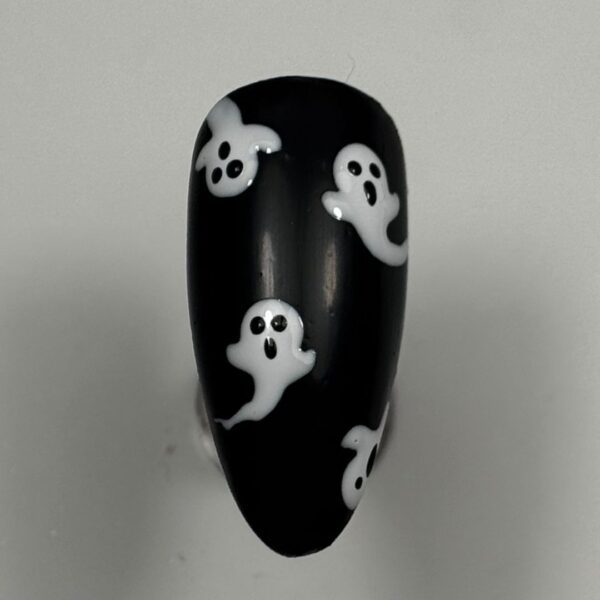
Use a small dotting tool and black gel polish to create two round eyes, then add a slightly elongated dot beneath them for the mouth. Cure again.
Step 5
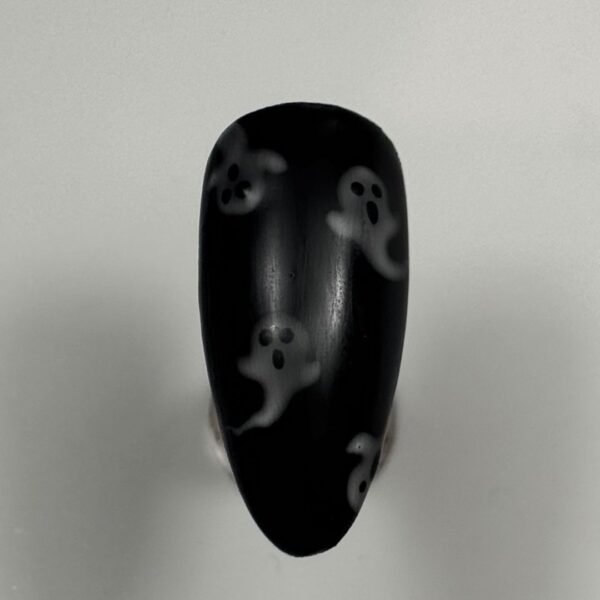
To create the layered effect, paint a thin coat of black jelly gel polish over the entire nail. Cure. (Top tip: If you don't have a jelly gel polish, you can mix black gel polish with your base coat.)
Step 6
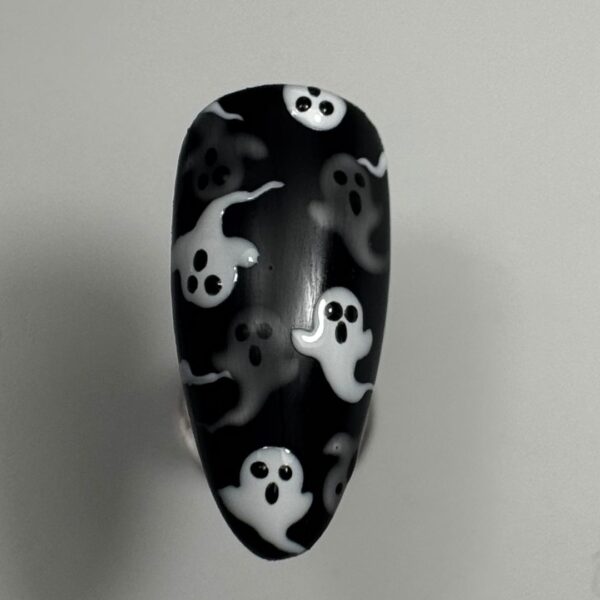
Repeat steps 2-5, creating more ghosts in different areas of the nail - don't worry if they slightly overlap the first layer of ghosts.
Step 7
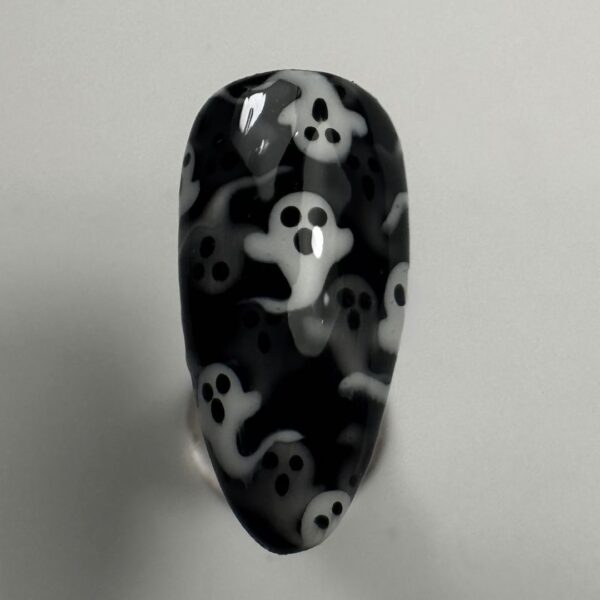
To create the top layer of ghosts, repeat steps 2-4 again. Then, instead of adding another layer of black jelly gel polish (as in Step 5),
paint over the top layer of ghosts with a glossy gel polish top coat. Cure.