
Lilo & Stitch nail art

Step by Step, Themed
This Lilo & Stitch nail design by Georgina Duffy is the perfect nail art for any Disney fan!
Georgina has been creating nail art since 2012, loving the challenge of character art and all things Disney.
Step 1
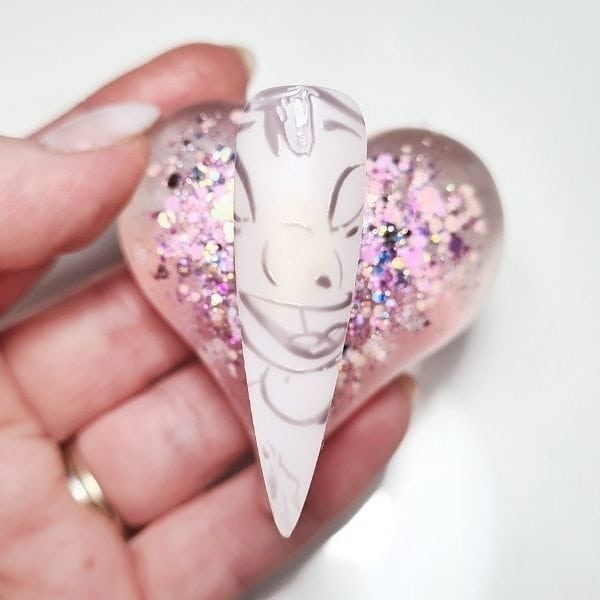
Begin by drawing your outline and cure. Try to avoid using black, as it makes it harder to cover if you need to amend anything. I use a grey for my initial sketch. With character faces, I find it easier to draw the key feature outlines at this point too - eyes, nose, mouth, hair, eyebrows etc. Don't worry too much about it not being perfect as this is just a guide.
Step 2

Add your first bit of colour then cure. For this particular design, I have added colour to Lilo's skin, one colour inside a section of the mouth, and her dress.
Step 3
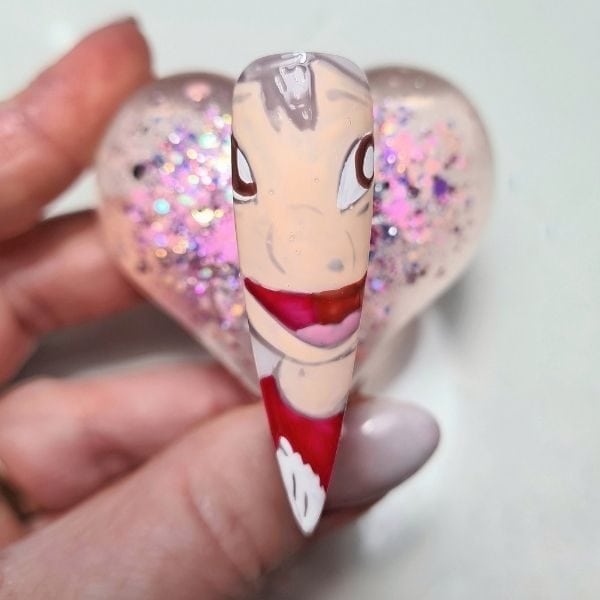
Add another layer to the skin to cover over any lines you now don't want or need, if required. Add colour to the eyes, the flower on Lilo's dress, and then the other two colours which will finish her mouth. Cure.
Step 4
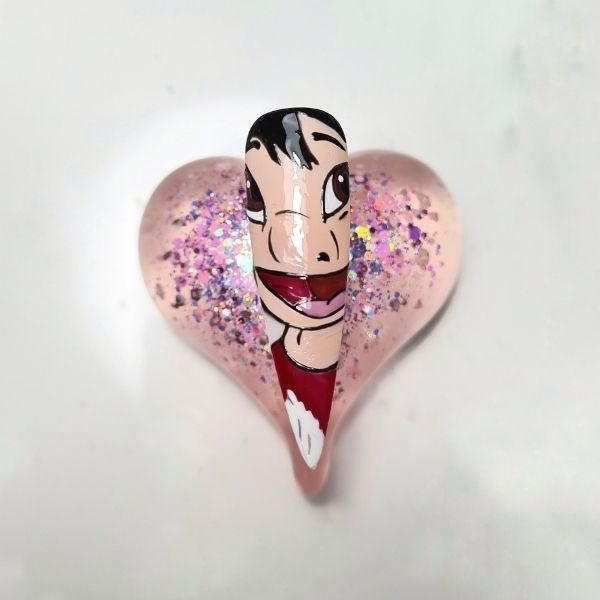
To outline, I have chosen black, as it's a clean finish. I have added black to her hair and eyebrows, and finished the rest of her eyes. I added a white dot to the eyes for a more realistic shine. I cured at this point, then went on to outline the key features which then completed the look.
Step 5
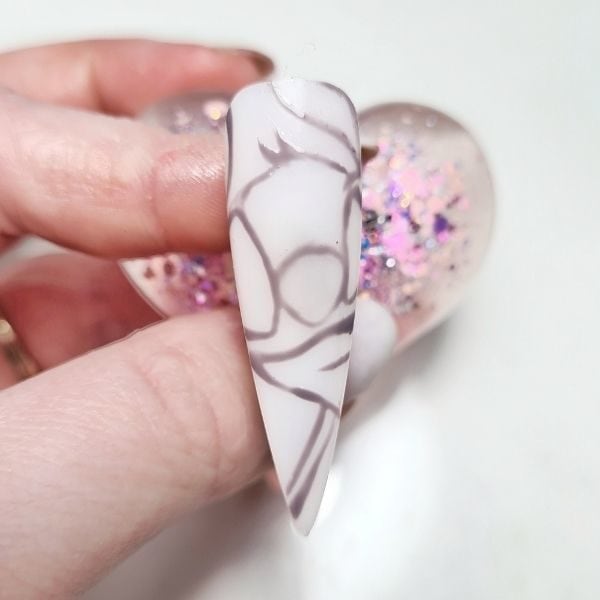
For Stitch, begin by drawing your outline and cure - once again using a grey for my initial sketch, as it's easier to cover if I need to amend any of my original lines. My initial sketch is as before, using face outline, eyes, nose, neck and hair. Don't worry too much about it not being perfect.
Step 6

Add your colours and cure. His chin and eyes use a light blue, and the rest of his face is a mid blue shade. I also added pink for his ears.
Step 7

Add a darker blue for his nose then cure. Add the first of the eye detail in black.
Step 8

Reapply any of the colours if required, and add the white dot to the eye to create that three-dimensional and more realistic feel. Cure.
Step 9

Outline in black to make the design pop and cure.
Step 10
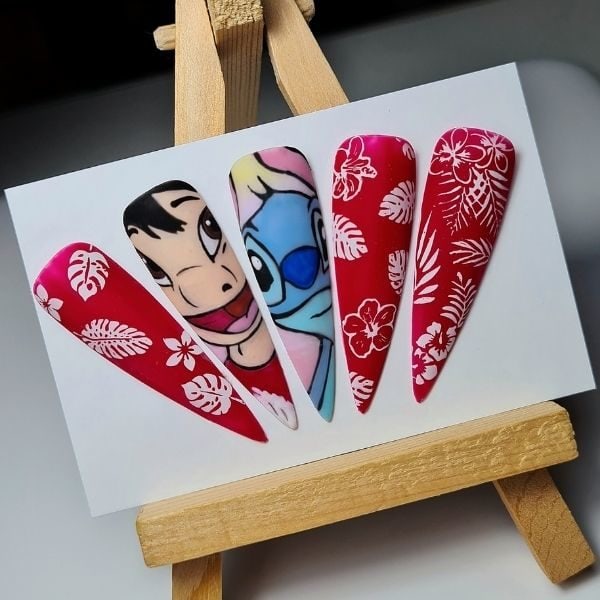
Finish the design with a matte top coat for those key details to be visible without any light glare or over shine.
