Easter nail art: how to create matte Mini Egg nails

Seasonal & Occasions, Step by Step
Lucy Price-Marshall, OPI educator & Scratch Stars Natural Nail Specialist of the Year 2023 & 2024 shares how to create this negative space Mini Egg design.

“The nail art took 10 to 15 minutes to create, and I would charge £10 on top of a standard OPI GelColor service,” she says.
Products used:
Step 1
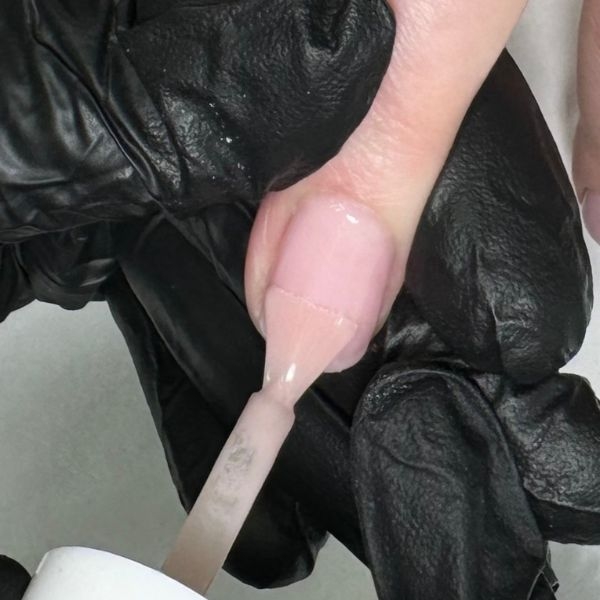
Prep the nails and apply two coats of OPI GelColor in Bubble Bath, curing between each coat.
Step 2
Apply one coat of OPI Matte Top Coat and cure. This will prevent colour bleeding and allow for precise application.
Step 3
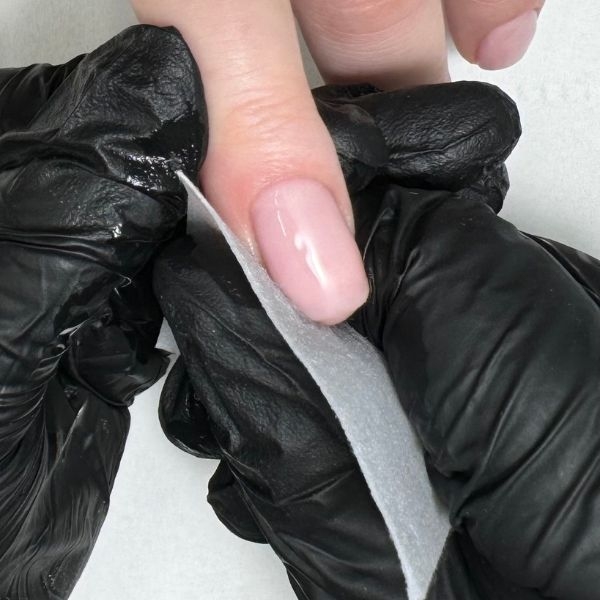
Remove the inhibition layer by cleansing the Matte GelColor Top Coat.
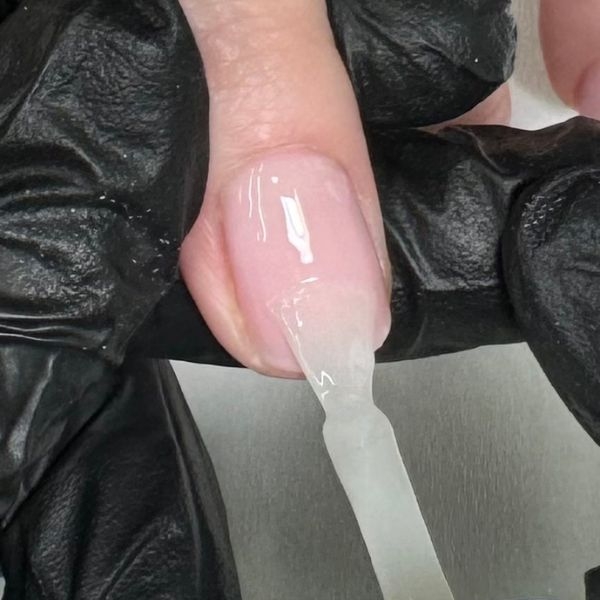
Step 4
Apply one stroke of your first chosen colour from the cuticle area to the free edge, creating an even band down the centre of the nail. Do not cure. Colour used: OPI GelColor in Buttafly.
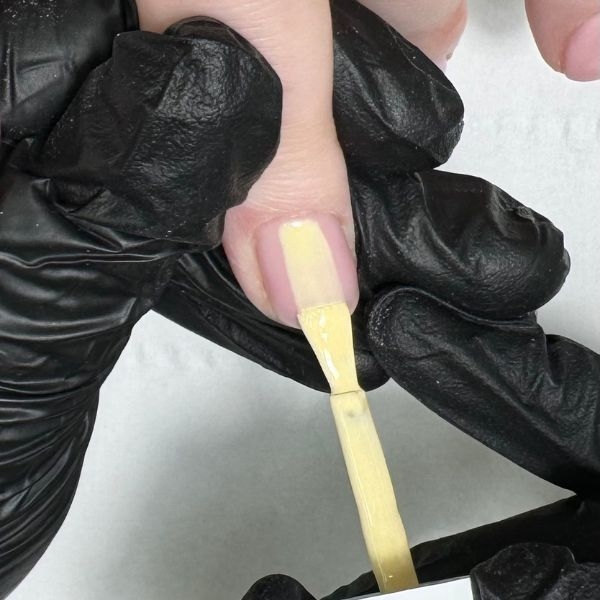
Step 5
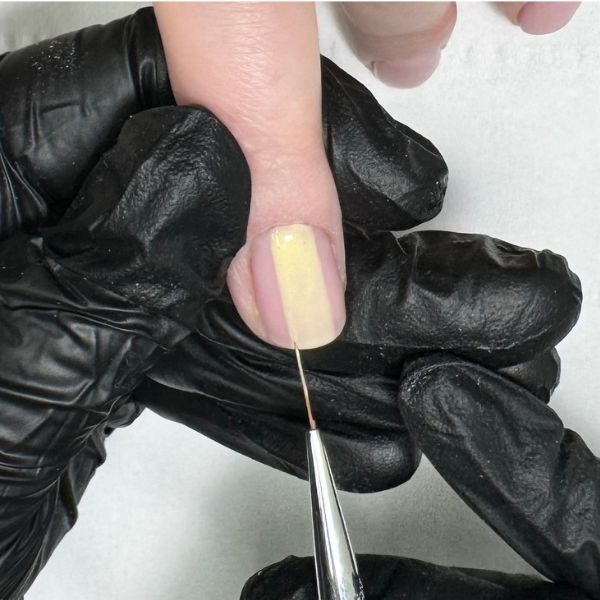
Using a liner brush, make sure the edges are crisp and straight. If the nail plate is narrow, you can use the liner brush to paint on the coloured band. Cure.
Step 6
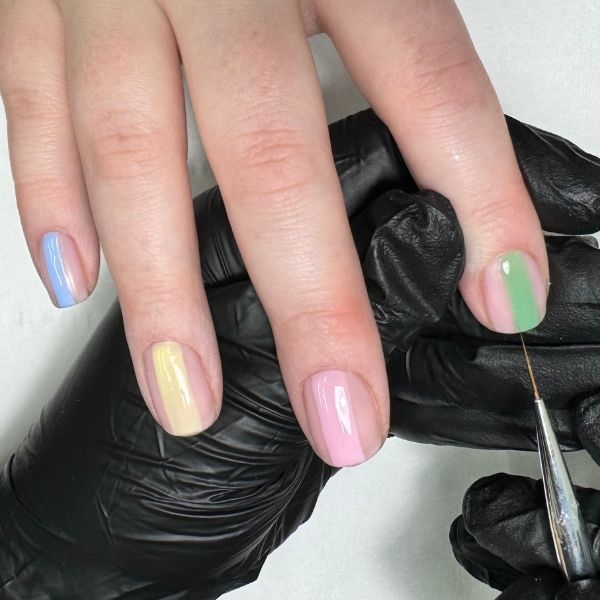
Repeat this step on all 10 nails using various pastel shades. I used OPI GelColor shades, Mod About You, Apricot AF, *Verified*, $elf Made and Sickeningly Sweet.
Step 7
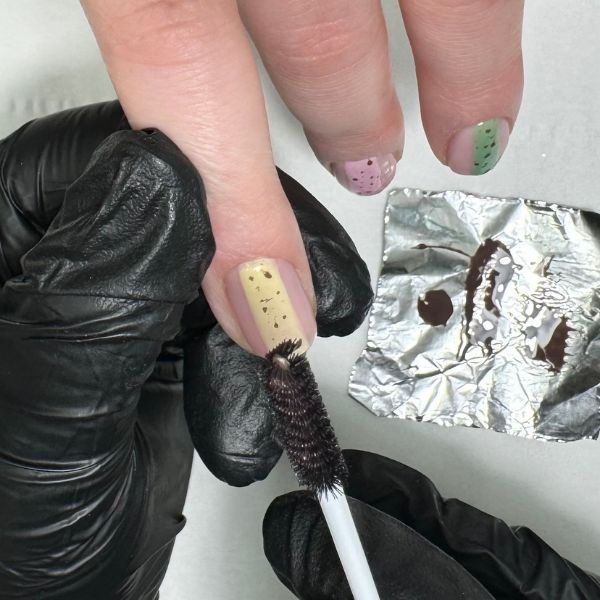
After curing, wipe over nails to remove the inhibition layer. Using GelColor in You Don't Know Jacques and a disposable mascara spoolie, apply speckles to the pastel band, and cure when happy.
Step 8
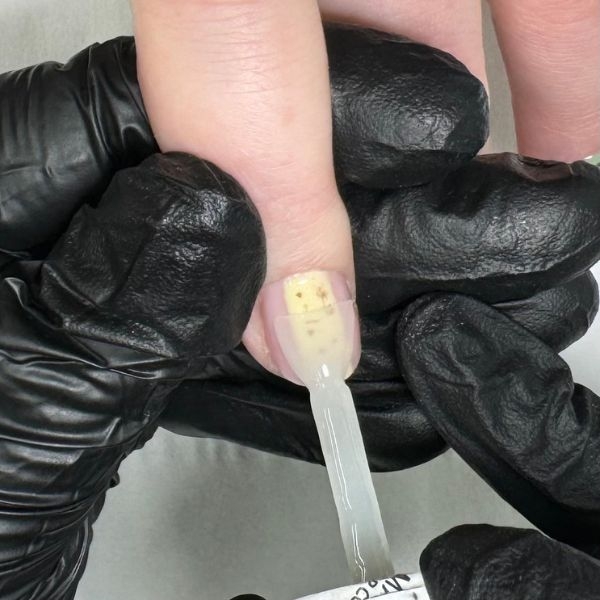
Apply matte top coat, cure and cleanse.

Read the latest issue