

Nail art tutorial: 5 steps to create a watercolour flower design

Floral, Step by Step
Sacramento-based nail art specialist, Alena Muraveva, shares a step-by-step for this watercolour floral style.
 “My nail art journey began long before I picked up a nail brush – since childhood , I’ve been immersed in painting with watercolour and oil,” she tells Scratch. “Art was always my way of seeing and sharing beauty. Over time, I felt a deep desire to bring that creativity into everyday life, and what better canvas than nails?
“I find endless inspiration in the works of traditional painters and the soft, flowing lines of nature,” she continues. “I’m proud to be a multi award-winning artist, winning accolades at Nailympia competitions and the Nail Nations Championship 2024 by Nail Art France Events. These competitions challenged and refined my vision — and I’m excited to continue evolving.”
Step 1
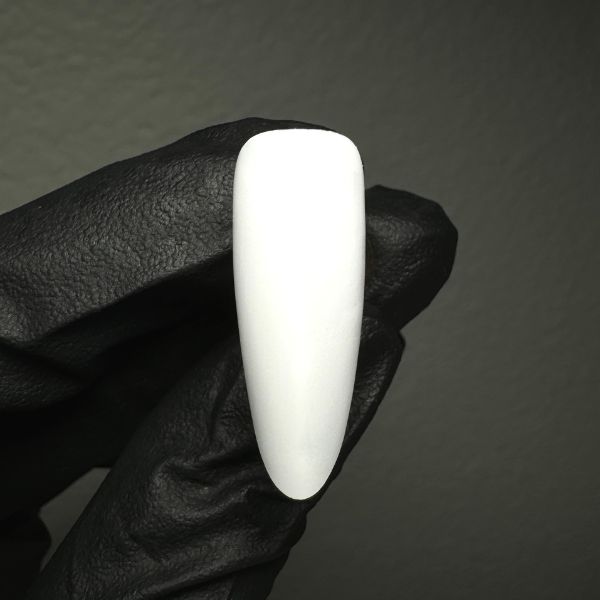
Paint the nail with two coats of white gel polish. Cure after each layer, then apply a matte top coat and cure. This smooth, matte surface is ideal for watercolour painting.
Step 2
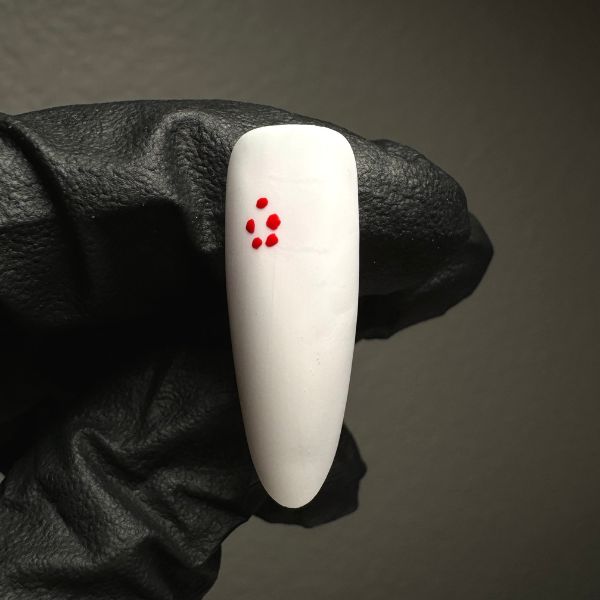
Using a dotting tool or fine brush, place five small dots of pink watercolour paint in a circle where the flower will be. These will become the centres of the petals.
Step 3
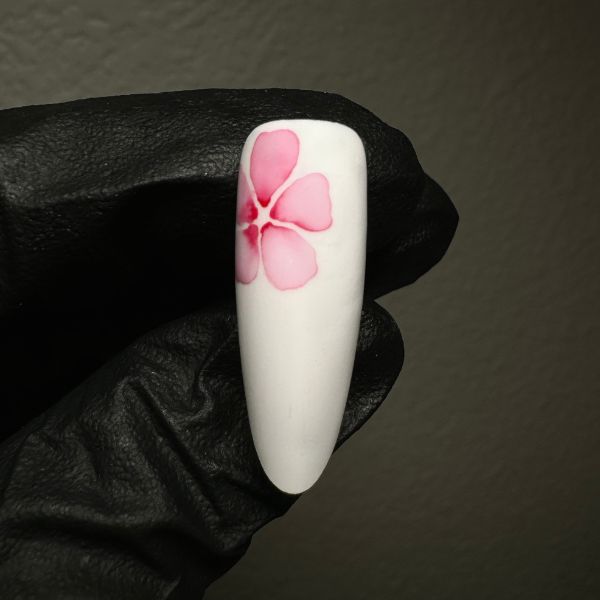
Using a clean brush that is well saturated with water, gently drag the pink paint outward from each dot to form translucent, petal-like shapes. The matte surface helps the colour disperse beautifully. Once the desired effect is achieved, let it dry for a few minutes.
Step 4
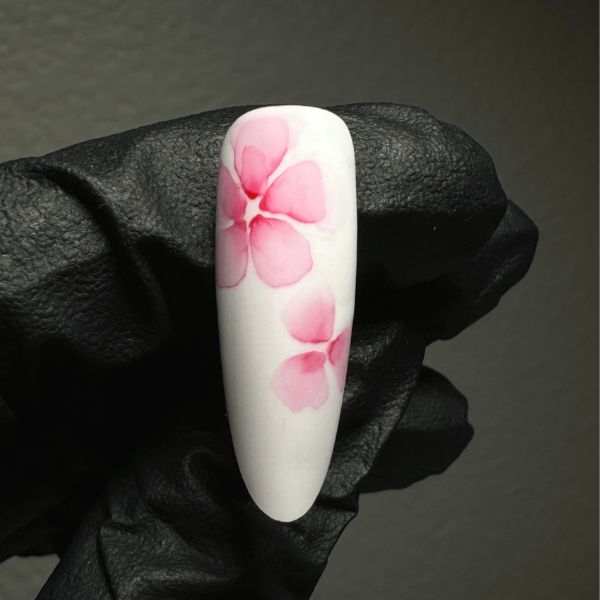
Repeat the same technique to add more flowers and petals below the main bloom. Keep the placement organic and balanced. Allow to dry when finished.
Step 5
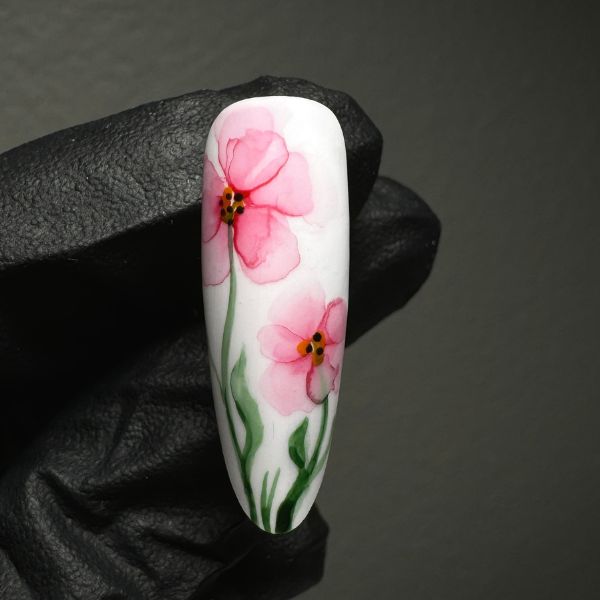
Add small black and yellow watercolour paint dots in the flower centres. Then use a fine brush and green watercolour paint to create soft flower stems and delicate leaves. Let these dry, and finish with a layer of matte top coat. Cure.

Read the latest issue


