

Nail tutorial: How to apply Gelish Hard Gel

Step by Step
Najet Hamila Strand, global director of education at Nail Alliance, shares why she loves the Gelish Hard Gel system: “Its self-levelling properties are helpful when building the apex curve. Keep application thin around its perimeters. When it is time for rebalancing, filing and reapplication is quick, providing a faster service or leaving more time to spend on nail art.”

Below, she shares a step-by-step for how to use the system with tips.
Gelish products are available in the UK via www.gelishmorgantaylor.co.uk
Step 1
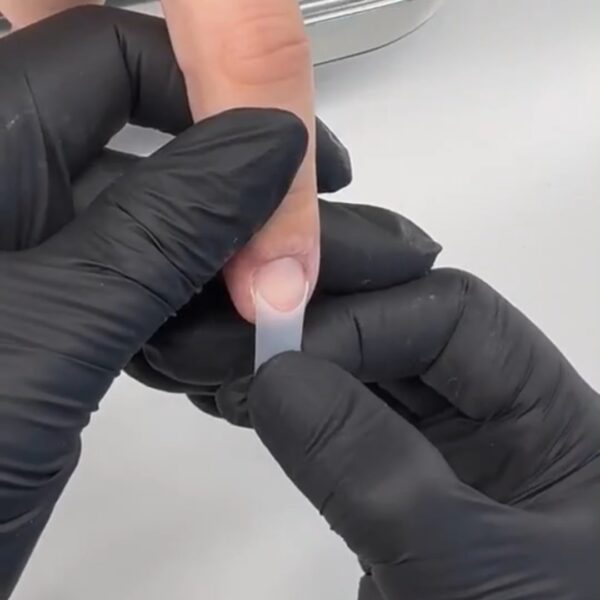
Select the correct sized tips for each nail. Ensure they reach the full width of the natural nail without overlapping the skin. If needed, file the sides slightly.
Step 2
Apply the tips using nail adhesive and use tip cutters to cut to the desired length.
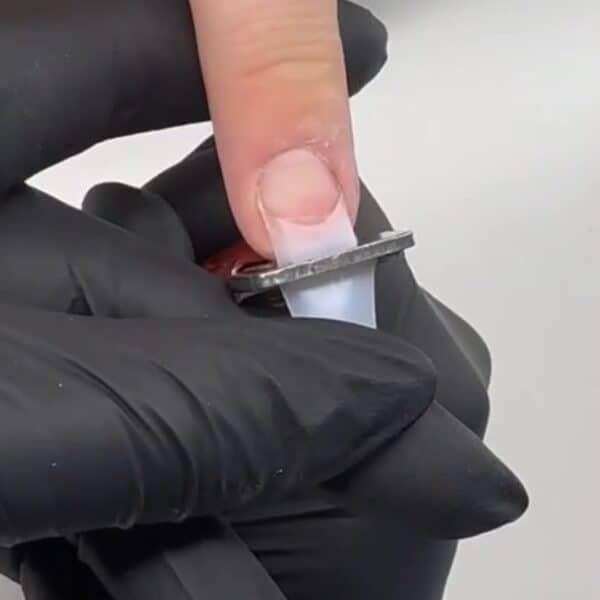
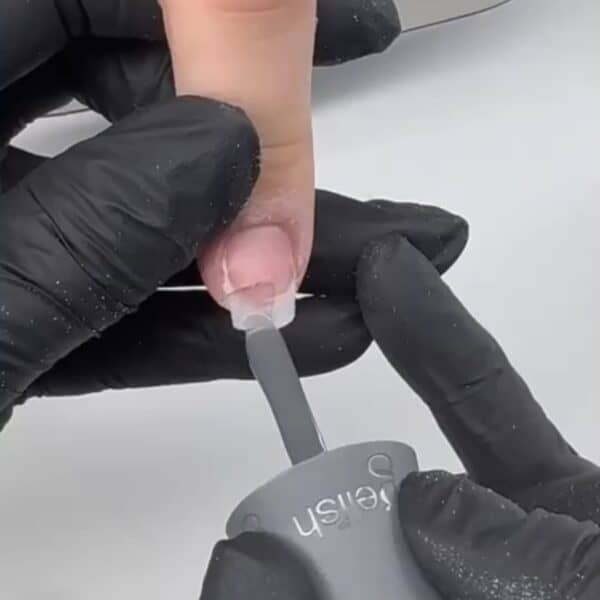
Step 3
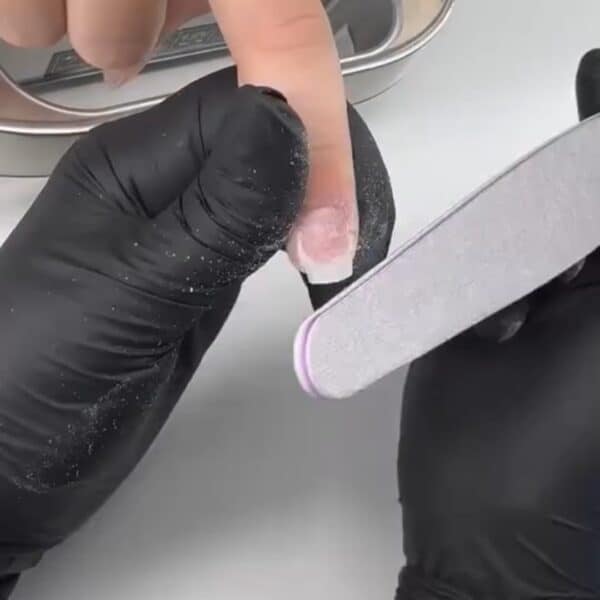
Blend the seam of the tip using a 180/180-grit file so it sits flush with the natural nail, ensuring a smooth transition and natural appearance. Remove dust using a nail dust brush or lint-free wipe.
Step 4
Apply Gelish pH Bond to the natural nails only, avoiding the tips.
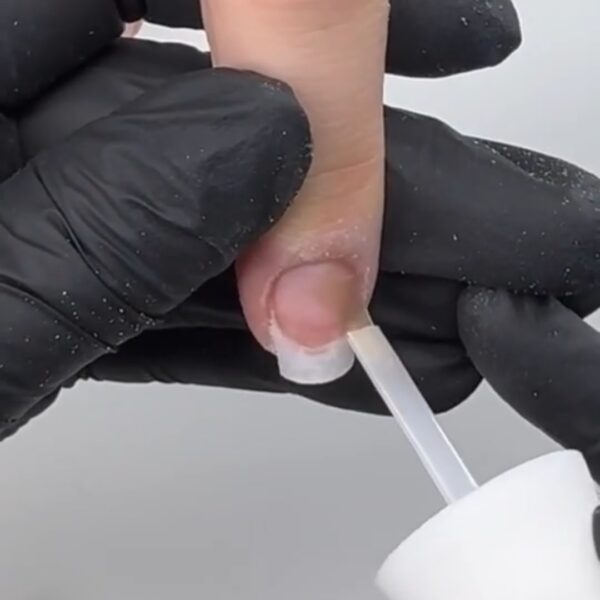
Step 5
Apply a thin layer of Gelish Foundation Soak-Off Base Gel, scrubbing into the nail and tip. Cure for five seconds.
Step 6
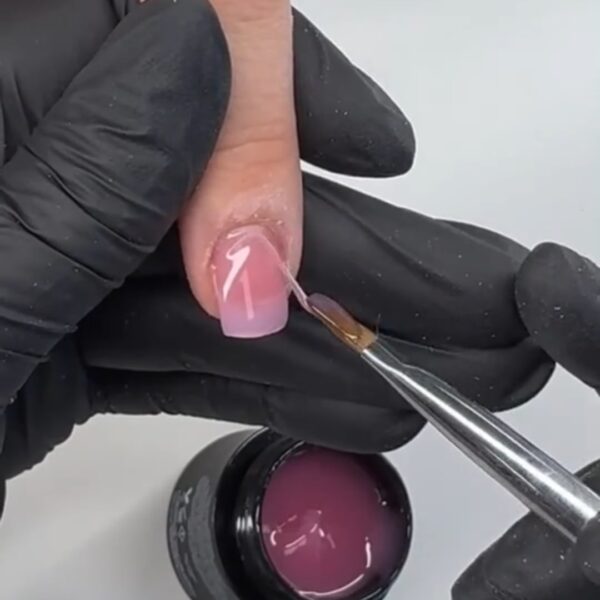
Brush a thin layer of Gelish Hard Gel over the nail, but do not cure. This will help guide the next layer of gel smoothly into place. Apply a bead of Gelish Hard Gel to the centre of the nail, using a square or oval brush. Gently pull it down towards the cuticle, sidewalls and free edge. You can also use the stringing method, allowing the gel to ‘string’ from the brush to the nail in a controlled manner for precise placement. Cure in the Gelish 18g Unplugged Lamp for 30 seconds.
Step 7
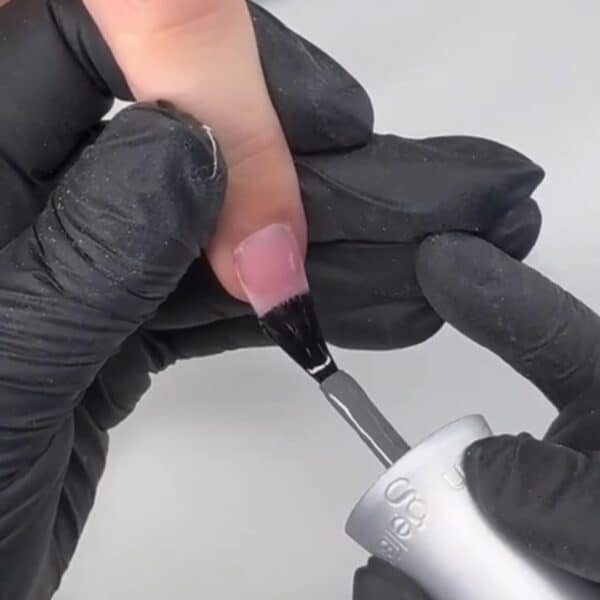
Apply your chosen Gelish top coat and cap 7 the edges to seal the enhancement. Cure for 30 seconds.
Step 8
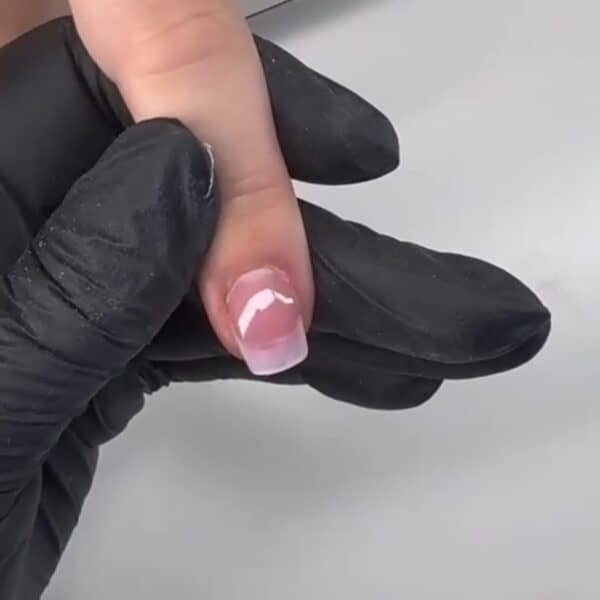
Remove the inhibition layer using Gelish Cleanser. Massage Nourish Cuticle Oil into the cuticles and surrounding skin to hydrate.

Read the latest issue


