
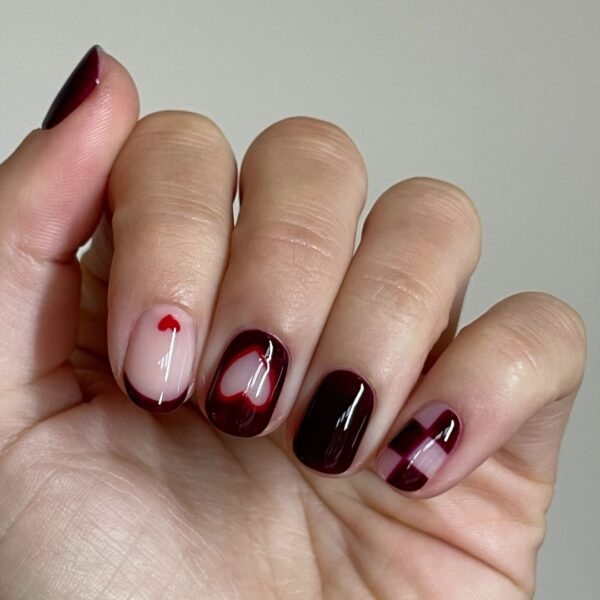
Heart & negative space nails

Step by Step
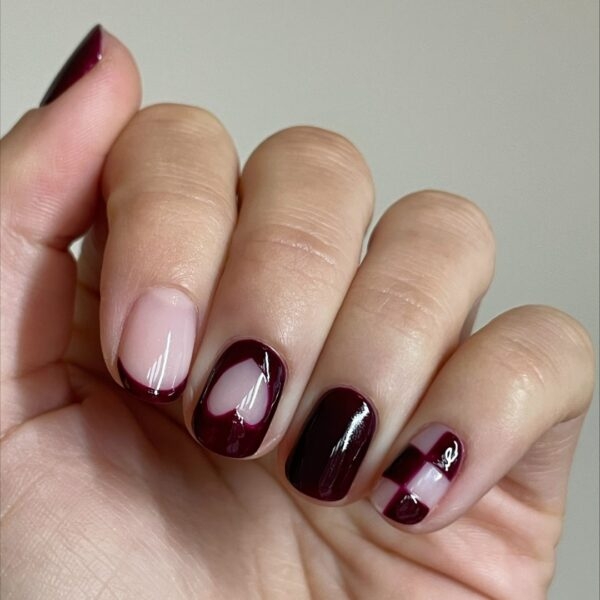
Salon System expert, Jaz Moger, shares how to create this negative space mix and match nail design featuring heart and checkerboard details. To create the design, she used shades from her GELLUX Mini Winter Edit with Salon System, available from wholesalers nationwide.
Step 1
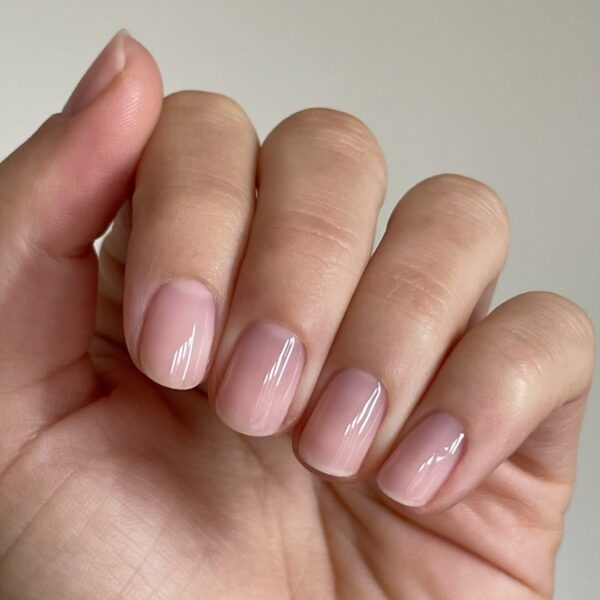
Prep the nails. File to shape, push back the cuticle and buff the nail plate. Cleanse nails with GELLUX Prep + Wipe, apply a coat of GELLUX Warm Pink Builder Gel and cure for 60 seconds.
Step 2
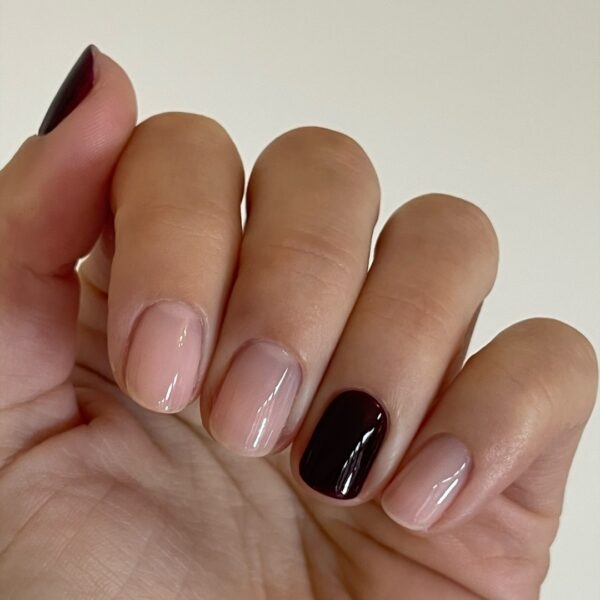
Apply two to three coats of GELLUX Mini Black Cherry on the thumb and ring finger. Cure between each layer.
Step 3
Using a fine liner nail art brush, paint a French tip with Black Cherry on the index finger. This may need two to three coats. Cure for 60 seconds.
Step 4
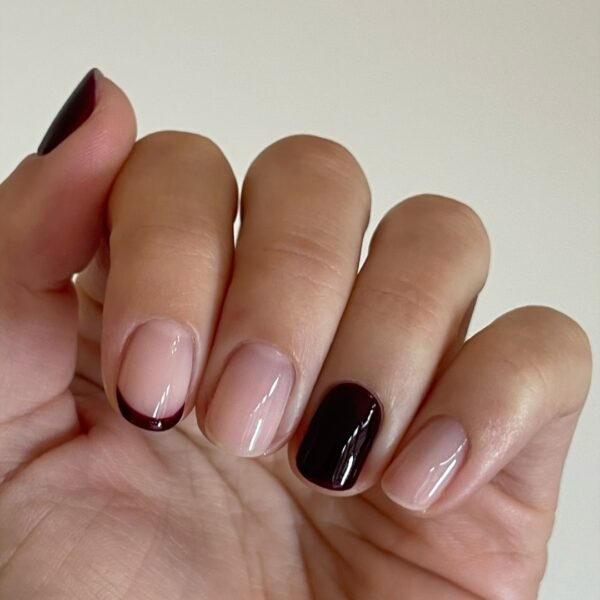
Using Black Cherry and the fine liner nail art brush, paint a line vertically down the middle of the little nail and two lines horizontally across the nail, to start creating the checkerboard. Cure.
Step 5
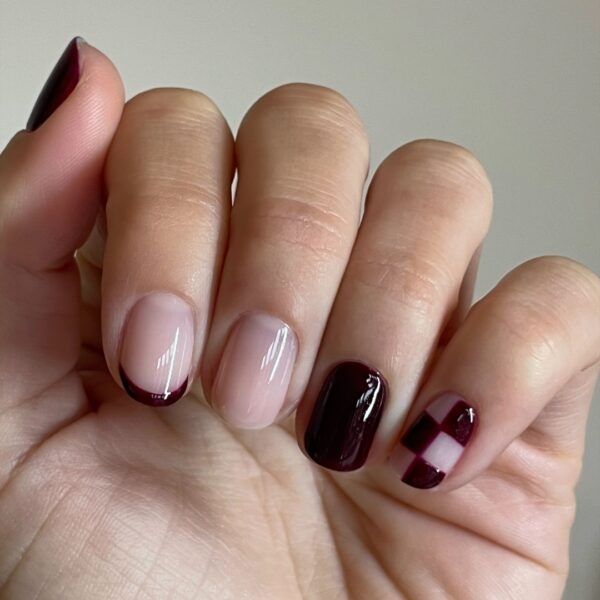
Fill in the checkerboard shape with the Black Cherry shade, curing between each layer. This may require two to three coats.
Step 6
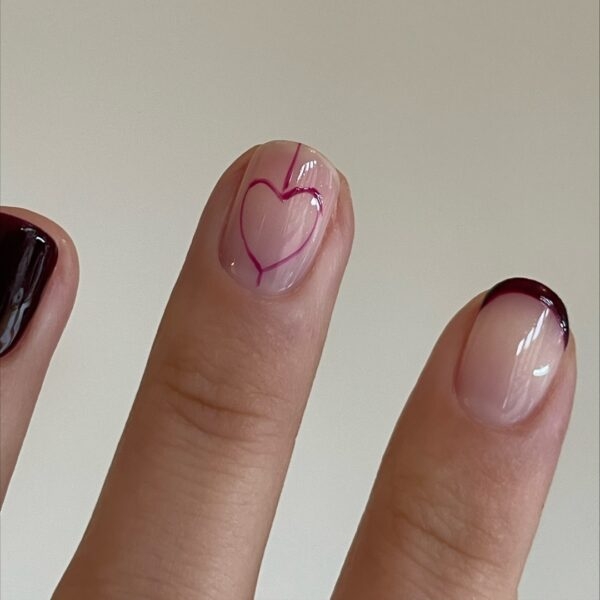
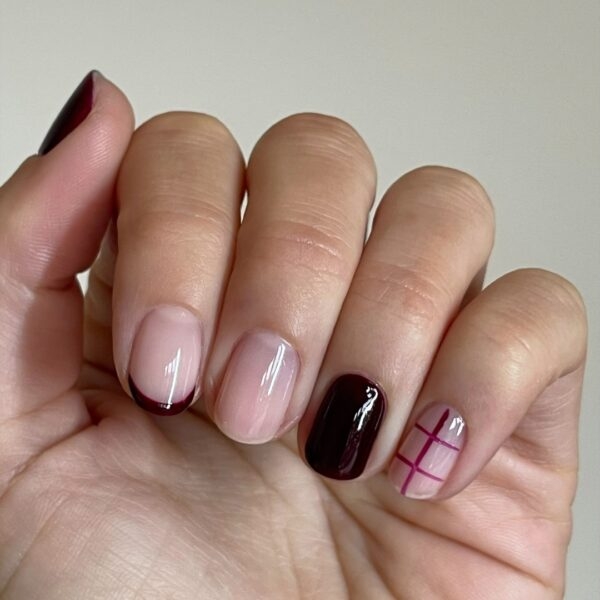
Begin to paint the negative space heart on the middle finger using GELLUX Mini Black Cherry. I like to create two lines in the middle of the nail then paint each side of the heart. Cure.
Step 7
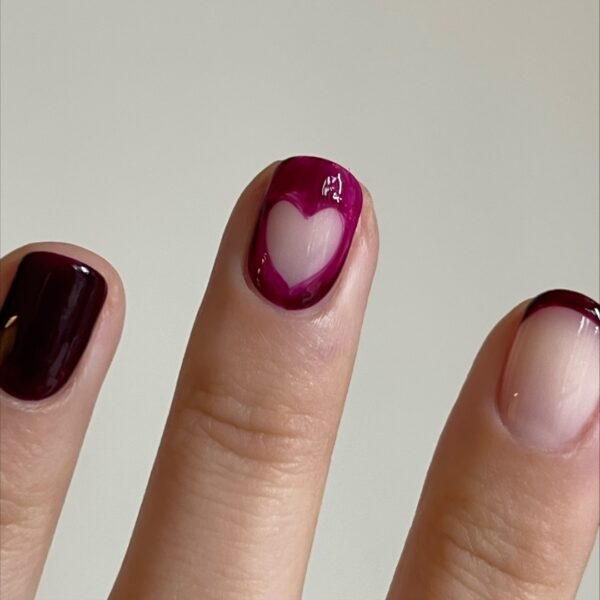
Start to fill in the outside of the heart with Black Cherry and cure.
Step 8
Paint another coat of the Black Cherry shade around the outside of the heart and cure.
Step 9
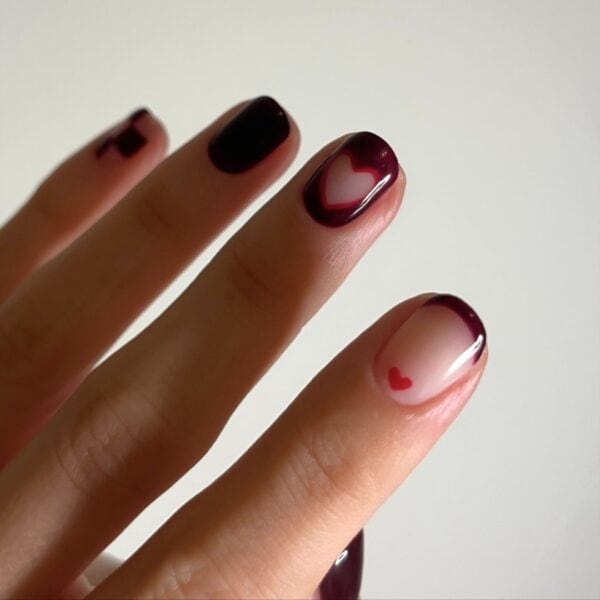
Using GELLUX Mini Really Red, paint an outline around the negative space heart and cure. Next, using a dotting tool, fine liner nail art brush and Really Red, create the small heart at the cuticle on the index finger and cure.
Step 10
Apply a coat of GELLUX Clear Base/Top Coat, cure, then wipe over the nails with GELLUX Prep + Wipe. Finish with application of a nourishing cuticle oil.
