
Santa hat nail design

Seasonal & Occasions, Step by Step
Salon System nail expert, Caroline Roberts of The Nail Fairy, showcases how to create a Christmas hat nail design using GELLUX, available from wholesalers nationwide.
Step 1
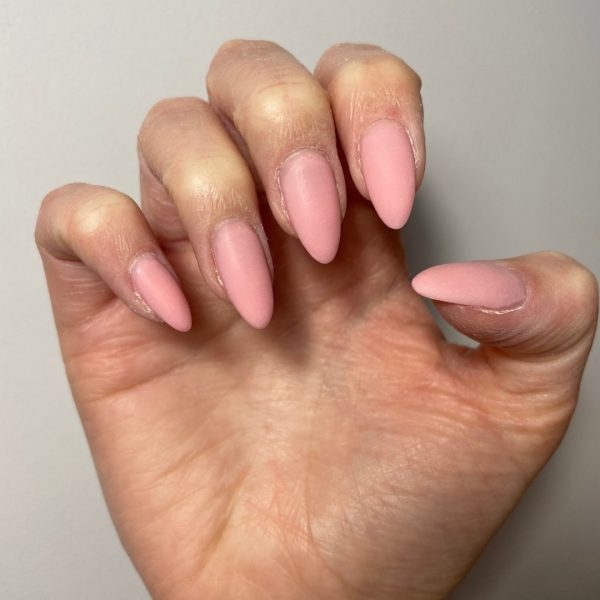
Prep the nails and push back the cuticles. Shape and buff the natural nail bed with a grey and yellow buffer. Dust and wipe the nails with GELLUX Prep + Wipe, before applying a thin layer of GELLUX Fast Bond. Apply two thin layers of GELLUX Builder Gel in Rose Pink, curing each layer for 60 seconds. Wipe off any sticky excess with GELLUX Prep + Wipe and lightly buff the nails for a matte look. Use a nail brush to remove any dust.
Step 2
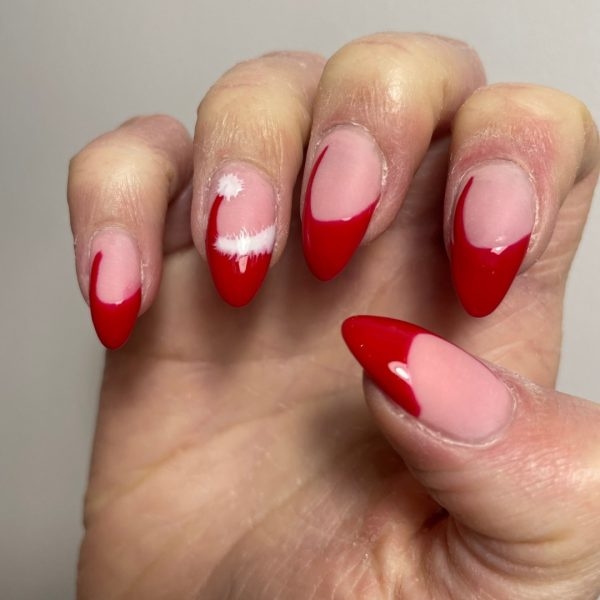
Apply GELLUX in Guess Who to create a French tip, then using a thin liner art brush, drag the colour up to create a tail on one side of the nail. Cure for 60 seconds.
Step 3
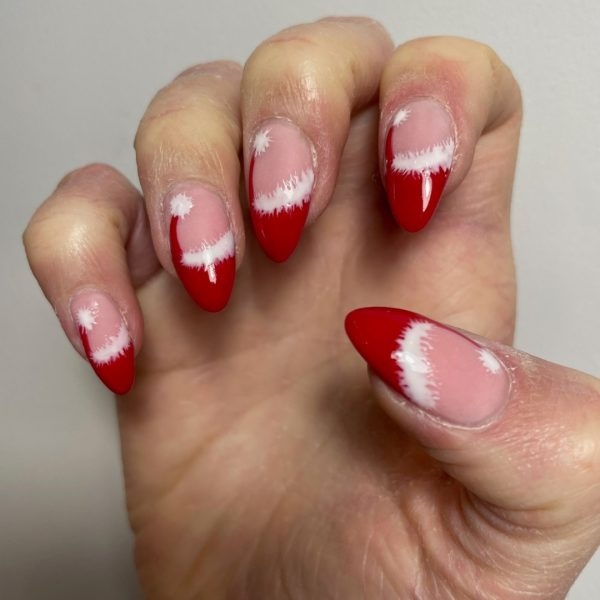
With a thin liner brush, paint a line of GELLUX in Purely White at the top of the red tip, feathering the edges to create a furry effect. Using a dotting tool, apply a dot of Purely White on the top of the hat's tail and feather the edge to create a pom pom effect. Cure for 60 seconds.
Step 4
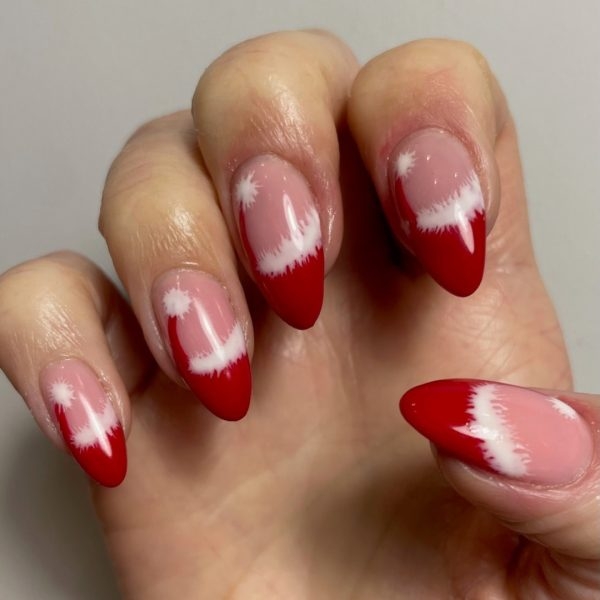
For a glossy finish, GELLUX Shiny Top Coat was applied and cured for 60 seconds. Wipe the sticky residue with GELLUX Prep + Wipe, before applying cuticle oil to finish.
