Sparkling Snowflakes

Autumn/Winter, Seasonal & Occasions, Step by Step
Sophie Harris-Greenslade, aka The Illustrated Nail, reveals how to create a sparkling snowflake design that’s perfect for winter and the festive season.
Step 1

Paint all 10 nails with two coats of I Believe in Manicures by OPI.
Step 2

Apply two coats of Diamond Glitter by Barry M.
Step 3

When the nails are dry, apply striping tape down the centre of each and press firmly onto the nail.
Step 4

Apply striping tape across the nail to create a cross shape, again pressing firmly onto the nail.
Step 5
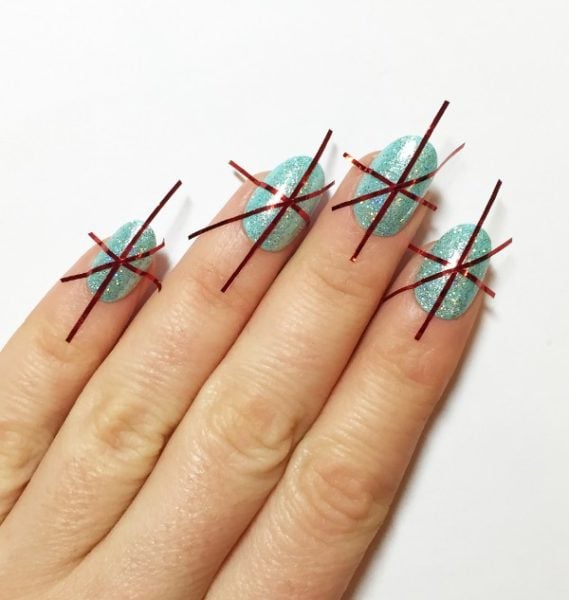
Apply a strip of tape diagonally across the centre of the cross.
Step 6

Apply another piece of tape diagonally from the other side to create a star-like criss-cross.
Step 7

Apply tape in a 'V' shape at the end of each line of tape to create a snowflake pattern.
Step 8

Paint over the entire nail with Alpine Snow by OPI.
Step 9
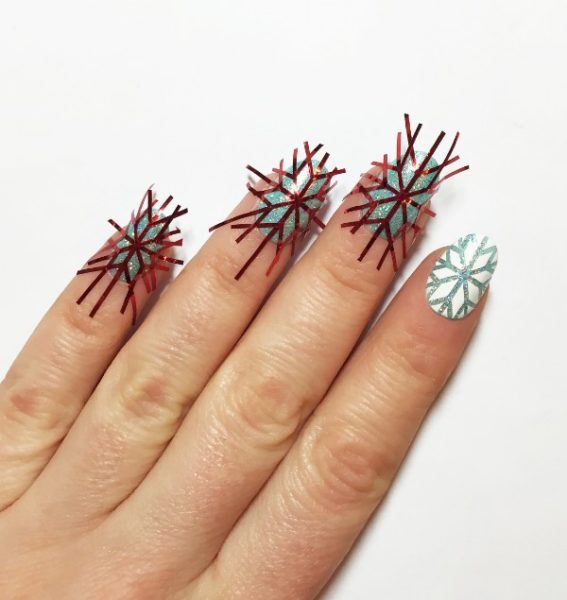
Using tweezers, lift off the striping tape, one nail at a time. Take off the 'V' shape branches of the snowflake first, then take off the piece of striping tape that you applied last and then the piece before and so on. If you don't do it in this order, you could ruin the design. The polish should be slightly wet when you remove the tape to give a cleaner finish to the lines.
Step 10
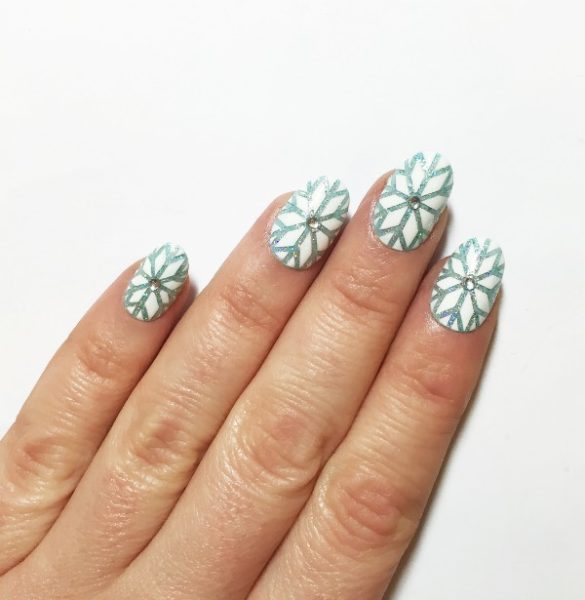
Apply a top coat. When dry, add a dab of glue to the centre of each snowflake and apply a crystal to finish.

Read the latest issue