Summer bee nails

Spring/Summer, Step by Step
Salon System nail expert, Caroline Roberts, owner of Nail Fairy, has created a cute summer bee nail style using GELLUX shades.
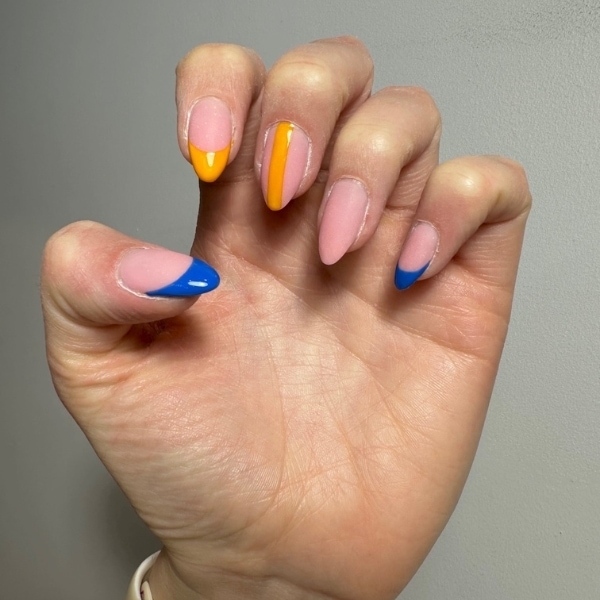
Step 1
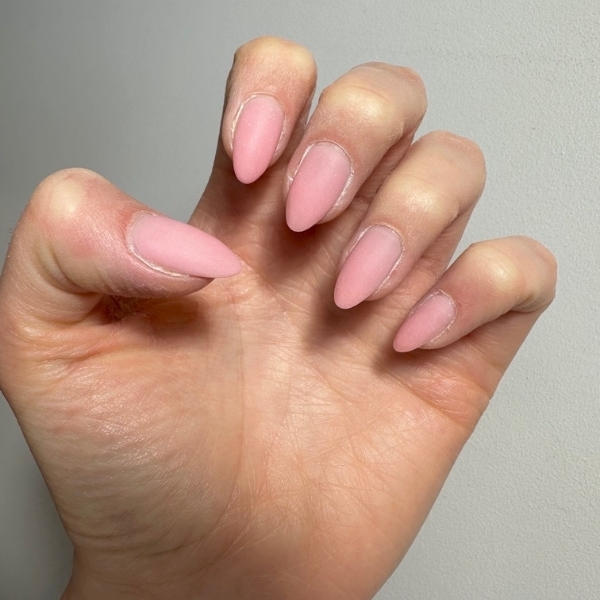
Prep the nails and push back the cuticles. Shape and buff the natural nail bed with a grey and yellow buffer. Dust and wipe the nails with GELLUX Prep and Wipe, then apply two thin layers of GELLUX Builder Gel Rose Pink, curing each layer for 60 seconds. Lightly buff the nails for a matte look, then use a nail brush to remove any dust.
Step 2
Using a fine art brush, apply GELLUX Mini Inky Blue to create a French tip on the thumb and on the little finger. Then again, using a fine line art brush, apply GELLUX Mini Lemon Meringue to the index finger creating a French tip. Next, apply again GELLUX Mini Lemon Meringue and paint a strip down the middle finger. Cure each layer for 60 seconds.
Step 3
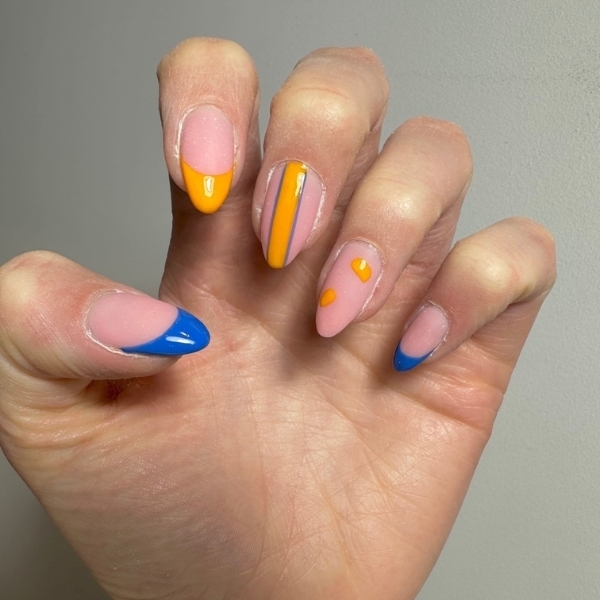
Apply a thin line down each side of the yellow stripe using GELLUX Mini Inky Blue with a fine art brush. Then, using a dotting tool, create two little oval shapes on the ring finger using GELLUX Mini Lemon Meringue. Cure for 60 seconds.
Step 4
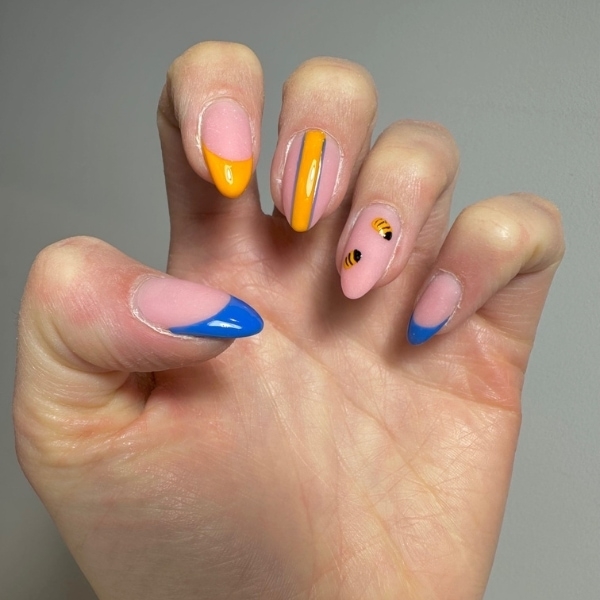
Next, using a very fine line art brush, apply GELLUX Black Onyx to the oval shapes, creating thin stripes and a thicker one at the end to create the Bee effect. Cure for 60 seconds.
Step 5
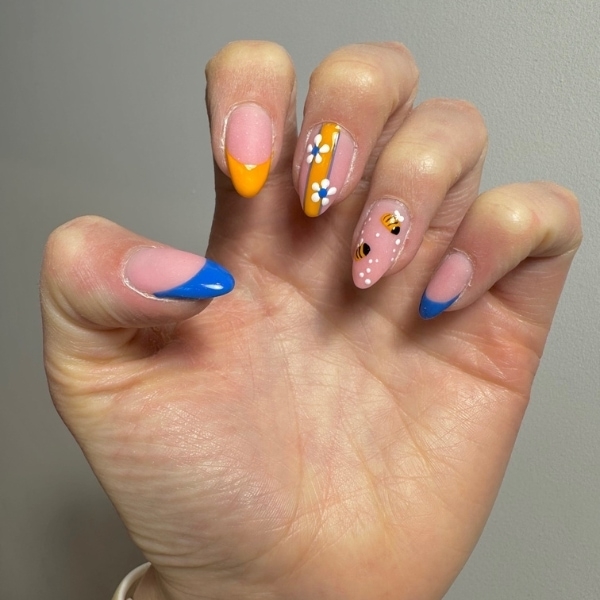
On the ring finger, using a dotting tool, add two dots to the body of the bee for its wings and dots around the two bees using GELLUX Purely White. Then, on the middle finger, create a circle of white dots and then drag the dots to the centre with a thin art brush, creating petal shapes. Afterwards, apply GELLUX Mini Inky Blue and place a dot in the centre of the petals. Using the same method as steps 3, 4, and 5, create the same pattern with the bee and flower on the thumb, curing for 60 seconds.
Step 6
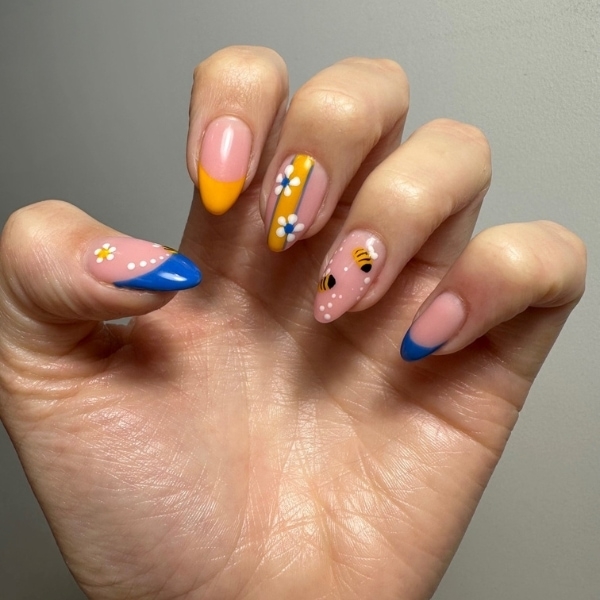
For a glossy finish, apply GELLUX Shiny Top Coat and cure for 60 seconds. Wipe the sticky residue with GELLUX Prep + Wipe before applying cuticle oil to finish.

Read the latest issue