
Tie-Dye Dreams

Spring/Summer, Step by Step
Salon System nail expert, Karen Louise, reveals how to create this tie-dye inspired nail design using the Gellux Soak Off Gel Polish Soul Sister collection, available from wholesalers nationwide.
Step 1
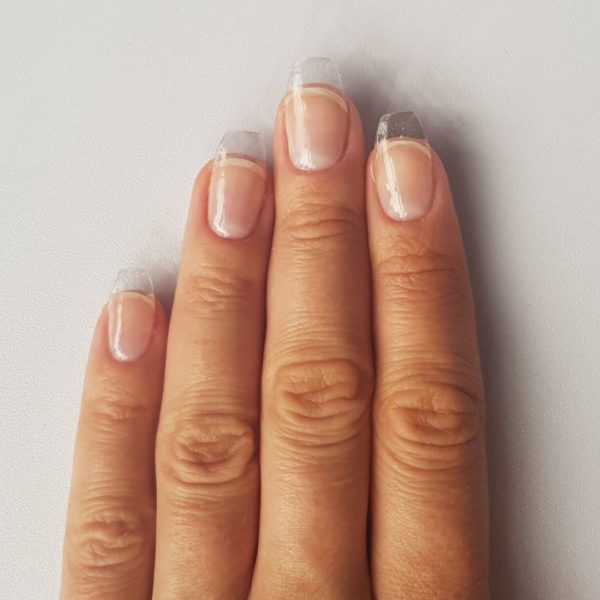
File nails to shape, push back cuticles and buff the nail plate. Cleanse GELLUX Prep + Wipe and apply GELLUX Easy Off Base Coat, making sure you cap the edges and cure.
Step 2
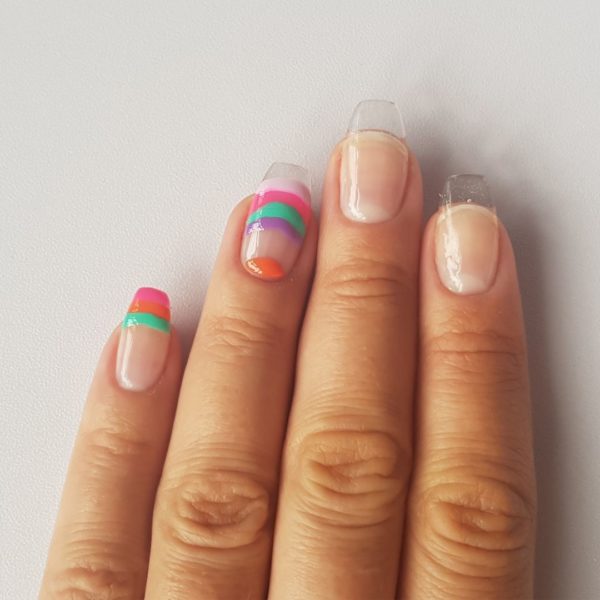
Start from the pinky finger and only work on two nails at a time. On the pinky nail, use a small detailing brush or dotting tool to apply GELLUX Sugar Addiction to the edge of the nail, then GELLUX Boy Trouble then GELLUX Gossip Girl.
At the base of the ring finger nail, create a half moon shape in GELLUX Boy Trouble, then using GELLUX Girlfriends create a curved line but making sure to leave a gap at the free edge. Then follow on your design with GELLUX Sugar Addiction, GELLUX Gossip Girl and GELLUX BFF.
Step 3
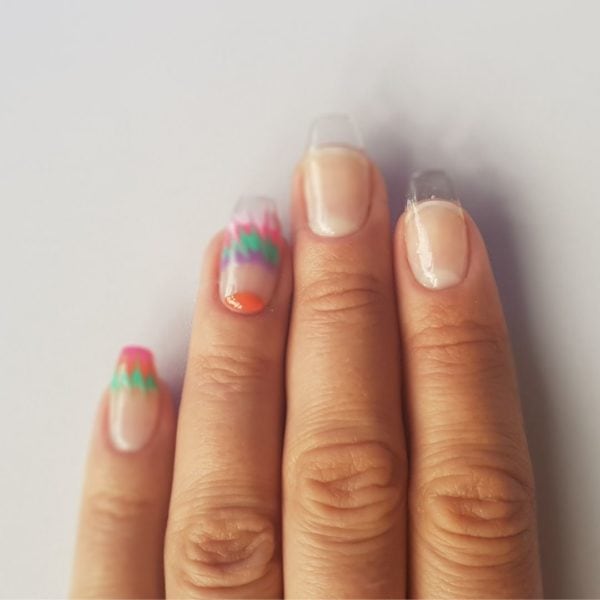
Using a small dotting tool or an orange stick, drag your tool through the design towards your cuticle area leaving a gap big enough to drag the design back the other direction towards the free edge to create a tie dye effect, making sure each time you drag the design you wipe your tool clean, then cure.
Step 4
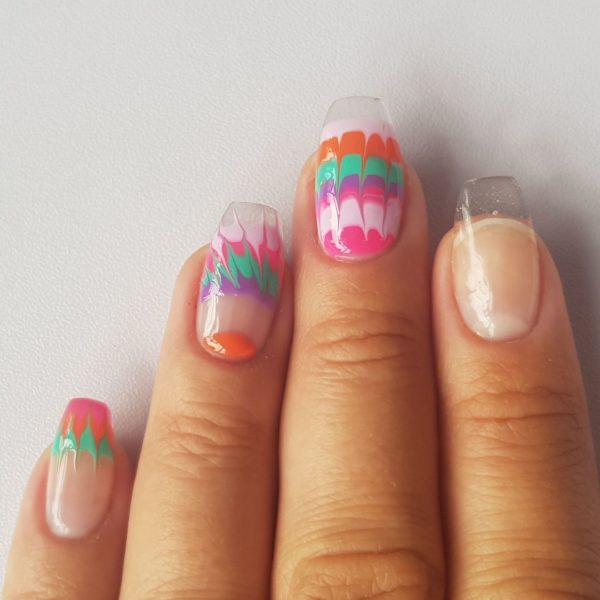
Repeat the process down the middle finger and thumb, then cure.
Step 5

On the index finger, use GELLUX BFF, GELLUX Girlfriends, GELLUX Gossip Girl and GELLUX Sugar Addiction to create circles using your tool and then repeat, dragging the design inwards to the inner circle and alternating outwards. Be sure to wipe your tool each time you drag your design, to create a flowered tie dye effect then cure your design.
Step 6

Apply GELLUX Top Coat to the nails, making sure to cap the free edges, and cure. Wipe with GELLUX Prep + Wipe, then massage in the GELLUX Nail and Cuticle Oil.
