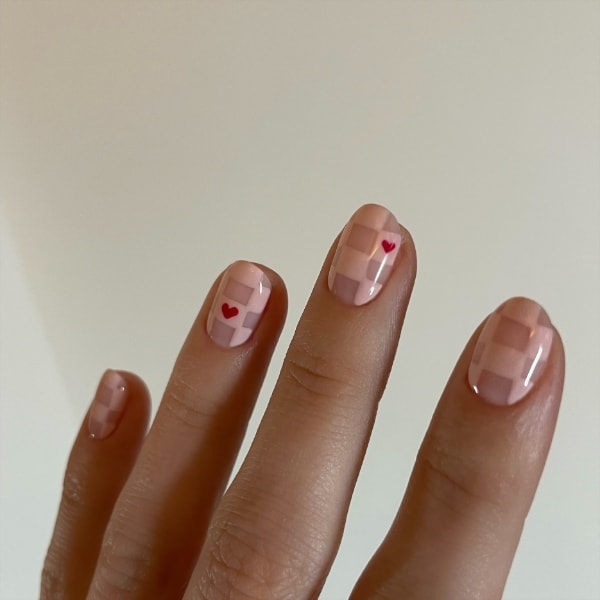
Valentine’s checkerboard nails

Seasonal & Occasions, Step by Step
Salon System nail expert, Jaz Moger, has created a Valentine’s checkerboard nails step-by-step using GELLUX.
Step 1
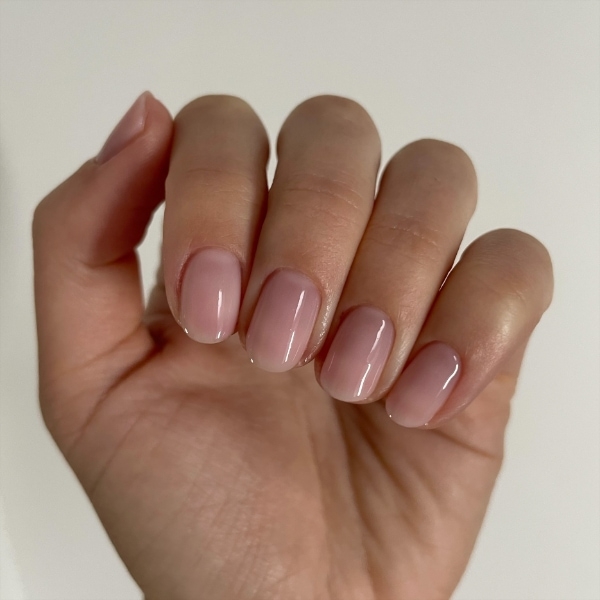
Prep the nails. File to shape, push back the cuticle and buff the nail plate. Cleanse nails with GELLUX Prep + Wipe, apply a coat of GELLUX Light Pink Builder Gel and cure for 60 seconds.
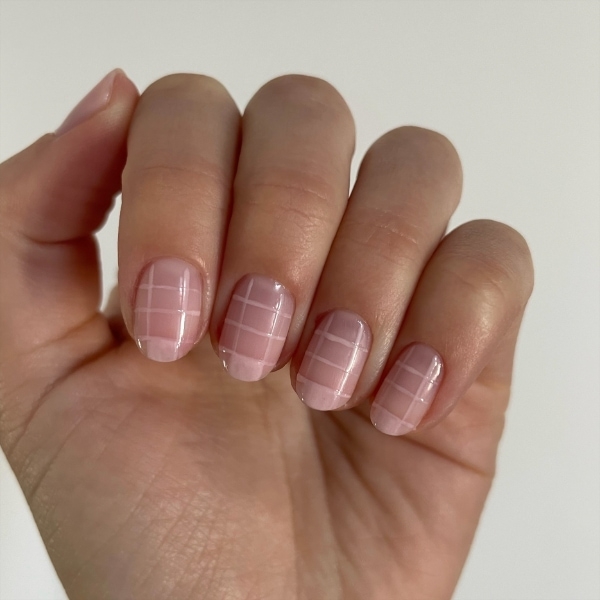
Step 2
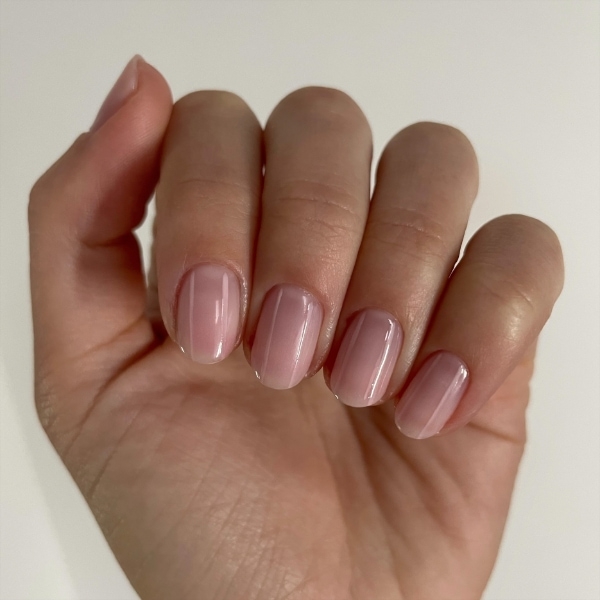
Using GELLUX gel polish in Slumber Party and a fine liner nail art brush, paint two lines vertically down each nail and cure.
Step 3
Paint a line vertically across the middle and cure.
Step 4
Paint a line either side of the middle line and cure.
Step 5
Start to fill in the checkerboard still using Slumber Party. I like to start at the top.
Step 6
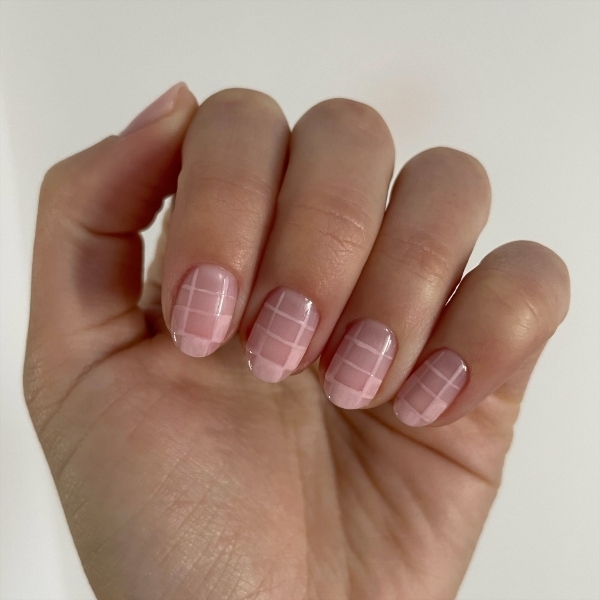
Continue filling in the checkerboard, leaving every other square blank.
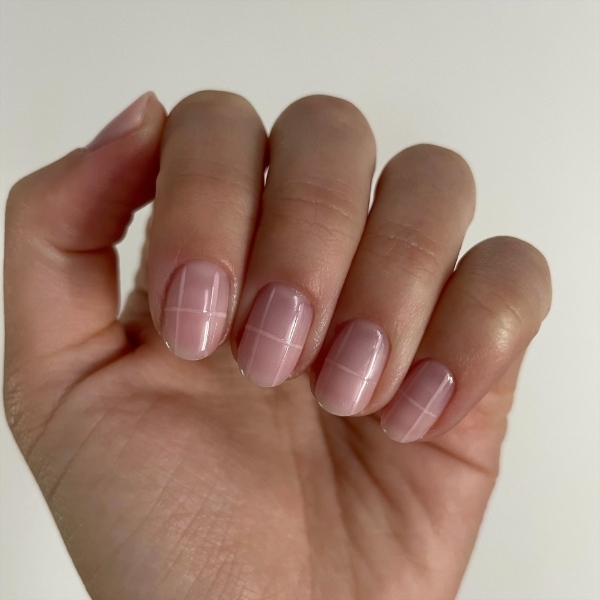
Step 7
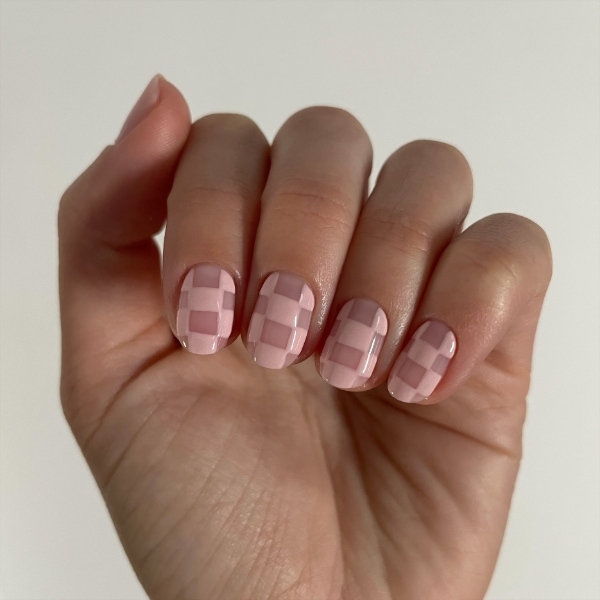
Once the whole board is filled in and cured, apply a second coat and cure again.
Step 8
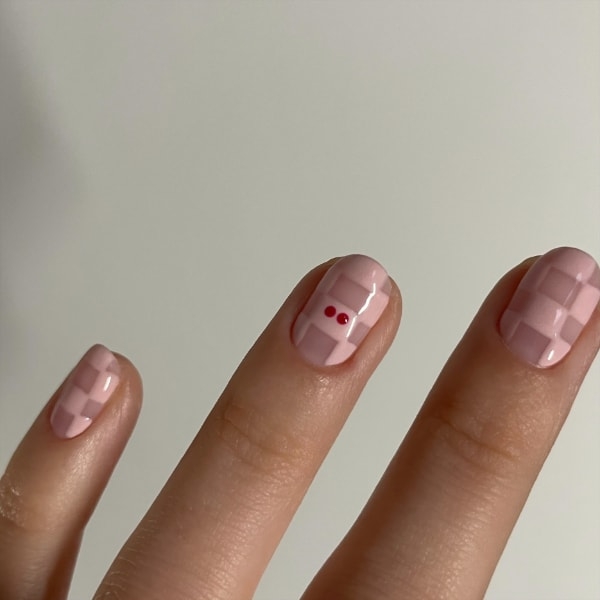
Using GELLUX gel polish in Fri-Yay and a dotting tool, create two dots in one of the squares to start the top of the heart.
Step 9
Using a fine liner brush, join up beneath the dots to create the full heart. Then create another micro heart and cure.
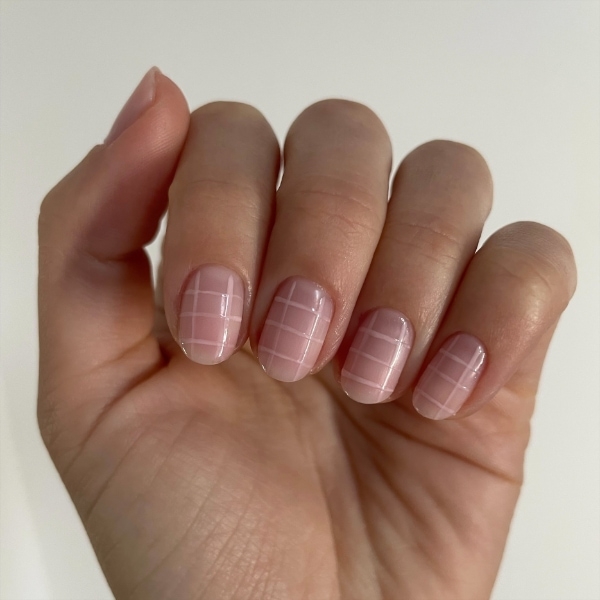
Step 10
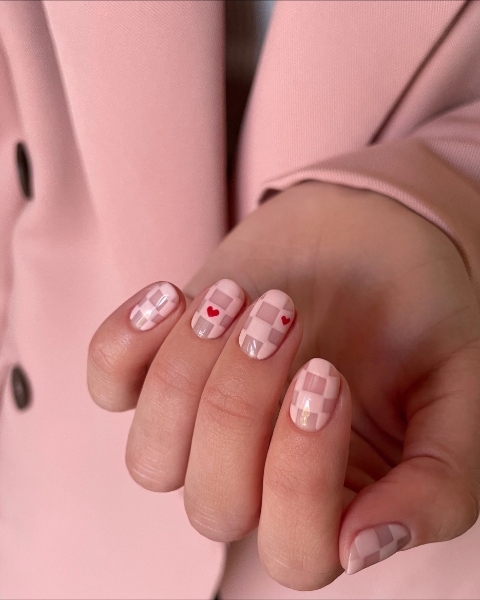
Finish the design by applying two coats of GELLUX Super Shiny Top Coat and cure between each layer. Once cured, wipe over the nails with GELLUX Prep + Wipe and oil the cuticles.

Read the latest issue