

How to close a nail form correctly to ensure a great enhancement
By Katie Barnes | 05 August 2019 | Expert Advice, Feature

The perfect form fit is one of the most important elements when it comes to a well-structured sculpted nail enhancement. The correct placement of the nail form is essential but an often overlooked component of the form fit is the symmetrical closure of the wings. Without this, it will be impossible to create a balanced enhancement.
Each side of the nail form is created equally, and when these two sides do not meet perfectly, both the structure and appearance of the enhancement will be affected. One side will be higher than the other, creating a misshapen c-curve and concave and this cannot be corrected. The lower arch on the nail enhancement must be uniform on both sides and an incorrectly closed nail form will cause inconsistent lower arches.
To correct this, one side of the lower arch will likely be over-filed and cause a weakness.
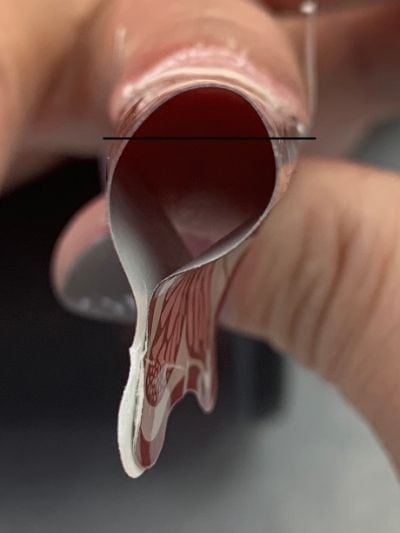
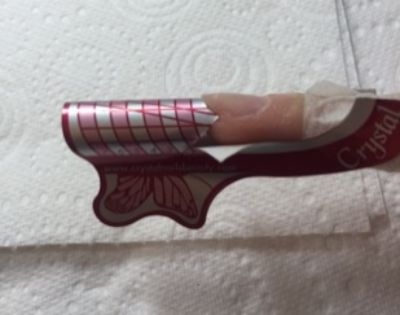
Incorrectly closed nail form
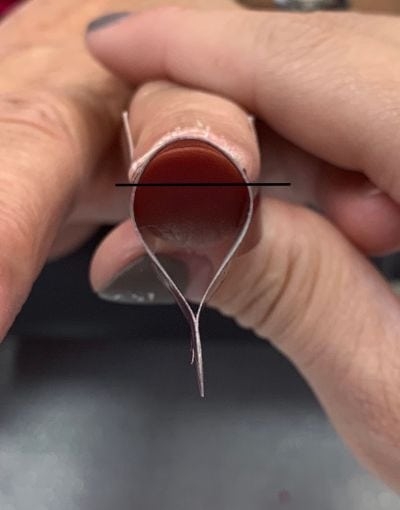
Correctly closed nail form
It is also necessary to ensure that you do not pucker or crinkle your nail form by applying excess force during the application process. Ensure you check all angles and views of the nail and form fit during application and work in a slow, controlled routine for success. The nail form creates the platform on which your enhancement product is applied. If this is not smooth, or has indentations, the product will follow these inconsistencies.
Correct tailoring of your nail form includes cutting to fit securely at the natural free edge and cutting relief cuts from the corner points of the natural nail at a 45-degree angle to allow a precise application and a c-curve to be created with the nail form. Both of these cuts allow you to close the nail form without issue as the form will perfectly meet up to the natural nail.
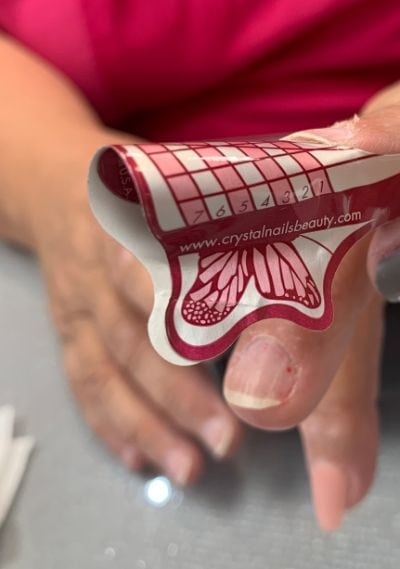
Incorrectly closed nail form
Form tailoring
How to apply and close the nail form:
1. Peel the nail form from the backing paper.
2. Open the perforated wings to help apply the form correctly (if these are left together it can be tempting to apply the form downwards).
3. Apply the tab behind the nail form for extra stability (make sure this is straight and kept away from the free edge to allow for tailoring). If this is not applied evenly you will experience the same issues as the wings not being symmetrically closed.
4. Carefully pinch the very tip of the wings together, ensuring the join is seamless. Good quality forms are sticky and allow you to peel open again if you make a mistake with this. By pre-pinching the form, it makes application easier.
5. Place the form in the correct position for the shape required and tailor the form to fit the natural nail and make relief cuts.
6. Apply the form back on the nail and close fully underneath.
The nail form creates the foundation for any nail enhancement. When this foundation is incorrect, inconsistencies will follow in each subsequent application step. Regardless of compensating in other areas such as product application and filing, if this initial form fitting step is improper, it will be impossible to successfully correct it later on. This is why it is paramount to take your time on the form fitting step because it is the first and one of the most crucial steps to a successful nail enhancement.
For full application of form fitting and tailoring for almond, square and tapered square shaped enhancements, watch below.
Love Katie B x