

How to perfect nail product application by the cuticle
By Katie Barnes | 06 November 2018 | Expert Advice, Feature, Technique

Mastering cuticle application can be a tech’s nemesis, but it needn’t be. Of course, it takes practice but follow my top tips for perfecting your cuticle application with L&P and gel polish.
Perfecting L&P cuticle application
When working with L&P, ensuring the mix ratio is correct – especially around the cuticle zone – is paramount. If it is too dry, you won’t get a tight bond of product, causing lifting but if it is too wet it will flood the skin, causing skin irritation and allergies.
There should be no ridge of product than can be seen or felt and the join between enhancement and natural nail should be absolutely seamless.
It is essential that the product is correct with application and not tidied up afterwards by cleaning up with brush or file. Touching the skin will cause overexposure to your client and the product to lift, not to mention discomfort for the client by removing the excess product from their skin.
While you will often need to work a little wetter at the cuticle zone, to avoid this being too wet, work with smaller beads for better control.
It is important to work with a clean, quality brush that’s in good condition. Always keep the brush in a point for a controlled cuticle application. If the brush is flat and puffy, it will be difficult to control the product precisely and avoid skin contact.
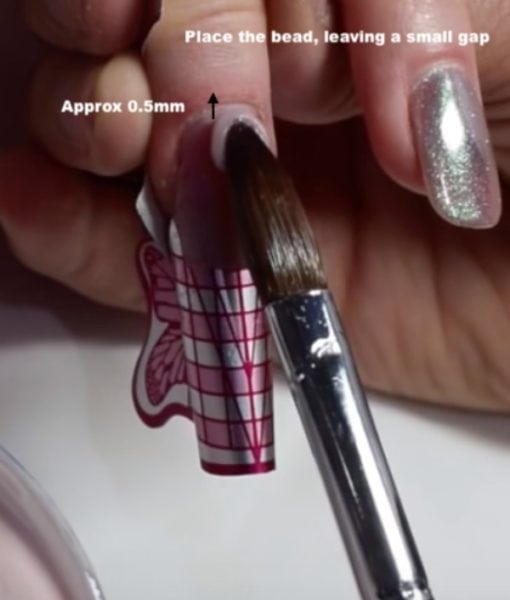
- Place a small acrylic bead near to but not right at or on the cuticle.
- Using the tip of the brush, lightly touch the back edge of the acrylic bead at a 45-degree angle.
- Walk round the product in a patting and pressing motion working from, the centre to one side, then to the other.
- Very gently rock your middle finger which is against the brush back as you walk the product round. This will keep it away from the cuticle and ensure a flush application without pulling the product away.
- Avoid pressing the brush flat to the nail, otherwise you will press the product into the skin.
- The file should only refine and never correct poor application. When filing, hold the file at a 45-degree angle, over the product and file in small movements from one side to the other and back again. While you don’t want to use a sharp file and risk irritation to your client, a good condition file is paramount for smoothing the area so work with a soft grit, new file.
- When applying gel polish or top coat on the enhancement follow the below steps.


Perfecting gel polish cuticle application
Far too often I see freshly completed sets of nails that appear to have have 1-2 weeks’ worth of growth. Perfecting your polishing technique and getting a super close cuticle application that looks as if it is growing from under the skin (but never touching) will set you apart from your competitors.
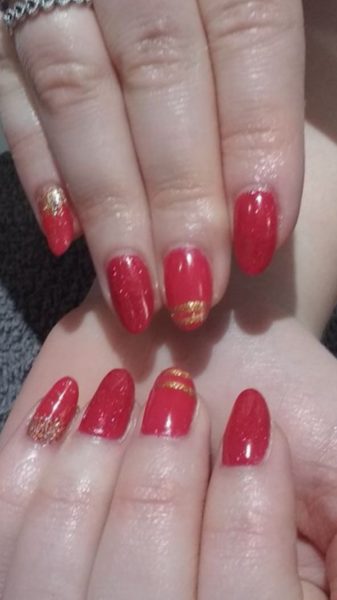
Fresh enhancements that appear to have 1-2 weeks’ growth
The first step is good preparation. Ensure the nail plate is smooth and free of any dust and the cuticle work is flawless.
Remember, if you are spending more time than usual, this should be charged as an additional service. Your cuticle work can be done using manual tools or an e-file, which should only be used following correct training.
- Immediately prior to painting, take your cuticle pusher and push back the eponychium again as this will have bounced back somewhat.
- Use a small fine liner brush to apply a ‘frame’ around the cuticle and sidewalls.
- To get this even closer and avoid skin contact, use your fingers to pull back the skin or if you find this tricky, ask your client to.
- Take your polish brush and fill in the remaining area, capping the free edge and then cure. You only need to do this outline for the first layer.
- If your gel polish is a fairly self-levelling and fluid consistency or it’s particularly warm, to avoid running into the skin, apply as usual and create the frame last before curing.
- Take care when applying thicker products around the cuticle zone. Products such as glitter must be pressed in with a gloved finger (remember the product is uncured and will lead to allergies) and following curing, excess glitter should be dusted off prior to top coat application.
You may be reading this thinking this will add a lot of time onto your service, but I can assure you it doesn’t, I can perform a gel polish service with these techniques in 20 minutes and the results speak for themselves.
Perfecting your cuticle application will help prevent lifting and service breakdown, giving you less work on your infill services as well as preventing skin contact and causing your client potential allergies while creating a flawless looking enhancement to be proud of.
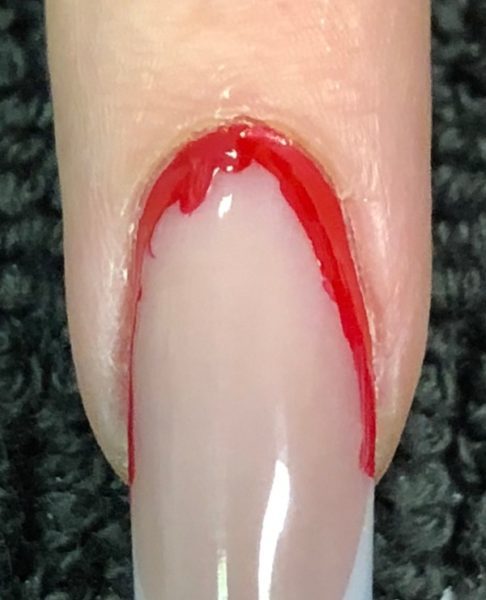
Creating a frame around the cuticle zone

Flush & close cuticle application
Love Katie B x